Revisiting an Old Friend: The Saga of an I-16 (Type 28)
By Hector Mirasol
Revisiting an Old Friend: The Saga of an I-16 (Type 28)By Hector Mirasol |
|
Some times I think about how nice it would be not to have an interest in the VVS. Browsing modelling sites you realize the wide spectrum of possibilities you have if you are interested in Zeros, Focke W, Spitfires, Mustangs or even the elegant Veltro. Myriads of excellent models, hundreds of detailing sets, piles of reference books at your finger tips. But unfortunately, I am cursed by the Soviets.
Not so long ago to find a model on a VVS subject was quite a difficult task and the choices on the IIWW were really limited. Not to speak on the quality of the models or its historic accuracy, or finding a reliable source for a modest investigation.
I am not an expert. I struggle to get a decent model and I have to much respect for history to consider myself anything else than a very keen “aficionado”.
I was a nearly a kid when I found the first 1/72 Revell I -16, the Matchbox one (which was the same dog in a different box if I am not wrong) . I switched to 1/48 when Hasegawa issued their new mould and then the resin set of wings which I never managed to get.
That was long time ago but I still can remember that I could not believe my eyes when I found the first Hobby Craft I-16. Since then may things have happened if you have an interest in modelling the VVS, but for me that was probably the turning point. Now you have really nice models on an acceptable range of subjects in most of the different scales, but there is still a long way to go...
If I do not remember badly my first contribution to this VVS devoted site was this model:
 |
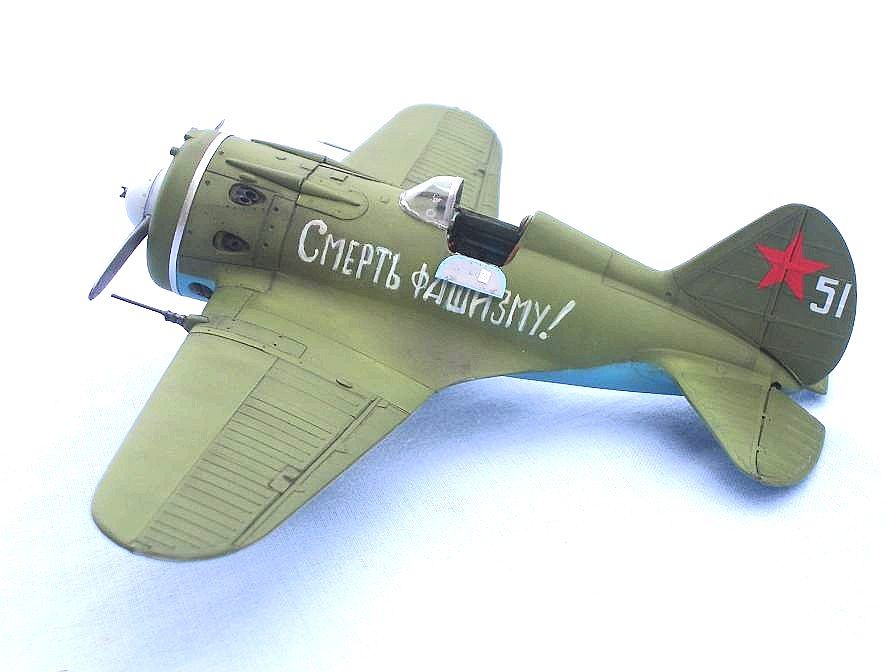
It is meant to be Boris Safonov´s "White 11", a Type 24 I-16 . At the time I was quite proud of it, in fact was the first time I used my own airbrush and tried some wheathering thechniques, shadowed panel lines and used different shades in different parts of the plane.
Have a look at it. You will soon realize that joy is a very brief condition. The aircraft does not have features of a Type 24, the wings are wrong, the cowling is wrong, the detail surface of the tail is wrong, the interior (even if you can not see it) is wrong, the “topside green, Russian green” from Aeromaster is a very nice paint but the green shade has nothing to do with the real. The cherry in the top of the cake is that it seems that Za Stalina! "White 11", was not Safonov´s plane.
To the impartial observer it is clear that I covered myself in glory.
It is not possible, I thought. I have a very nice picture of that HSU in front of that very plane.
You know that I have a really big respect for Mr. Pilawskii, his life is devoted to historic research and on top of that, he is quite a big fellow. Well, the case is that he seems to think that Safonov was just photographed in front of that plane during a propaganda session. The plane he used to fly was a Type 28 with a different slogan (Smert Fashistam). The inconvenience asking the Oracle is that you may get answers. Damn you, Erik.
I really hope that Pilawskii will have time to write an article on the subject. It is a very interesting subject in one of the most important VVS pilots.
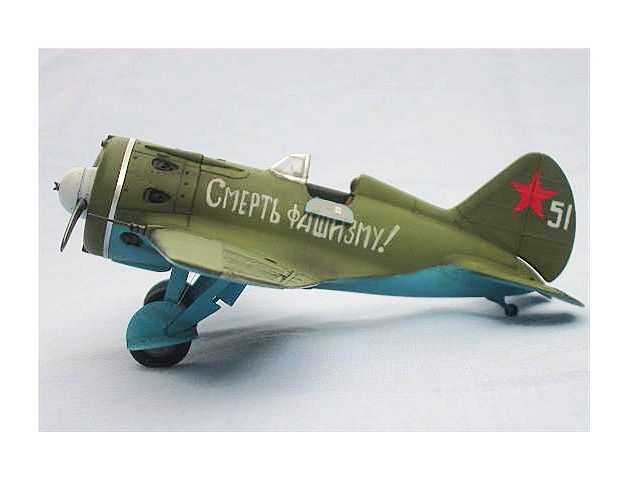
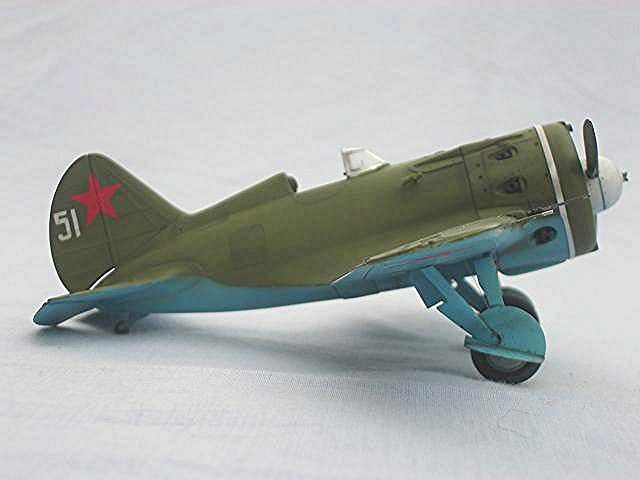
Well, the fact is that every time I saw my model, I was tempted to throw it in the bin, but at last I thought; what the hell, let's do it right.
Despair is a feeling I often have by looking at my models, but that time my sequence of thought was as follows: I am going to change the wings, I am going to change the tail, I am going to change the guns, I am going to detail the cowling and change the exhaust repositioning of the lower ones nearer to the wing root (I was not going to make the ski recesses in the cowling; I am not such a masochist) and finally I will repaint it in a nice AII green shade. Hell, I do not have decals with the inscription!. It does not matter. I will hand paint it.
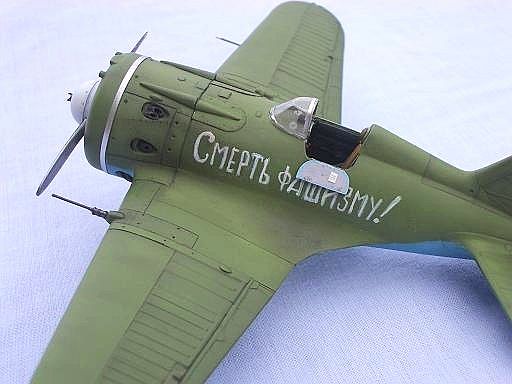
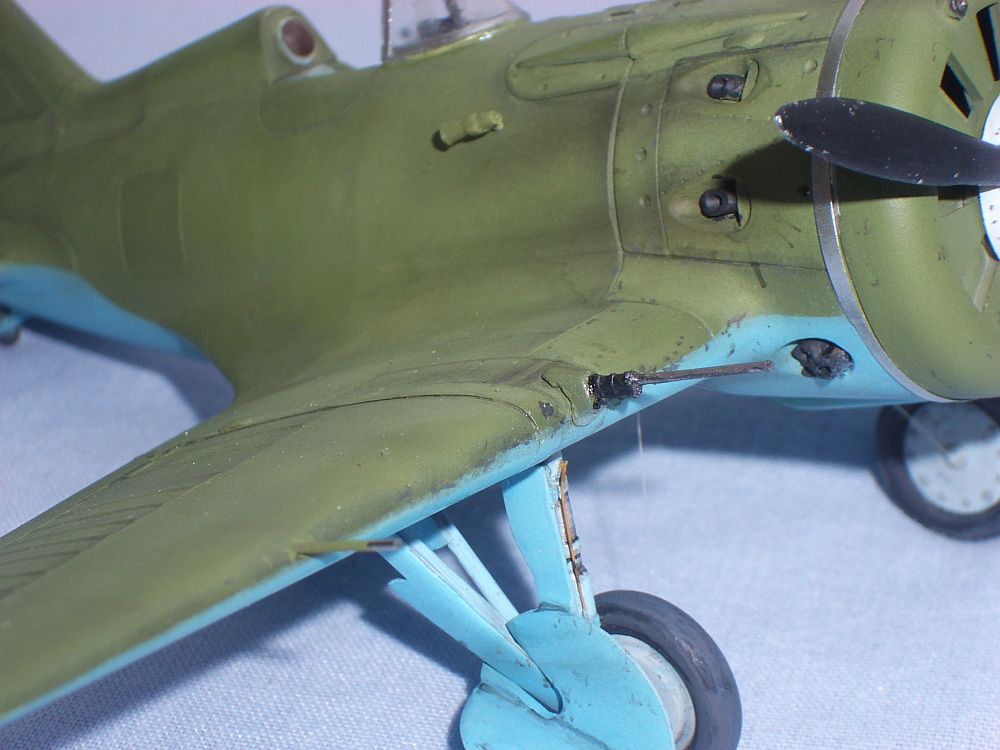
The Hobbycraft mold (or nowadays the Academy one) depicts two kind of wings. One will be good for a type 5 if you make the ailerons longer, up to the wing root. In that one the rib structure of the wing goes close to the edge. The other option is good for the other types, the length of the control surfaces is correct and the reinforced structure of the wing is represented, making the surface smooth and flat more or less up to the one third of the wing. The type of wings offered by the manufacturer is at times quite random . If the box says Type 5 probably you will get the first type, but if you buy any other type you can get any of the two wings. My kit was a Hobbycraft Type 24 (if I am not wrong) and as you can see has the wrong wing.
What I wanted was more like this:
The detail in the wing is represented by raised lines. The obvious way to change the surface detail is to sand it down. But as Bob Partridge and Pete Vill discovered in its day when you sand it down the raised line becomes incised in the surface (white man magic). So you need either to sand it more, use suer glue over the lines and sand, or if you have a more inquisitive mind use an adhesive surface (masking tape, cello tape or any plastic adhesive thing at hand) to put on top.
Have a look at Bob Partridge’s article and see how he resolves the problem.
In a previous article I opted for sanding the front part and using Tamiya masking tape over the original raised detail which resulted convincing enough. Once painted the aspect was not too bad.
Alex Sekularac used another method, equally clever in his Type 5 article.
After all, those “do it yourself” methods are techniques you could do if you have time and interest to modify an old kit. The only manufactured complete kit that came to resolve those inaccuracies was the NeOmega Resin I-16.
The kit is good, corrects the wings fault, has a very nice interior detail, an engine and also resolves the lower cowling problem. The result is a very nice I-16 which I enjoyed building.
An intermediate option, equally good is to use the Airwaves
resin kits manufactured by Pete Vill and Bob Partridge, casted by Airwaves.
They have been praised many times and you do not need to by told by me that
they are highly commended.
So what I was going to do with my old out of the box Hobbycraft relic?
Before I go any further I have to say that all this was an experiment. I never
thought it was going to look well, so I did not take any pictures during the
process, only after painting. I thought that the results were perhaps interesting.
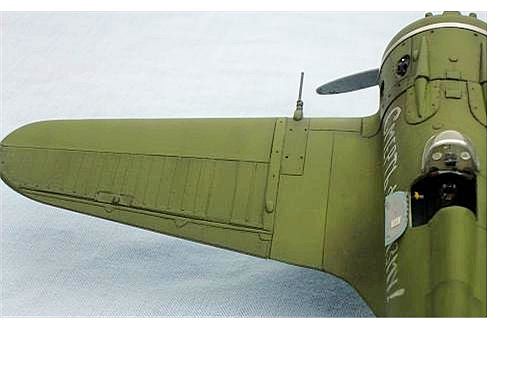
 This
time I decided to use another approach. The front part of the wing from the
leading edge has been covered by a broad piece of adhesive plastic tape. That
gives you a completely flat surface and solves the problem of sanding flat the
raised detail which turns into engraved lines. The ribs of the wing structure
which should be raised, are represented by thin stripes of Tamiya masking tapes.
The details of the wing rear edge and the ailerons have been represented in
a similar way, just looking to the scale drawings by Maslov and in Pilawskki´s
books. The small protuberance in the reinforcement of the outer wing section
is done with a bit of putty. The small holes were rescribed.
This
time I decided to use another approach. The front part of the wing from the
leading edge has been covered by a broad piece of adhesive plastic tape. That
gives you a completely flat surface and solves the problem of sanding flat the
raised detail which turns into engraved lines. The ribs of the wing structure
which should be raised, are represented by thin stripes of Tamiya masking tapes.
The details of the wing rear edge and the ailerons have been represented in
a similar way, just looking to the scale drawings by Maslov and in Pilawskki´s
books. The small protuberance in the reinforcement of the outer wing section
is done with a bit of putty. The small holes were rescribed.
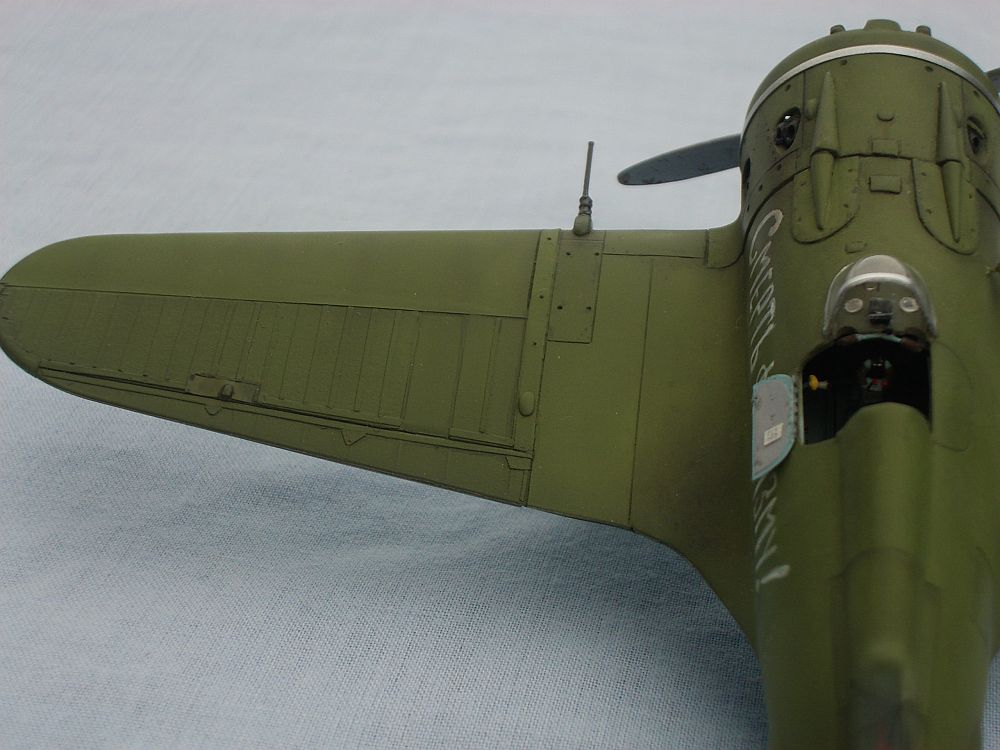
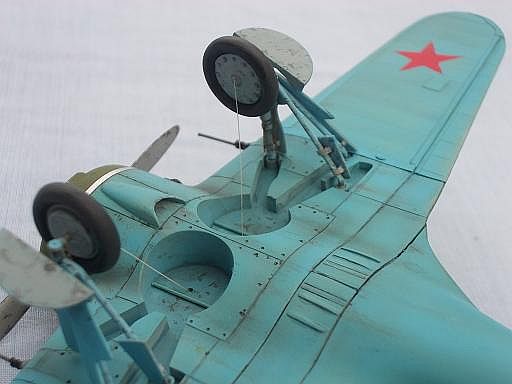
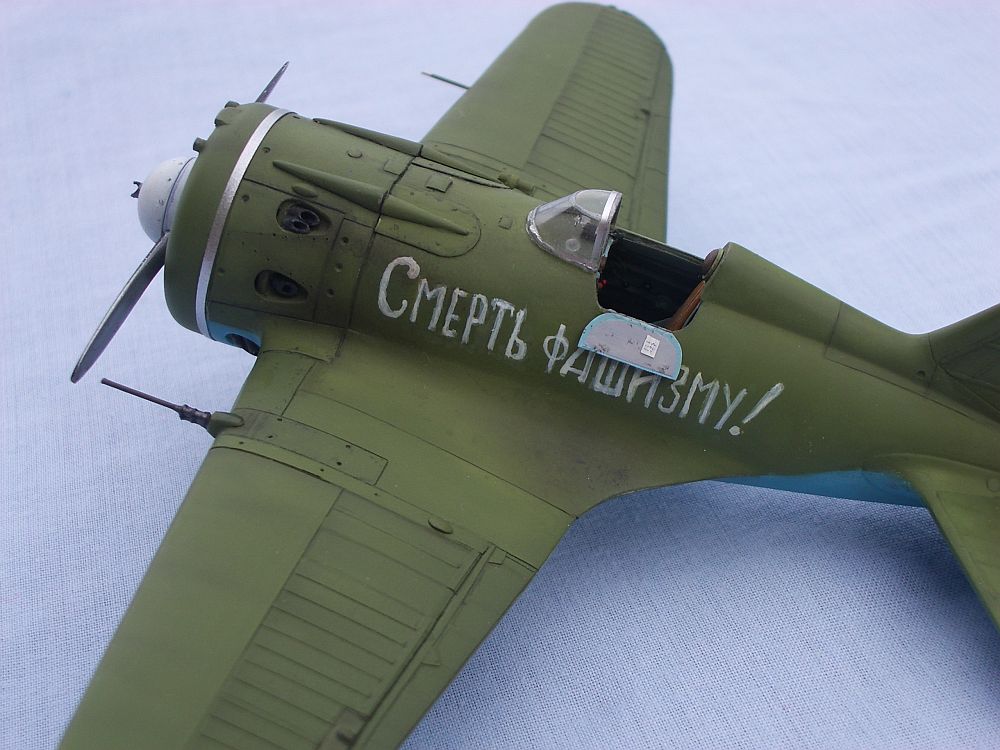
 The
tail has been aproached in a different way. The vertical section detail was
done with masking tape strips after sanding the raised detail as in the wings,
but while doing the horizontal surfaces I come up with another idea. The kit
detail there is quite raised so I thought about leaving it in place and sanded
it towards the leading edge but from there I coverd it with adhesive plastic
tape, in a way that you can see the underlying detail covered by “fabric”
as in the real thing. I was quite happy with the final result.
The
tail has been aproached in a different way. The vertical section detail was
done with masking tape strips after sanding the raised detail as in the wings,
but while doing the horizontal surfaces I come up with another idea. The kit
detail there is quite raised so I thought about leaving it in place and sanded
it towards the leading edge but from there I coverd it with adhesive plastic
tape, in a way that you can see the underlying detail covered by “fabric”
as in the real thing. I was quite happy with the final result.
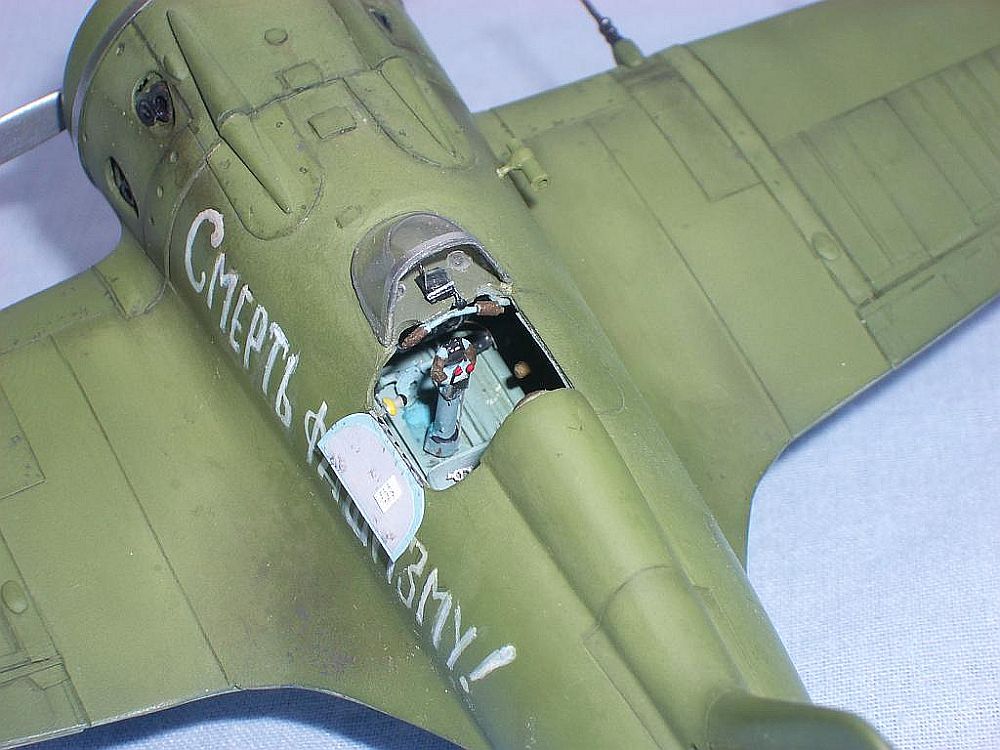
After that I added some detail to the cowling, fuel registers and rivets in the lateral cowling panels.
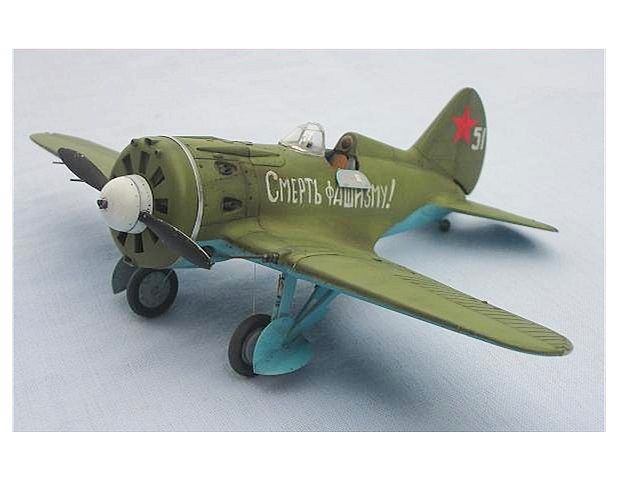
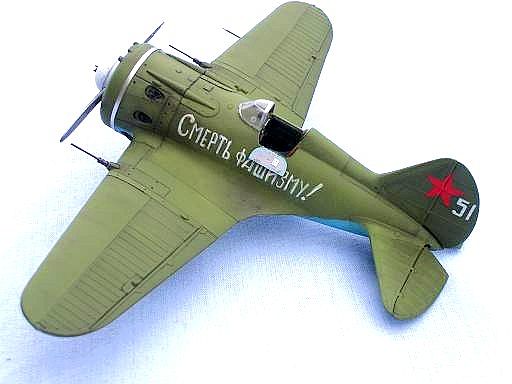
Painting
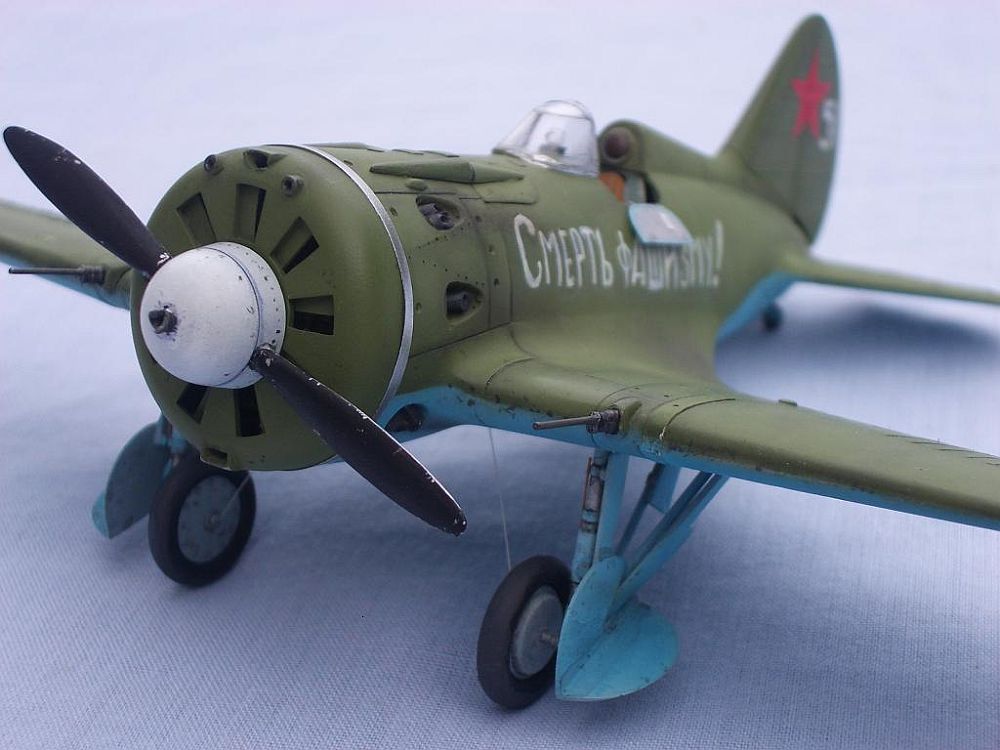
 It
was necessary to change completely the green shade to make it look like AII
Green and AII Blue. I did my own mix first spraying a darker shadow and then
with thinned paint of a lighter shadow working from the inside of the area towards
the outside. The panel lines are done with black or brown thinned paint and
the weathering in the usual manner with a sharp paintbrush and then with the
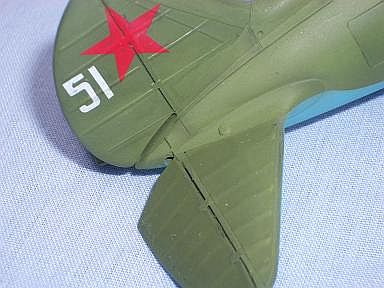
air brush to minimize the contrast. The slogan was hand painted and the numerals
are a mix of a decal from the spare box and hand paint . The red star is a decal
and then it was subtely sparyed with a darker shadow of red.
It
was necessary to change completely the green shade to make it look like AII
Green and AII Blue. I did my own mix first spraying a darker shadow and then
with thinned paint of a lighter shadow working from the inside of the area towards
the outside. The panel lines are done with black or brown thinned paint and
the weathering in the usual manner with a sharp paintbrush and then with the
air brush to minimize the contrast. The slogan was hand painted and the numerals
are a mix of a decal from the spare box and hand paint . The red star is a decal
and then it was subtely sparyed with a darker shadow of red.
After all this trouble, I was quite satisfied. All this thing happened just before the Eduard I-16 kit was released. I still have not seen it but I followed the controversy arising with it. I was pleasantly surprised when as a result of the criticism Eduard changed the shape of the cowling. I do not know how visible it was but just judging by the images in this site, and Eduard reviews I am pretty sure that the kit is not just worth buying but probably the best choice you can make. I have not managed yet to put my hands on it, but I can assure you, I am looking forward to it.
 |
 |
 |
 |
 |
 |
 |
 |
 |
 |
 |
|
 |
 |