Aviastend UT-1 and UT-2M Vacu-formed kits in 1:72 Scale
by Christoph Riesen
Aviastend UT-1 and UT-2M Vacu-formed kits in 1:72 Scaleby Christoph Riesen |
|
During the final years of the Soviet Union, I was exchanging
piles of model kits with several people in Russia, from whom I received a lot
of exotic, interesting and charming aircraft kits. Two of them I want to highlight.
There was a manufacturer named AVIASTEND producing nice vacu kits.
Out of these I have got the Yakovlev UT-1 and the UT-2M training aircraft, both
in 72nd scale. I assembled the two of them shortly after receiving the
models, now years ago. I do not know if Aviastend still exist nowadays; I have
not heard about them for a long time.
However, the following is what I remember of these models:
The kits
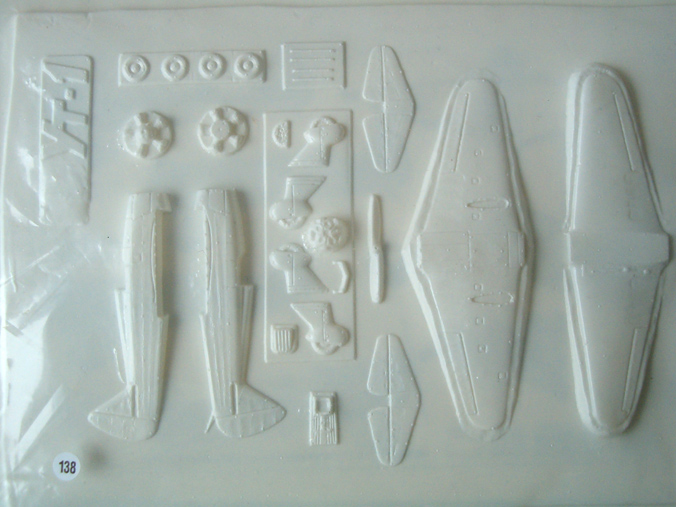
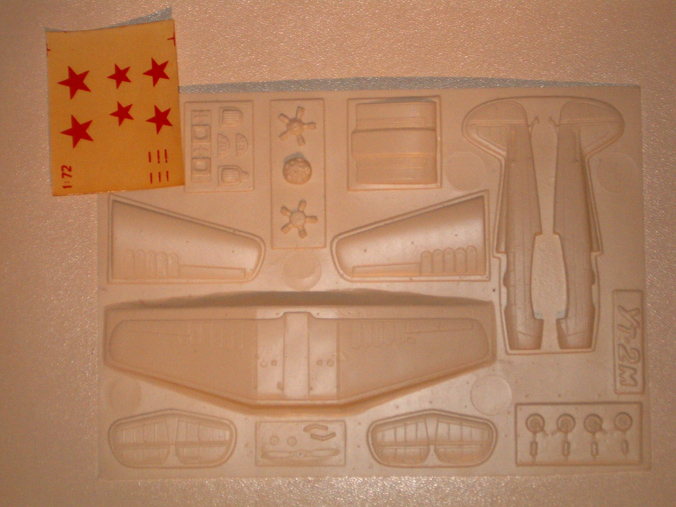
Both kits were basically just one sheet of thin, white vacuformed
plastic. No injection parts, clear parts or other details came with them. The
kits were both packed in clear plastic bags, and supplied with basic instruction
sheets and colour guide each. Hardly ever did I receive at the time Soviet vacu
kits packed in a box.
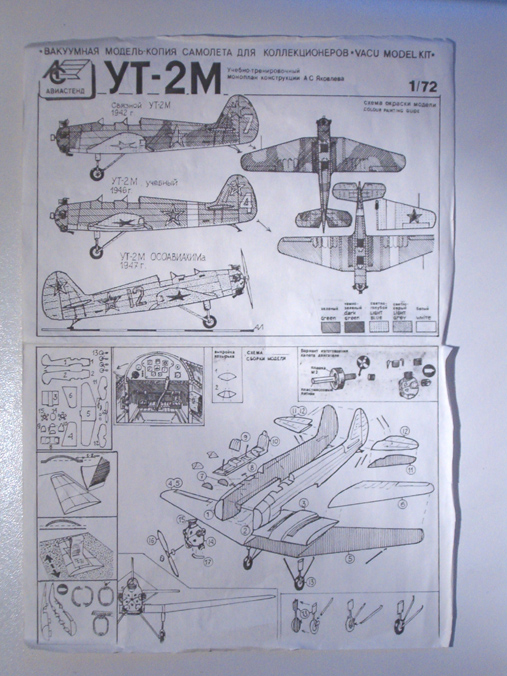
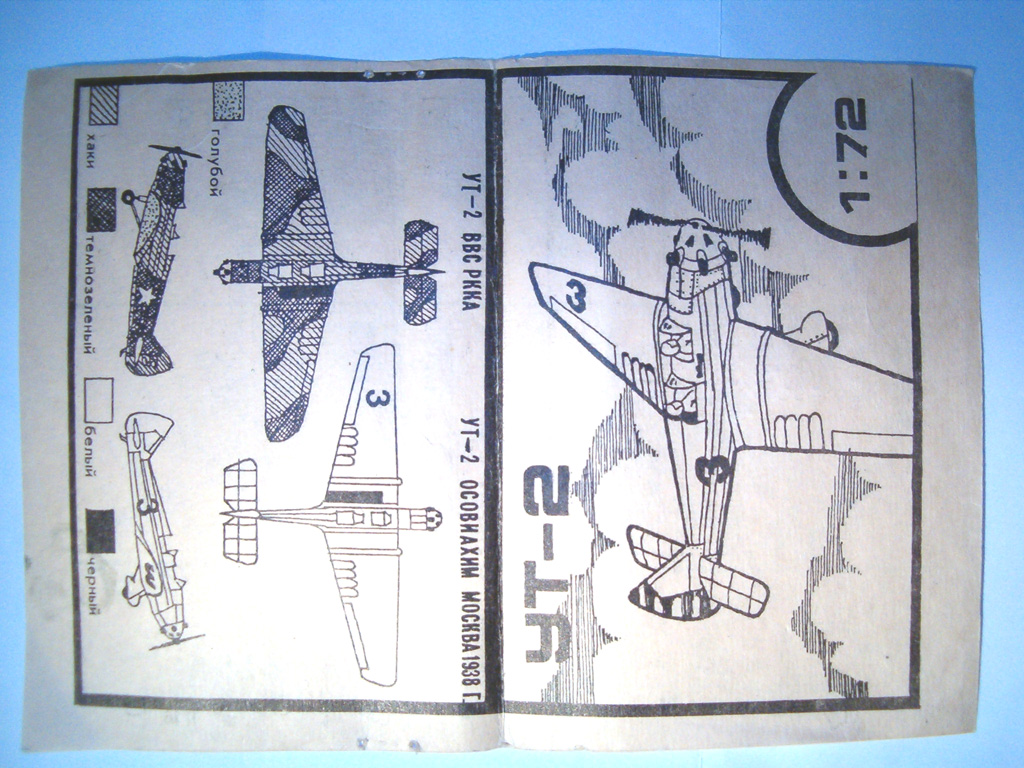
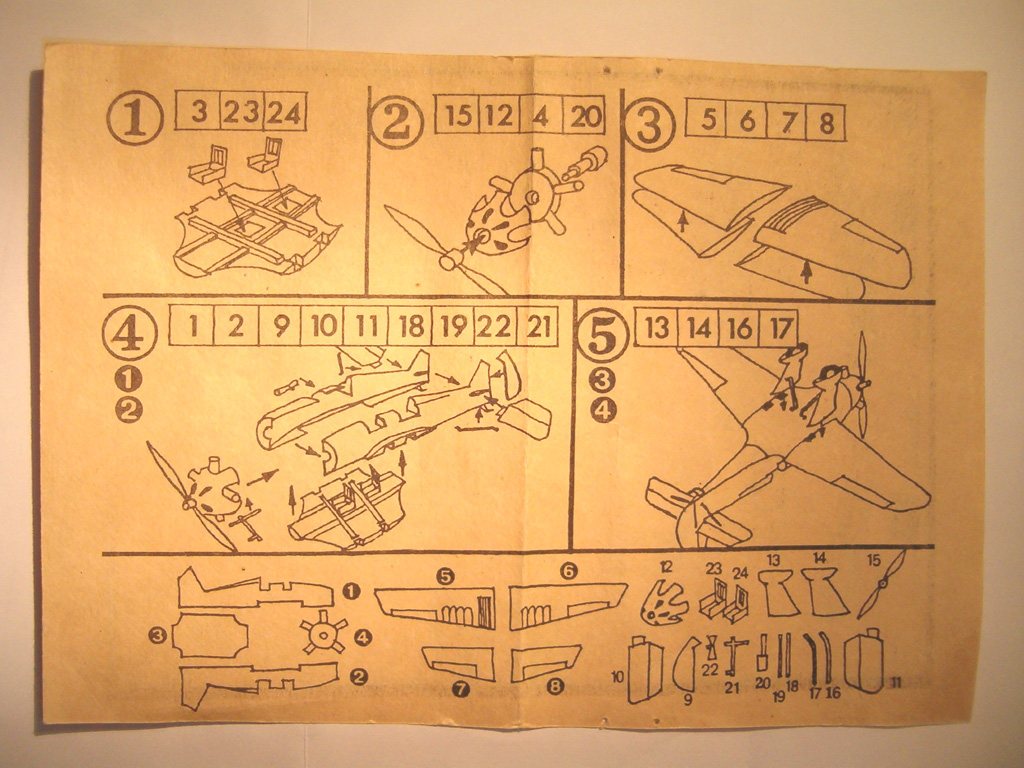
With the charming hand-drawn and handwritten instruction sheet
the adventure starts: it was all in Russian! Luckily I understand this, but
there is little information you would miss even without understanding it all.
Still, the sheets give somewhat useful guides for building the models, and without
many words they visualize some good hints for assembling vacu kits! There is
only a short description of the history of the UT-1, but nothing at all for
the UT-2M.
|
| UT-1 kit vacu sheet |
|
 |
| UT-2M kit vacu sheet | UT-2M instructions |
The decals supplied with the kit were rather unusable, imprecise, rough and thick, as they often were during Soviet times. So, one would be better off to look for a replacement from the spare box.
The Assembly
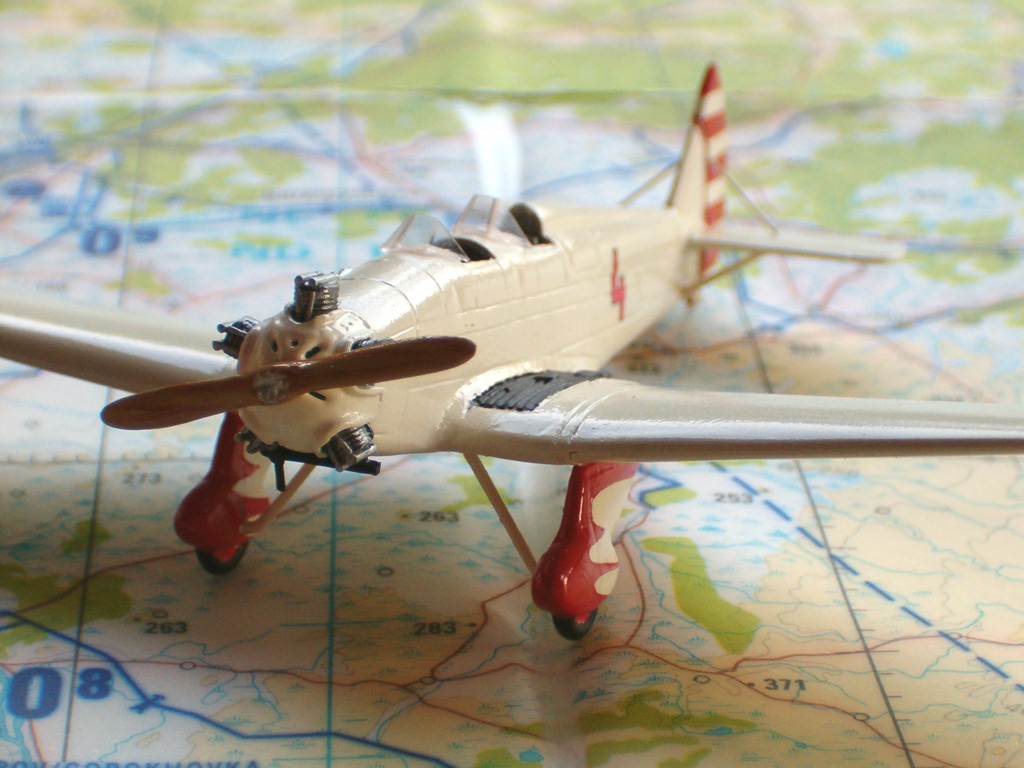
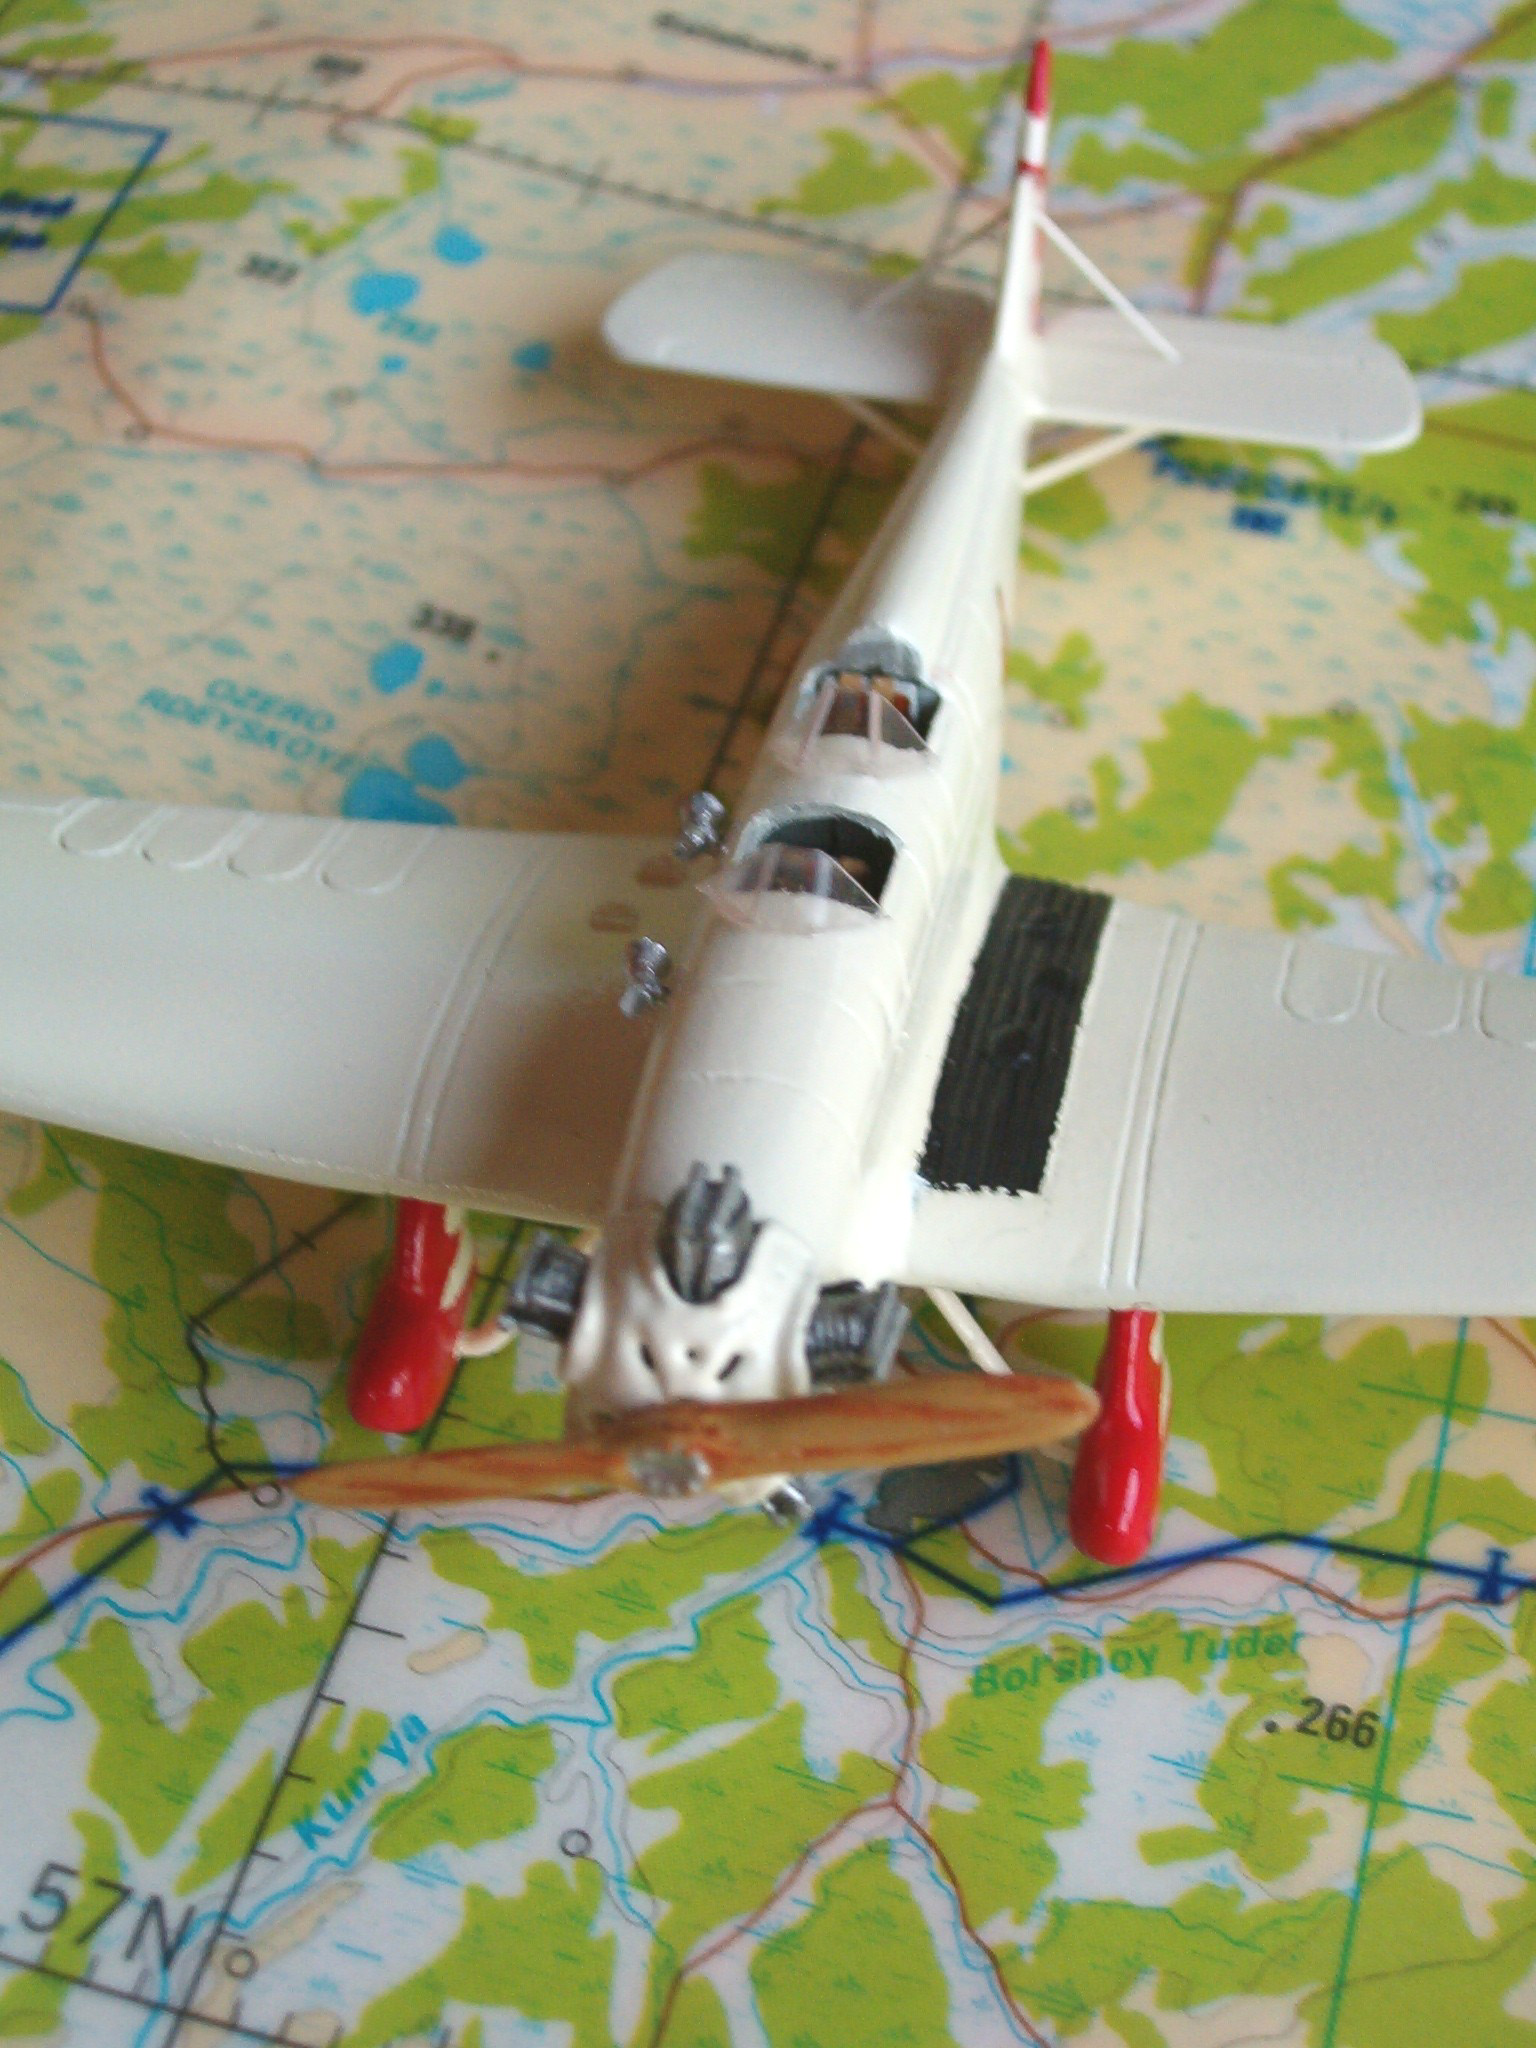
The kits were quite nicely moulded, with some fine detailing, the UT-1 being more convincing in that sense than the UT-2M. Cutting the parts out and sanding them to the right size was easy since the plastic sheet was very thin. Or, at least the ones of my kits were-- I noticed that the thickness could vary considerably from one kit to another out of the same mould, just according to the plastic sheets available then.
One should be careful not to sand away too much. However, this is one of the huge advantages of vacu kits-- the thin material makes the model appear more realistic and in-scale, in particular if it is an open-cockpit aircraft, or one with the canopy left open.
Interior fit-out for the cockpits had to be done from scratch, or with parts of the spare box, because nothing apart from seats and instrument panels was included. It was indeed worthwhile making an effort here; both aircraft are open and allow one to look into the cockpit and on pilots seats! The latter can be used from the kits; adding the belts they look realistic.
 ....
....
 ....
....
The Finish
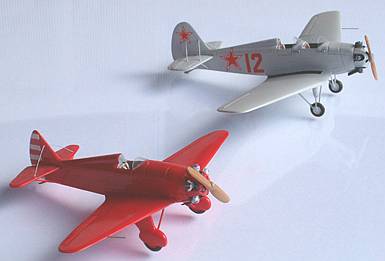
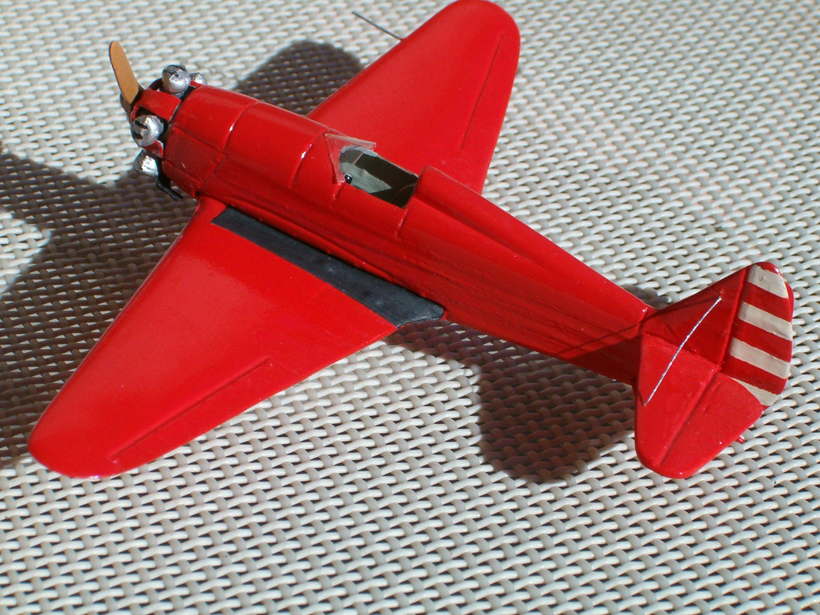
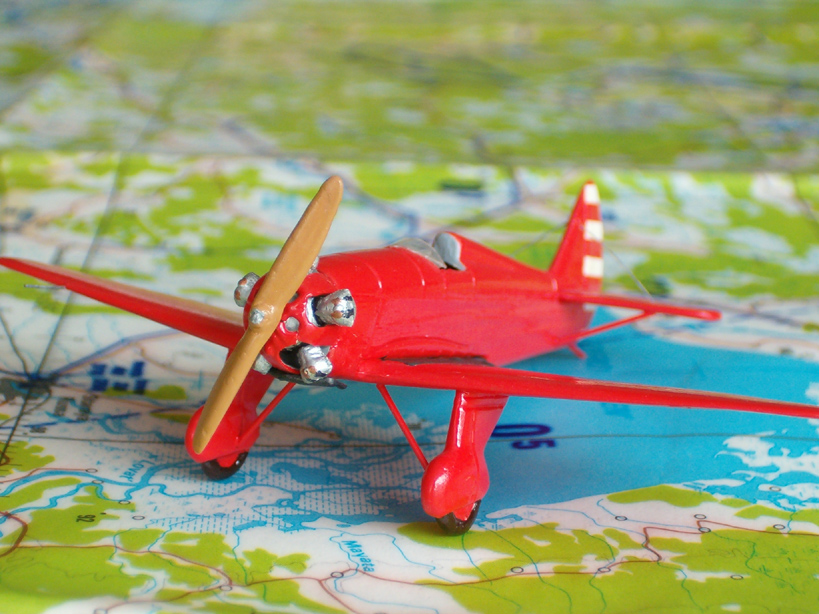
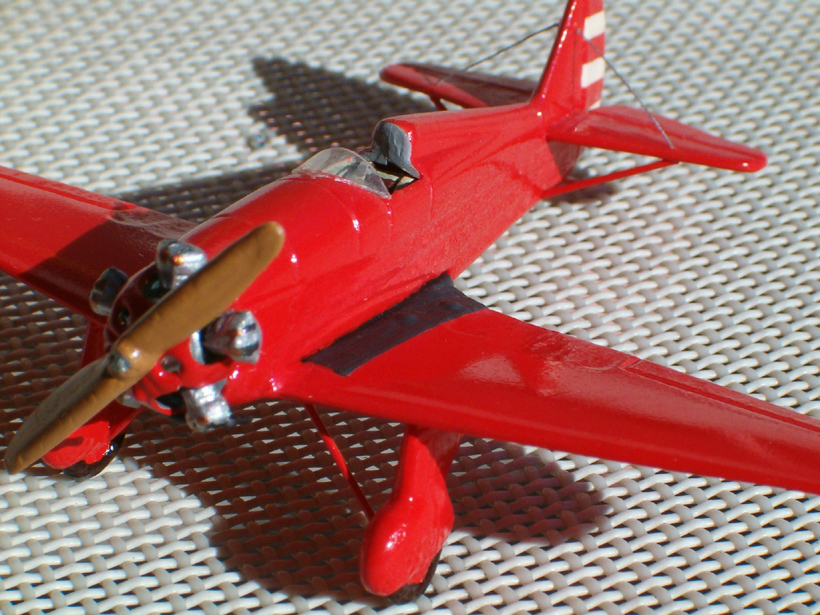
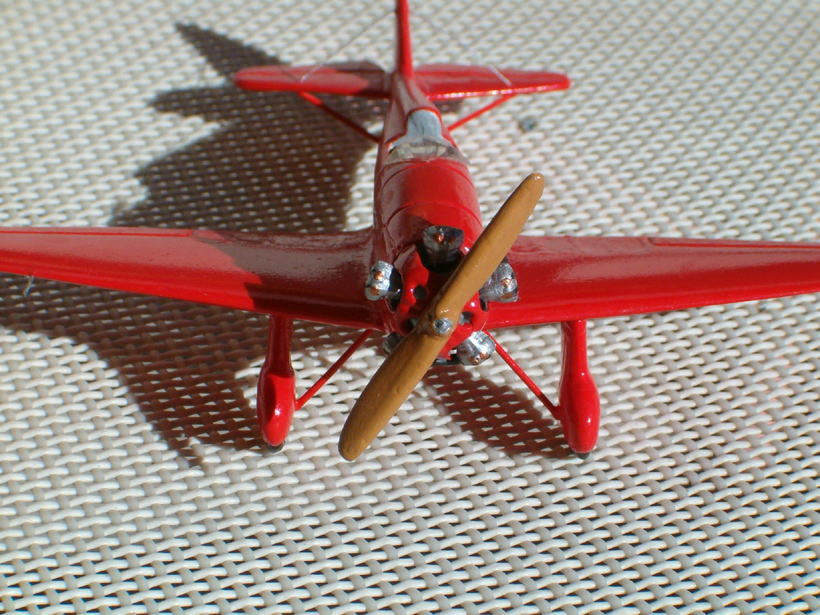
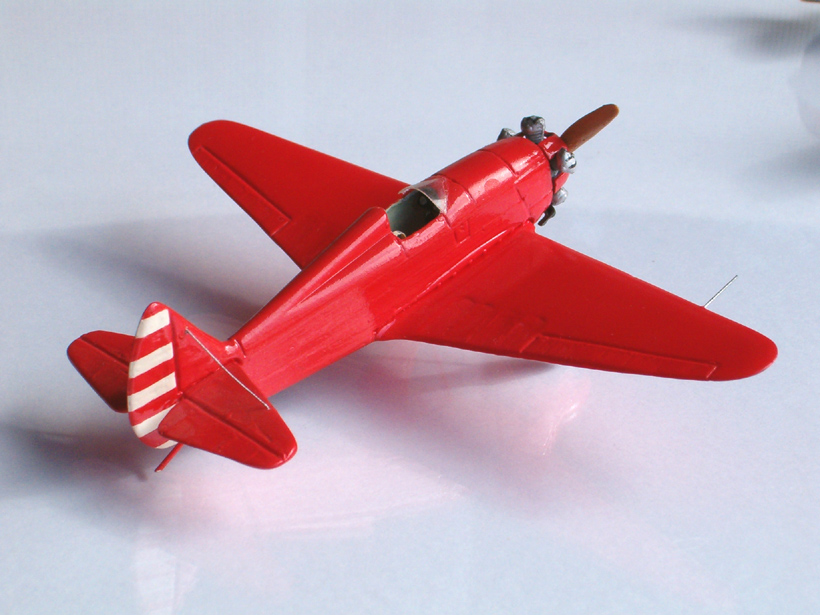
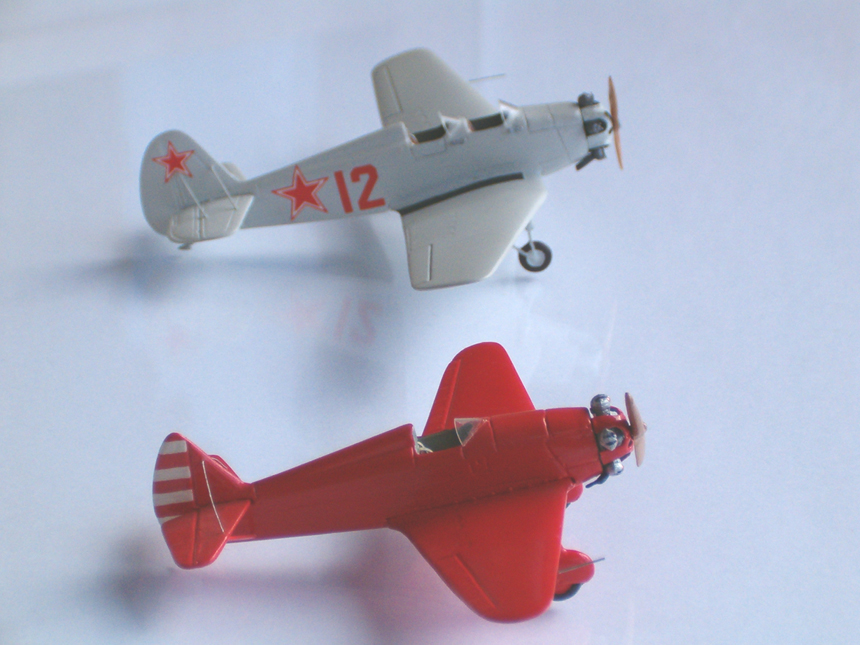
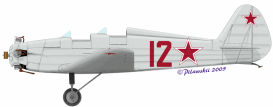
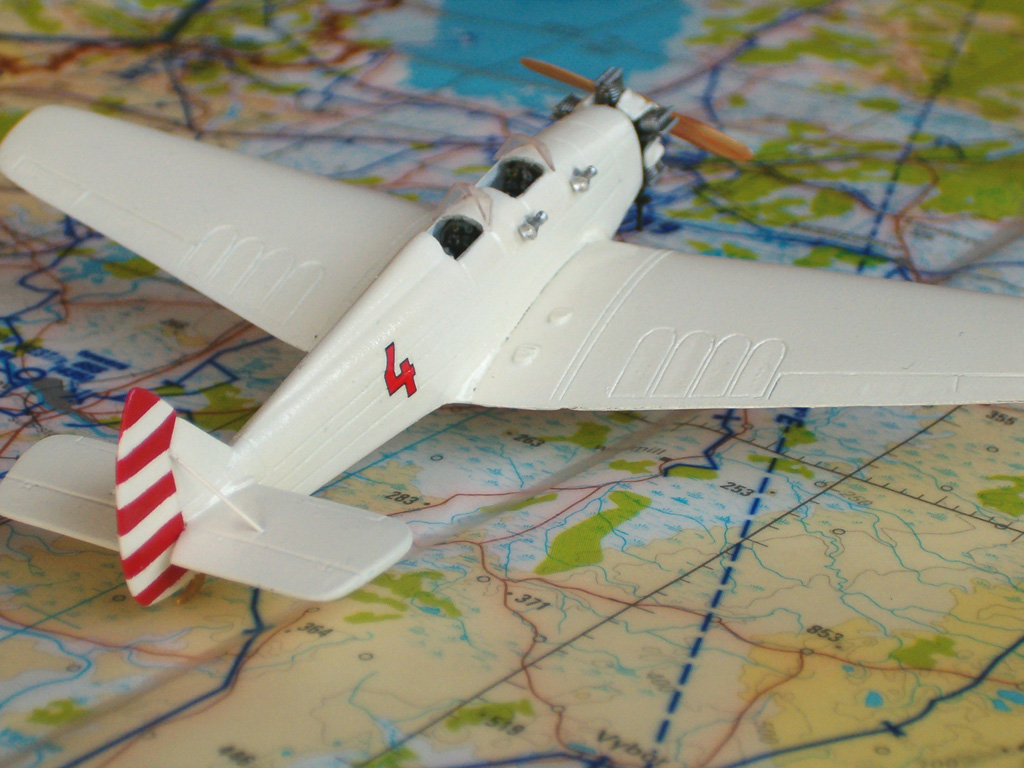
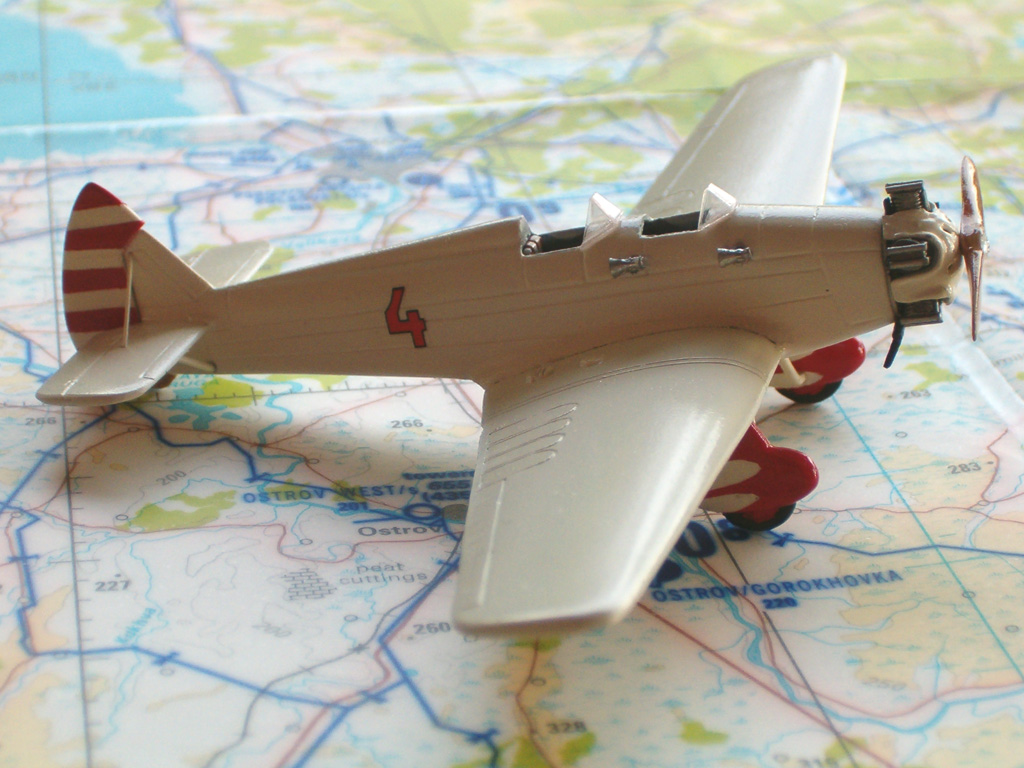
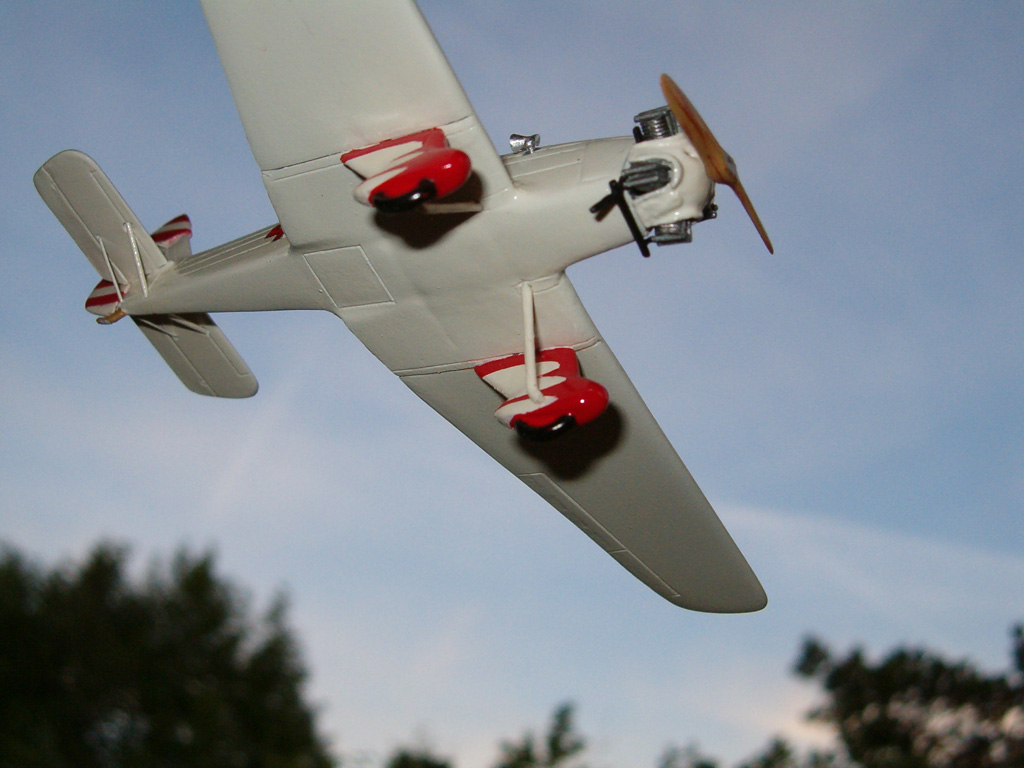
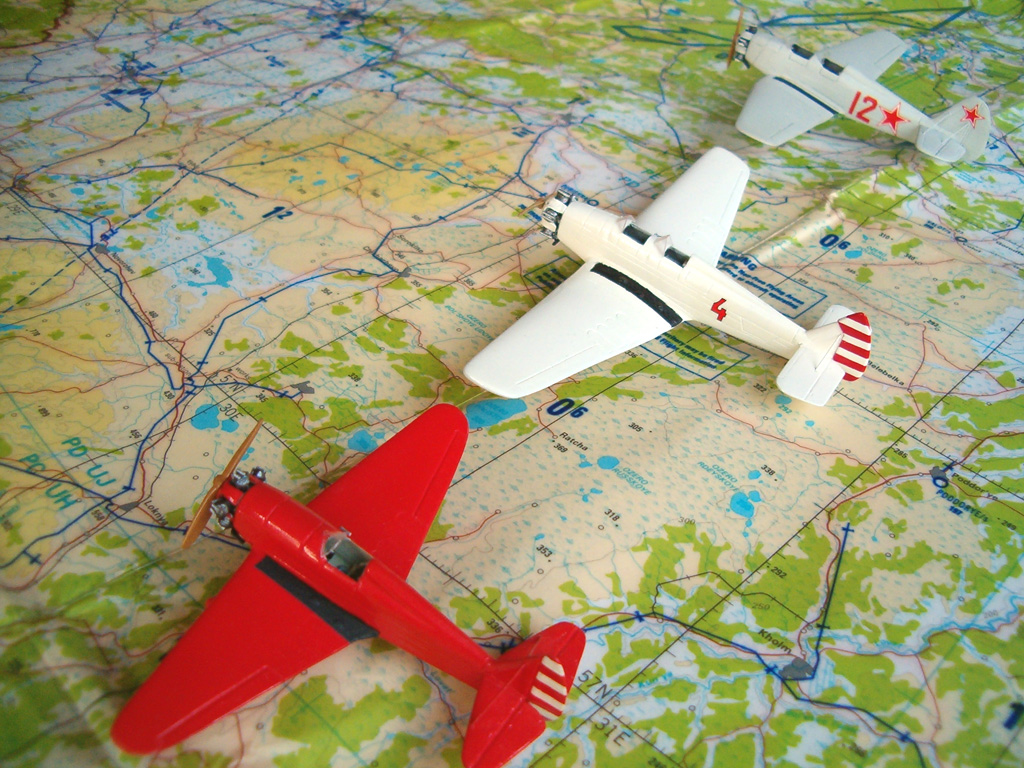
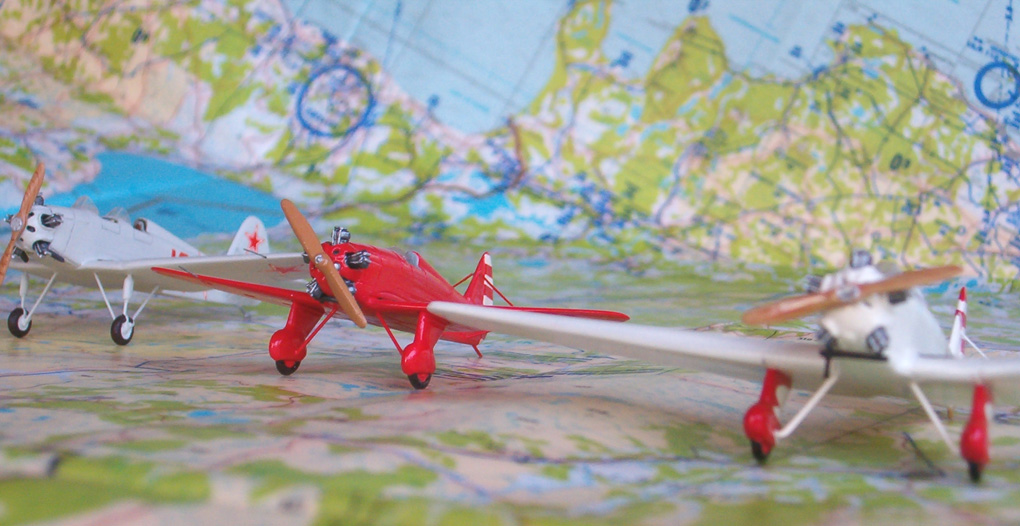
Regarding the painting suggestions, I was particularly pleased with the UT-1. This comes with several civil versions-- an overall red one, and a white one with red stripes and markings. I chose the red one and gave it a gloss finish. This makes it really a sight for the eyes in the middle of gray-green-olive-drab camouflaged aircraft.
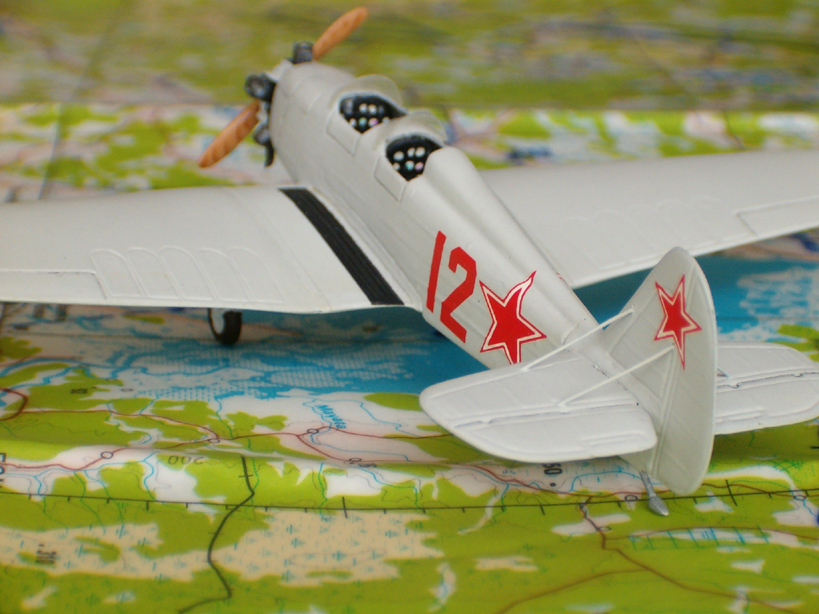
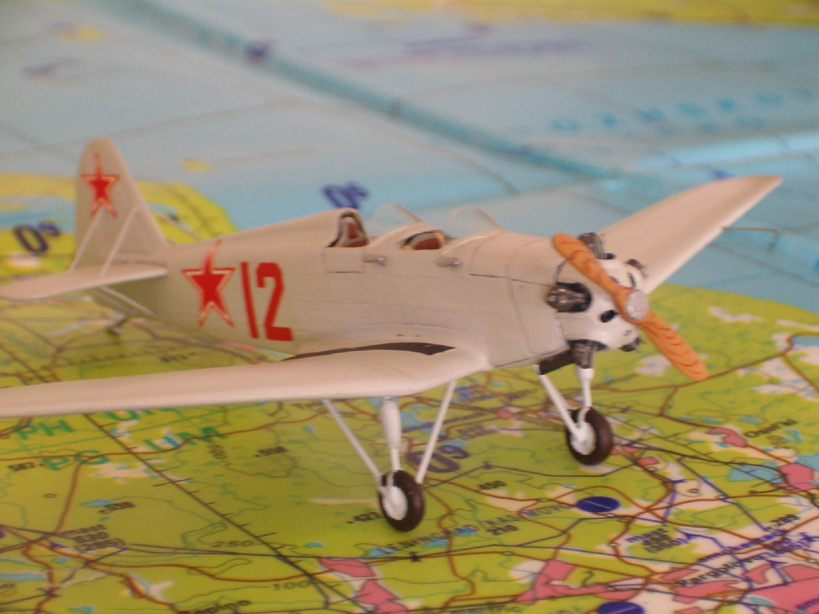
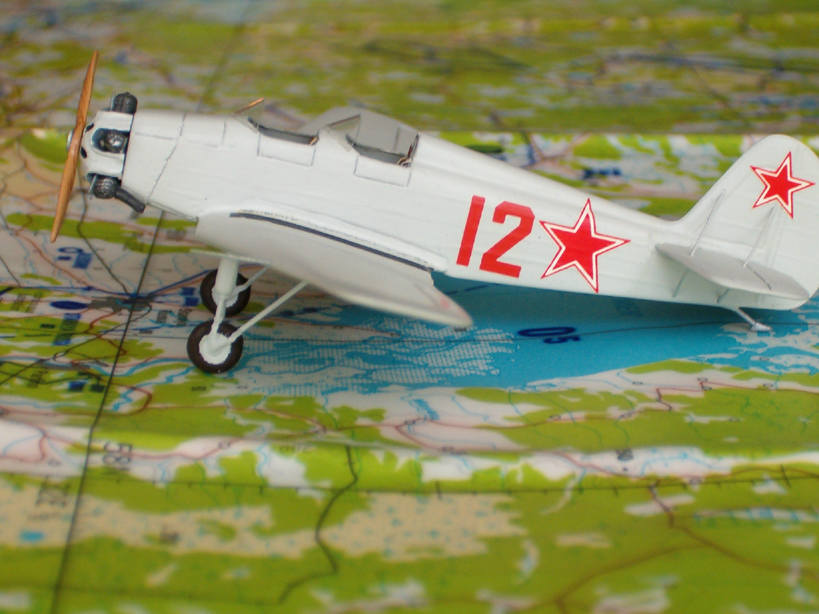
The UT-2M sheet suggests the standard painted variants, green or green with dark green top, with light blue underside. The variant I opted for is the overall light grey one which I gave a satin finish, making it look a bit more civil.
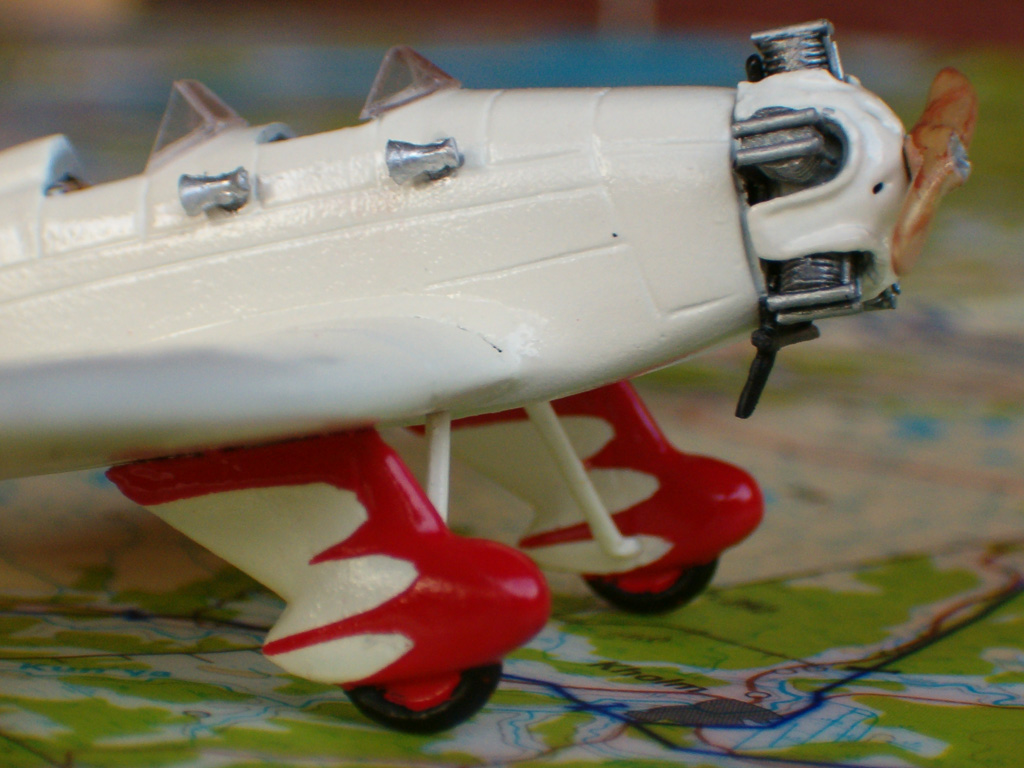
The rest is easy. Look for two venturi pipes from the spare parts box or make your own from scratch. Add these details to the starboard side of the UT-2M, and it will appear even more realistic. And last, add the struts and the windscreens. To do your own clear parts for these two aircraft you dont have to be a rocket scientist!
Conclusion
There they are, ready for take off-- two pretty models, possible
to be assembled with some care but without enormous pain. And the result is
certainly a very charming enrichment for every collector of VVS aircraft.
Now I am working on their brother: the UT-2, an injection kit
in 72nd scale, which also dates back to the Soviet age. This appears to be another
smashing addition for any Soviet prop aircraft collection!
Since NeOmega are producing the UT-1 also in 48th scale, I wish somebody would do the same with the two-seaters, or even manufacture them in 32nd scale. These aircraft certainly deserve a lot more attention form modellers than what they have currently.
 |
||
|
|
 |
 |
 |
 |
|
Erik has completed some new profile artwork for the UT-2M to acompany this article. Click here to go to the Digital Modeling section and see.
Christoph has now been kind enough to send images of his completed UT-2. We will post his comments below as they are completed.
 |
 |
 |
 |
 |
 |
 |
 |
 |
 |
 |
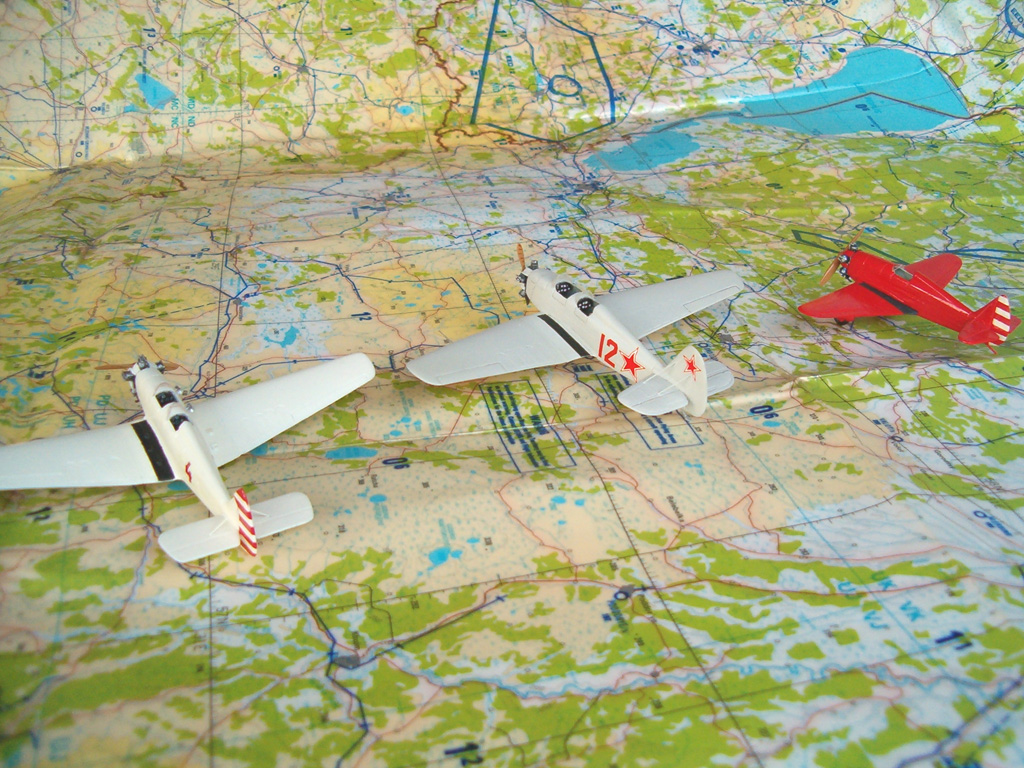
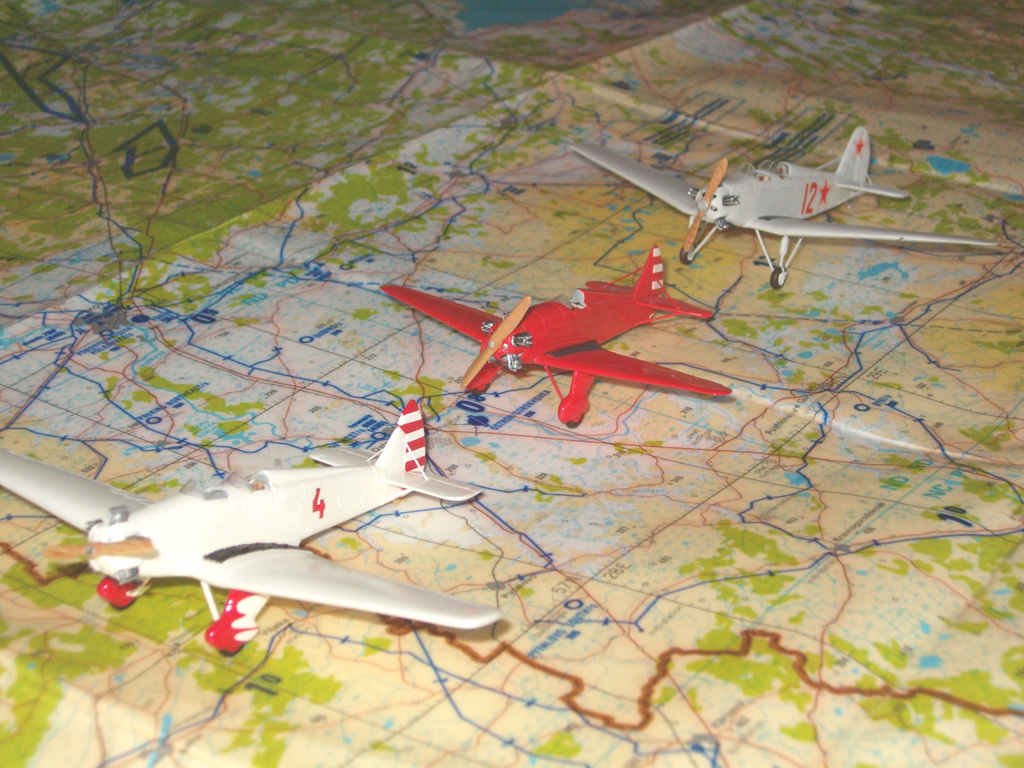
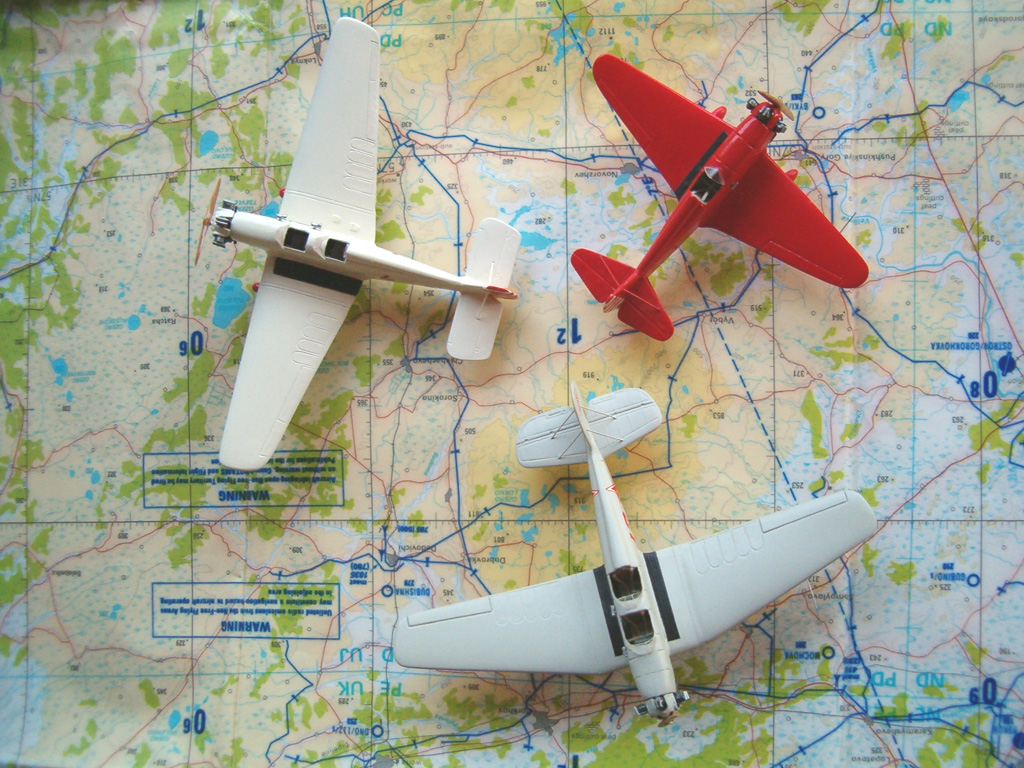
...What a fine collection these three make together. Well done,
Christoph.
 |
 |
 |
 |
 |