Eduard 1/72 Lavochkin La-7
By Matt Bittner
Eduard 1/72 Lavochkin La-7By Matt Bittner |
|
 Never
let it be said I'm a quick builder. I just performed a Google search on the
site to see when this kit was "in our hands" and ready for review.
All the way back in March
2004. And I'm pretty sure I started not too long after writing the First
Look on it. Wow. Sad. The worst part is I have a Yak-9T I started a year or
two before the La-7 that's still waiting to be painted. Really sad.
Never
let it be said I'm a quick builder. I just performed a Google search on the
site to see when this kit was "in our hands" and ready for review.
All the way back in March
2004. And I'm pretty sure I started not too long after writing the First
Look on it. Wow. Sad. The worst part is I have a Yak-9T I started a year or
two before the La-7 that's still waiting to be painted. Really sad.
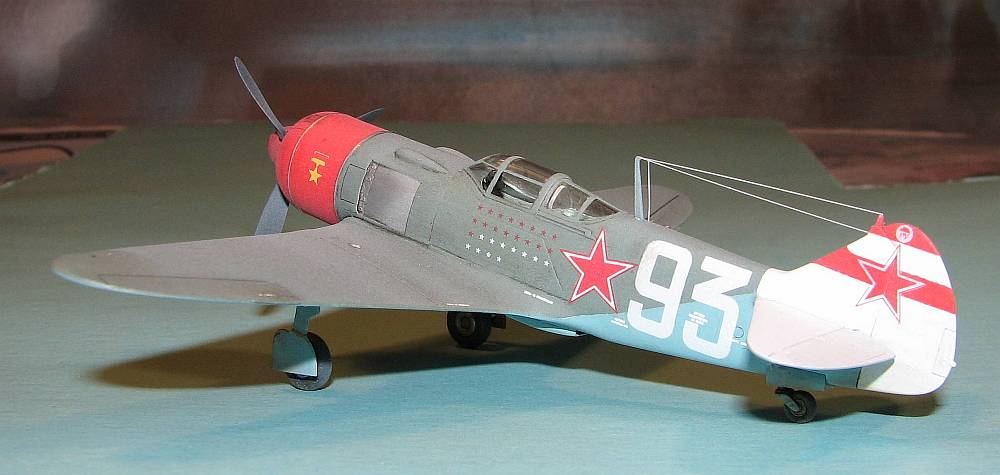
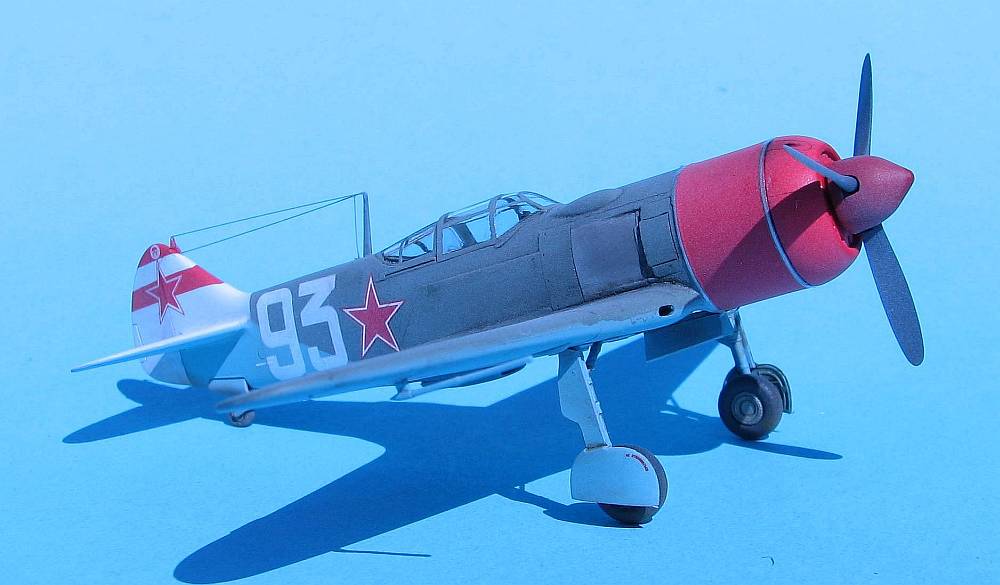
 In
any event, I was going through all my in-progress kits a few months ago and
decided to finish this one up quickly, and what better way to do that than with
a single color on the upper surfaces. So, rummaging through my decals I came
across a set of Propag Team decals for HSU Sergej Fodorovich Dolgushin's "White
93". Perfect. While I tend not to finish my models as those from the more
famous fliers (primarily because "everyone else does") it was best
to "bite the bullet" and "just do it". This also gave me
the perfect opportunity to try out the Agama acrylics and decal solvents as
well. Perfect.
In
any event, I was going through all my in-progress kits a few months ago and
decided to finish this one up quickly, and what better way to do that than with
a single color on the upper surfaces. So, rummaging through my decals I came
across a set of Propag Team decals for HSU Sergej Fodorovich Dolgushin's "White
93". Perfect. While I tend not to finish my models as those from the more
famous fliers (primarily because "everyone else does") it was best
to "bite the bullet" and "just do it". This also gave me
the perfect opportunity to try out the Agama acrylics and decal solvents as
well. Perfect.
 You'll
need to forgive me as I've been through two computers and a couple of hard drives
since I started the model. So any notes I took along the way are lost to time.
The best bet, though, is to read Ilya
Grinberg's review as he performs a few of the corrections needed on this
model. I decided to finish mine out of the box to show what it looks like when
you don't perform the corrections.
You'll
need to forgive me as I've been through two computers and a couple of hard drives
since I started the model. So any notes I took along the way are lost to time.
The best bet, though, is to read Ilya
Grinberg's review as he performs a few of the corrections needed on this
model. I decided to finish mine out of the box to show what it looks like when
you don't perform the corrections.
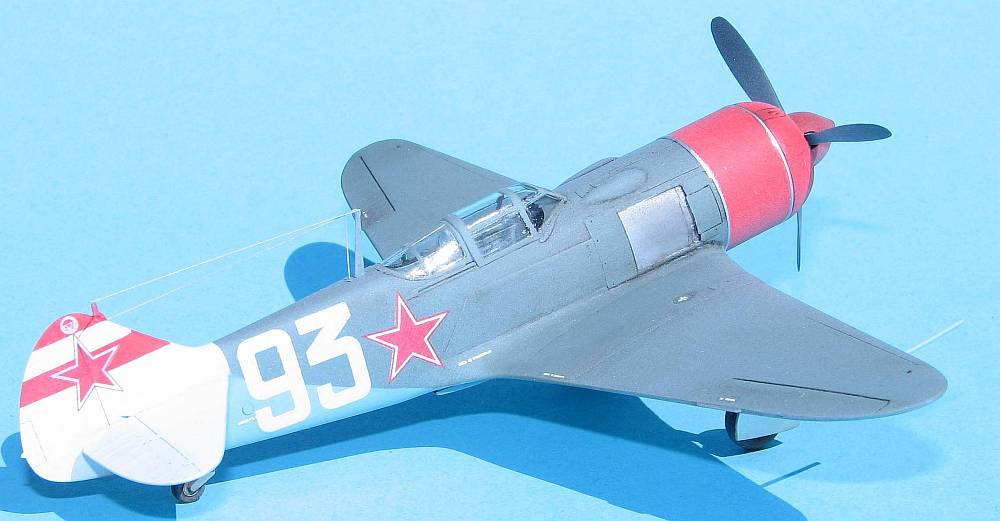
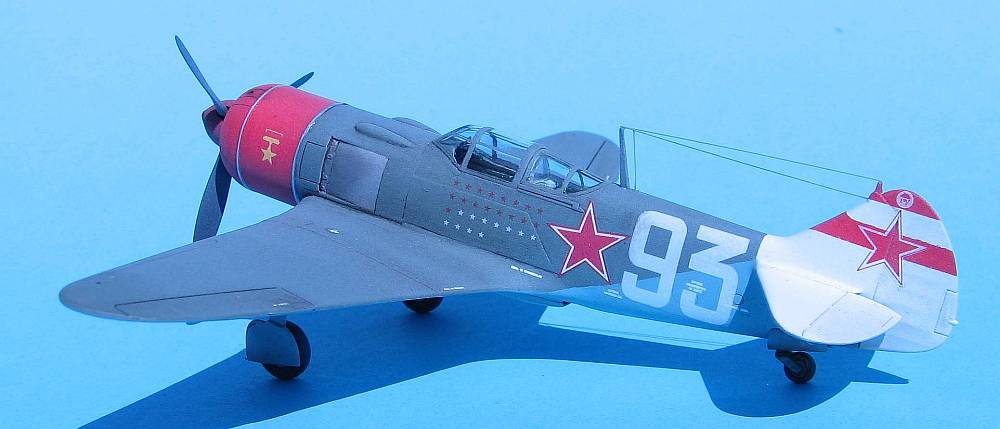
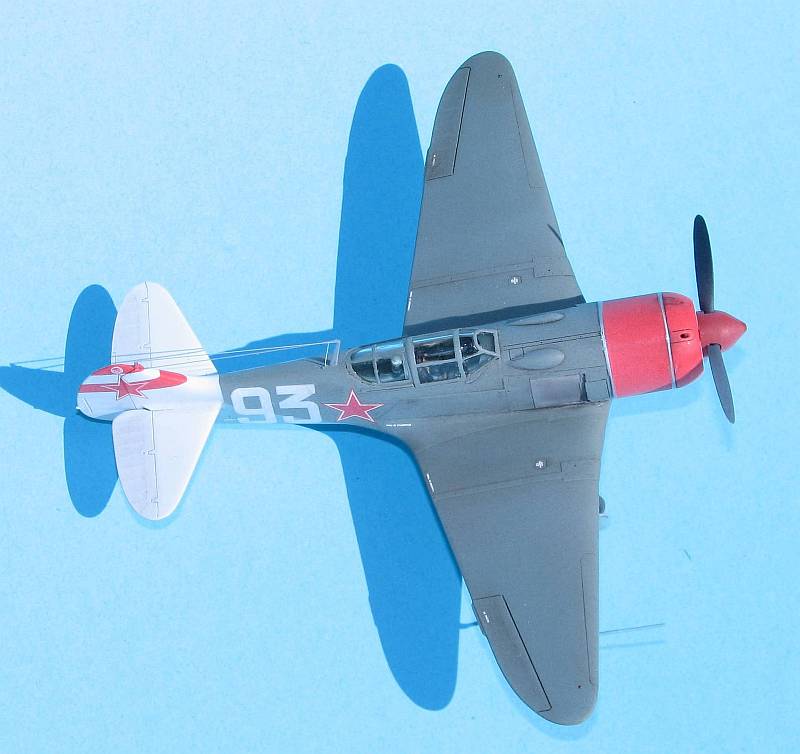
One area I remember needing help on was the upper nose. Some putty and CA later I had a decent fit with little to no panel line loss. In additon, there was a little bit of work on the wing-to-fuselage joint on the underside. Otherwise everything in this area was a decent fit as well. As I recall only light sanding was needed on the horizontal tail pieces to eliminate those seams.
 Since
this was the original, "non-profi" release (meaning no photoetch included
- something Eduard doesn't do anymore except on their Weekend kits) there was
nothing extra in the box, except for their masks. Their original vinyl masks.
Which aren't that great at bending around curves. So I removed the pieces that
were to adhere to the canopy via bends and applied them to Tamiya tape. Using
the vinyl pieces as templates I then cut out new masks from the Tamiya tape,
which worked like a charm. Perfect.
Since
this was the original, "non-profi" release (meaning no photoetch included
- something Eduard doesn't do anymore except on their Weekend kits) there was
nothing extra in the box, except for their masks. Their original vinyl masks.
Which aren't that great at bending around curves. So I removed the pieces that
were to adhere to the canopy via bends and applied them to Tamiya tape. Using
the vinyl pieces as templates I then cut out new masks from the Tamiya tape,
which worked like a charm. Perfect.
 Now
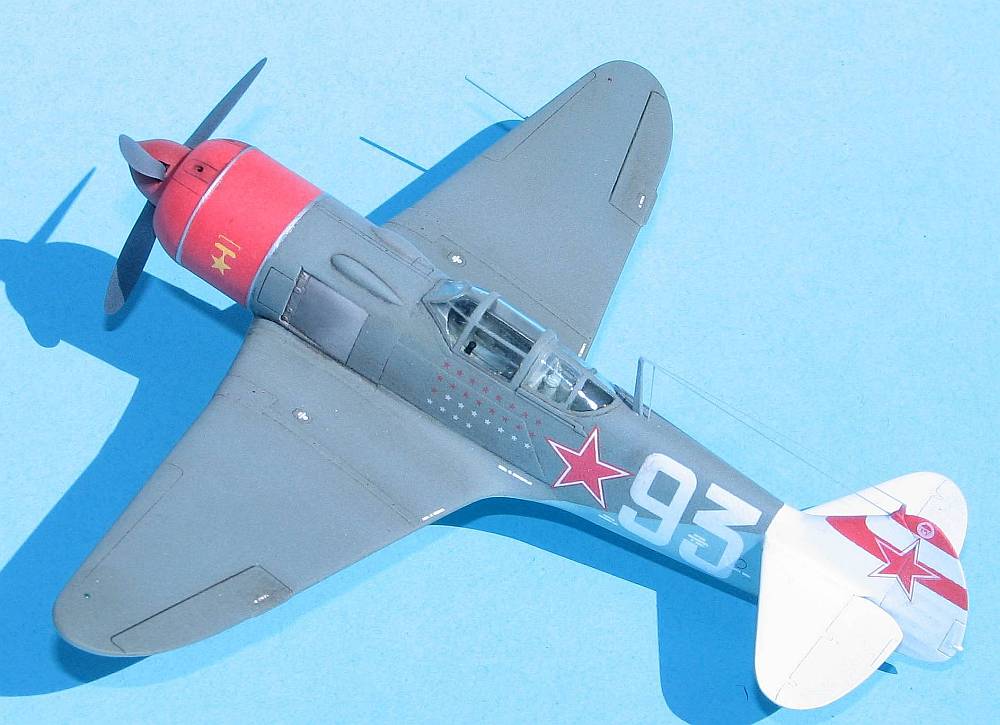
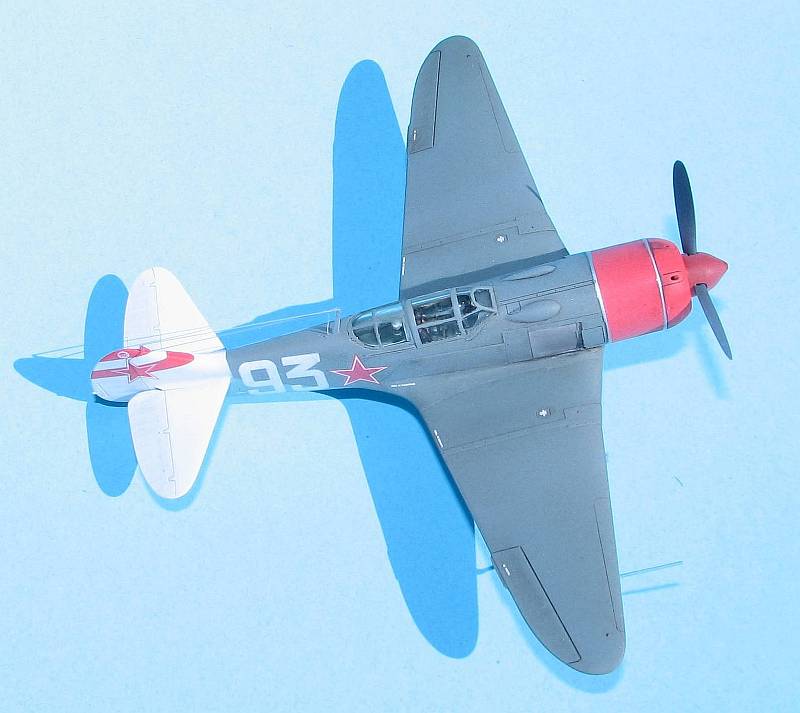
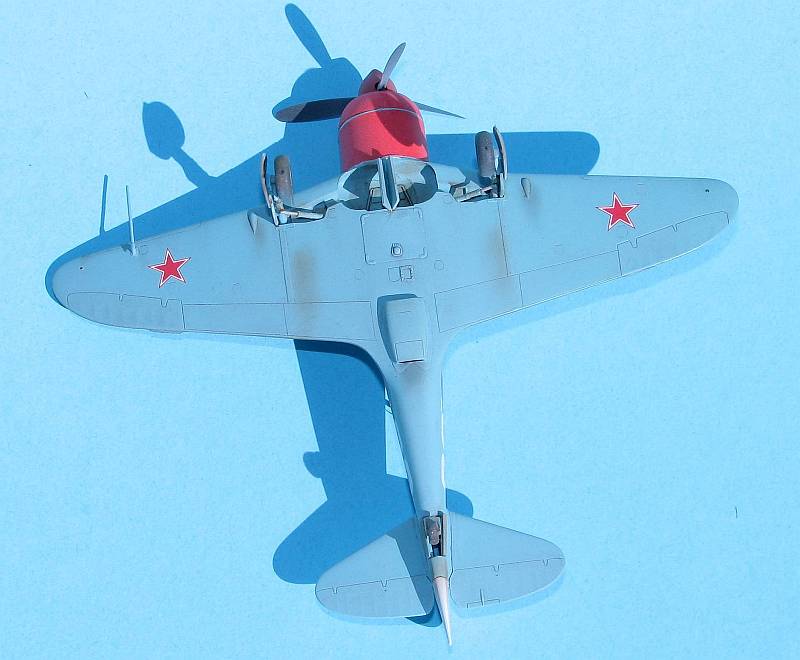
that I had everything together it was time for painting. The first thing I did
was to paint the white. Based on the most recent
research by Erik Pilawskii, it's now thought that the entire upper surfaces
of Dolgushin's tail was white, including the tops of the horizontal tail, and
there were only two red stripes on the rudder/fin and not three. In addition
the "yellow 3" found on some profiles on the rudder - and in most
decal sets - didn't exist either. So with this information in hand I sprayed
the tail and cowl white - the cowl so the red would be the same shade of red
in both areas (unfortunately I forgot to do this with the spinner, which is
why it appears to be a darker red than the rest). After a couple of days of
drying the white was masked and
Now
that I had everything together it was time for painting. The first thing I did
was to paint the white. Based on the most recent
research by Erik Pilawskii, it's now thought that the entire upper surfaces
of Dolgushin's tail was white, including the tops of the horizontal tail, and
there were only two red stripes on the rudder/fin and not three. In addition
the "yellow 3" found on some profiles on the rudder - and in most
decal sets - didn't exist either. So with this information in hand I sprayed
the tail and cowl white - the cowl so the red would be the same shade of red
in both areas (unfortunately I forgot to do this with the spinner, which is
why it appears to be a darker red than the rest). After a couple of days of
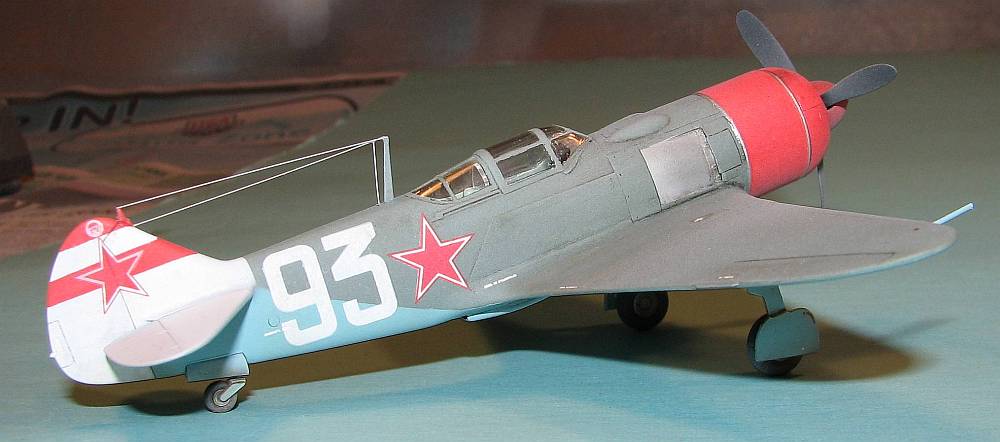
drying the white was masked and 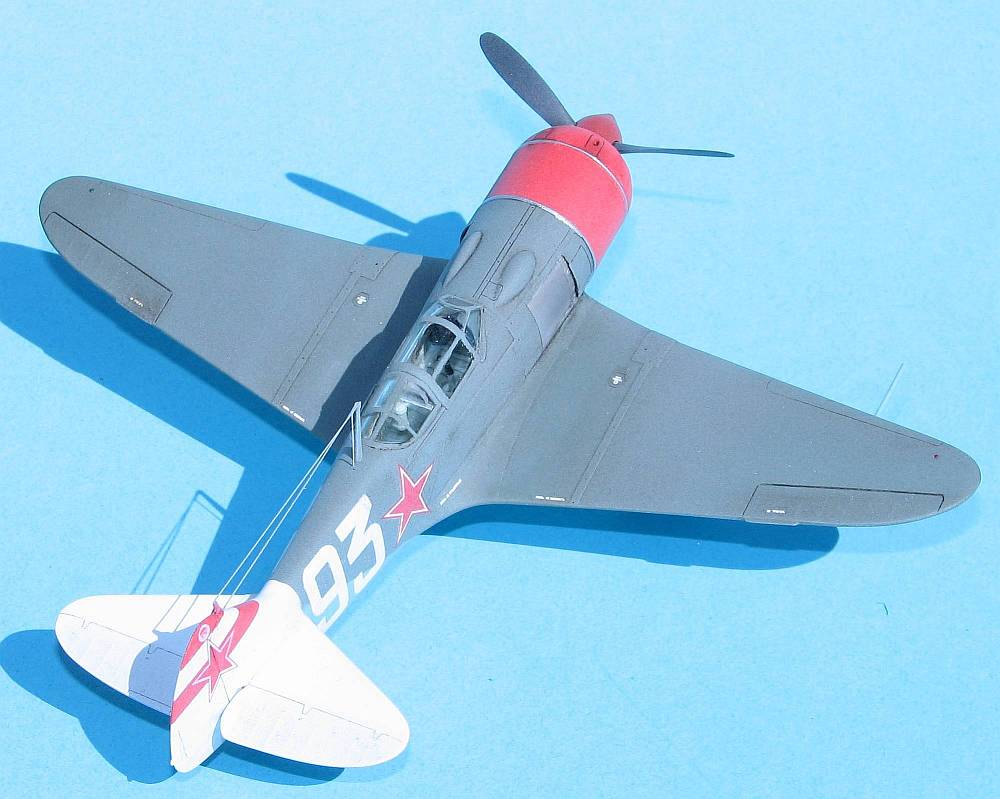 the
red was sprayed. I did it in this order because it was easier to mask the entire
nose and the entire tail at once, instead of trying to piece-meal it. After
masking the tail and nose I sprayed the undersides with "modified"
Agama "AMT-17 (sic) Light Blue". Unfortunately the blue wasn't bright
enough so I added Polly Scale "USSR Underside Blue" until it matched
what I thought was a bright-enough shade. After a couple of days of drying I
then masked the blue and sprayed the Agama "AMT-11 Blue Grey". Unfortunately
I didn't realise it at the time, but the Agama AMT-11 is a little dark and not
blue enough. Oh well, the model is finished.
the
red was sprayed. I did it in this order because it was easier to mask the entire
nose and the entire tail at once, instead of trying to piece-meal it. After
masking the tail and nose I sprayed the undersides with "modified"
Agama "AMT-17 (sic) Light Blue". Unfortunately the blue wasn't bright
enough so I added Polly Scale "USSR Underside Blue" until it matched
what I thought was a bright-enough shade. After a couple of days of drying I
then masked the blue and sprayed the Agama "AMT-11 Blue Grey". Unfortunately
I didn't realise it at the time, but the Agama AMT-11 is a little dark and not
blue enough. Oh well, the model is finished.
 As
a piece of reference I used the Agama thinner with their paints, and thinned
it 1/3rd thinner to 2/3rds paint. Sprayed like a dream and I had zero paint
pull-up. Nice. Too bad their VVS paints aren't accurate enough, but you can
get there with some deft mixing, as I proved with the underside blue. I also
used Agama's decal solvent system, which consisted of "Adhesol" under
the decal, "Tensol" on top of the decal a few minutes afterwards,
and "Hypersol" for those stubborn decals, and/or the decals needing
extra help to snuggle into deeper recesses and panel lines. I really like their
decal system! I've used the Microsol system for so long I didn't think anything
else would work, or existed, for that matter. I think the Agama decal set is
better than Microscale, and the Agama "Hypersol" is on par with Solvaset.
While the "Adhesol" is a dark color, it doesn't show through the decals
and doesn't change the color of anything. It works just as well as laying Future
under the decals. Excellent.
As
a piece of reference I used the Agama thinner with their paints, and thinned
it 1/3rd thinner to 2/3rds paint. Sprayed like a dream and I had zero paint
pull-up. Nice. Too bad their VVS paints aren't accurate enough, but you can
get there with some deft mixing, as I proved with the underside blue. I also
used Agama's decal solvent system, which consisted of "Adhesol" under
the decal, "Tensol" on top of the decal a few minutes afterwards,
and "Hypersol" for those stubborn decals, and/or the decals needing
extra help to snuggle into deeper recesses and panel lines. I really like their
decal system! I've used the Microsol system for so long I didn't think anything
else would work, or existed, for that matter. I think the Agama decal set is
better than Microscale, and the Agama "Hypersol" is on par with Solvaset.
While the "Adhesol" is a dark color, it doesn't show through the decals
and doesn't change the color of anything. It works just as well as laying Future
under the decals. Excellent.
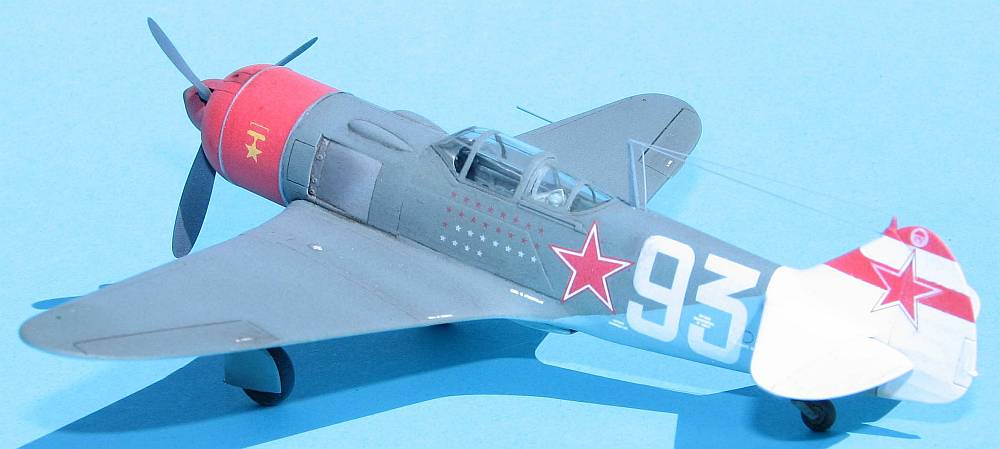
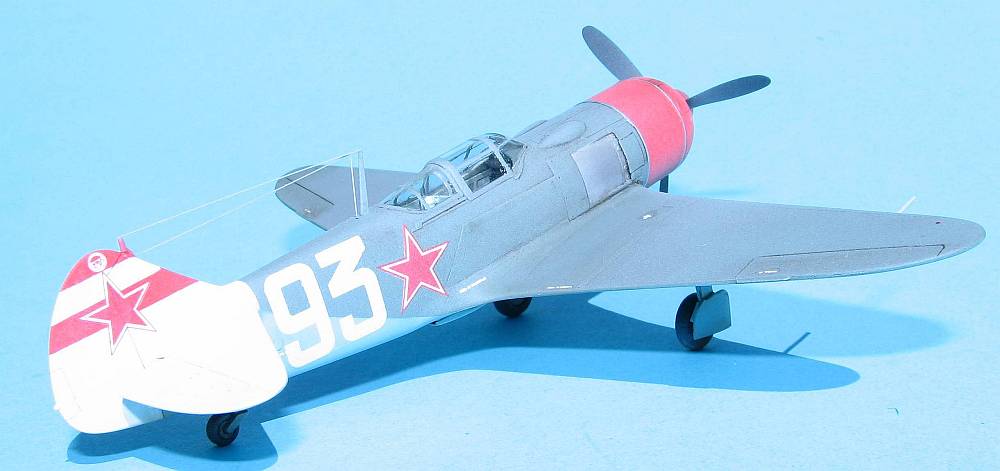
 Now
that the model is painted and the decals started to go on, trouble came to light.
The Propag Team set of decals for Dolgushin's plane are way too translucent.
Seeing the paint under the decals - especially the "White 93s" - was
a problem and did not look good at all. I asked around in different places,
especially on the VVS Forum, and thankfully my good friend John Thompson was
able to help me out and sent me another set of the Propag Team decals. The area
this really helped was the "White 93s" as I decided to replace the
stars with those on the Eduard sheet that came with the kit. I also botched
the "kill stars" decals on my sheet and had to use his as well. (Thanks,
John!!). All decals reacted perfectly with the Agama system. I waited until
I was done with the model, though, to add the metal rings to the cowl (which
came from the Eduard sheet). That way they remained "shiny" as they
would have in reality, since they were left natural metal.
Now
that the model is painted and the decals started to go on, trouble came to light.
The Propag Team set of decals for Dolgushin's plane are way too translucent.
Seeing the paint under the decals - especially the "White 93s" - was
a problem and did not look good at all. I asked around in different places,
especially on the VVS Forum, and thankfully my good friend John Thompson was
able to help me out and sent me another set of the Propag Team decals. The area
this really helped was the "White 93s" as I decided to replace the
stars with those on the Eduard sheet that came with the kit. I also botched
the "kill stars" decals on my sheet and had to use his as well. (Thanks,
John!!). All decals reacted perfectly with the Agama system. I waited until
I was done with the model, though, to add the metal rings to the cowl (which
came from the Eduard sheet). That way they remained "shiny" as they
would have in reality, since they were left natural metal.
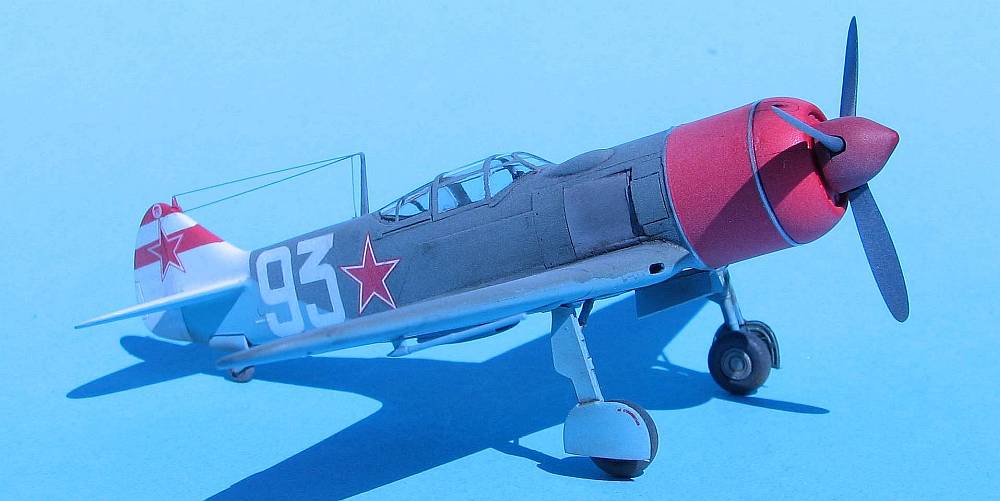
 Oh,
one point. You might think I "messed up" with the stars on the fuselage
sides since they appear "crooked". This is the way they were in reality,
as they wanted the stars to appear "straight and level" when the aircraft
was sitting on the ground.
Oh,
one point. You might think I "messed up" with the stars on the fuselage
sides since they appear "crooked". This is the way they were in reality,
as they wanted the stars to appear "straight and level" when the aircraft
was sitting on the ground.
Weathering was accomplished with oil washes and pastel chalks. The aerial is the wire I use to rid my biplanes with and was added before the final dull coat, so the dull coat would tone down the shine.
 All
I can say is, it's finally finished. Finally. After all these years. Yikes!
Oh well, it was a decent kit and not too difficult, it just languished as life
took control and I lost interest not only in modeling, but modeling single-seat
WW2 aircraft. But now I'm back into the fray and hope to finish my huge backlog
of in-progress kits.
All
I can say is, it's finally finished. Finally. After all these years. Yikes!
Oh well, it was a decent kit and not too difficult, it just languished as life
took control and I lost interest not only in modeling, but modeling single-seat
WW2 aircraft. But now I'm back into the fray and hope to finish my huge backlog
of in-progress kits.
As I understand it now, the only La-7 available from Eduard in 1/72 is the Dual Combo kit, all others being out of production for awhile (those being the "non-profi" that I've built here, their "Three Gun Version" as well as the "Profipack". The ironic thing is Eduard includes Dolgushin's markings in the Dual Combo kit which is good as I'm almost positive the Propag Team decals are also out of production, and buying two sets of decals because of the translucency problem could also be problematic.
 I
do wish there was more aftermarket for this kit. A resin landing gear well would
be nice as you can see straight through the wing cooling holes into the gear
well. In addition, a resin cockpit could also help, although Eduard's photoetch
provides a lot of detail. It's just the sidewalls need more help, as does the
area behind the seat.
I
do wish there was more aftermarket for this kit. A resin landing gear well would
be nice as you can see straight through the wing cooling holes into the gear
well. In addition, a resin cockpit could also help, although Eduard's photoetch
provides a lot of detail. It's just the sidewalls need more help, as does the
area behind the seat.
I still have the Three Gun version in my stash, so some day I will build another La-7. Just not in the forseeable future. Although it's one of the best single-seat fighters of WW2 (coupled with the Yak-3) I'm not too fond of it. Just don't tell Erik...
My thanks to Eduard, all those years ago, for the review kit. My apologies to them as well for taking so long to finish. Now to continue to work on all the other kits.
 |
 |
 |
|