| |
|||||
The Stal-7 (Steel-7) transport employed an inverted-gull wing which minimised the wing-fuselage junction airflow disturbance and enabled the height of the undercarriage legs (and thus, their weight) to be reduced.
Although successful and gaining a few world records for long-distance flights, the Stal-7 was not built in great numbers and its designer Bartini was arrested in one of Stalin's purges and placed in prison.
Work on a bomber derivative was undertaken by a 70-strong design bureau, OKB-240, under the leadership of a young engineer, Vladimir Grigor'evitch Ermolaev.
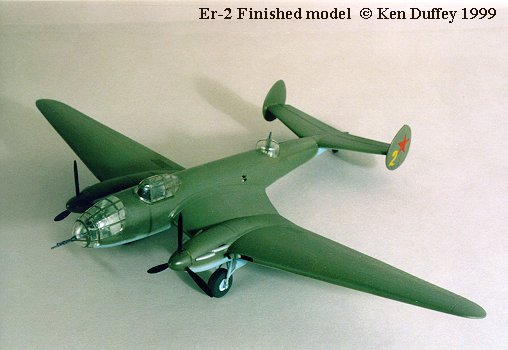
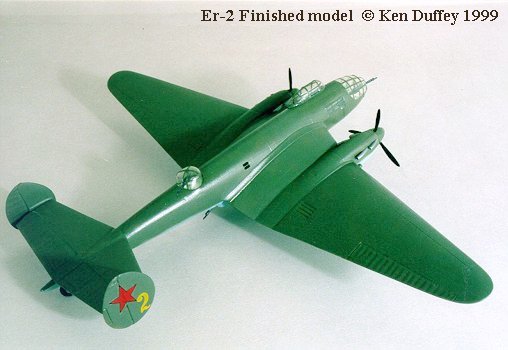
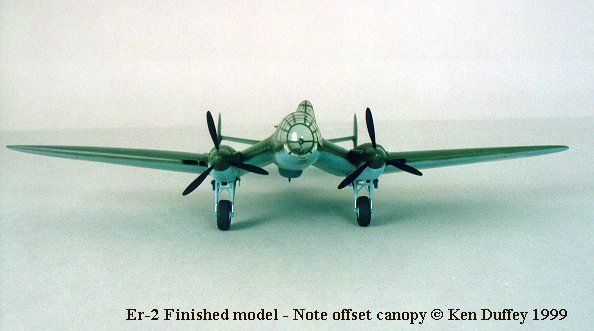
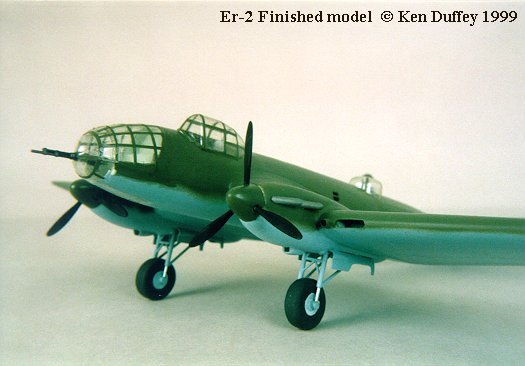
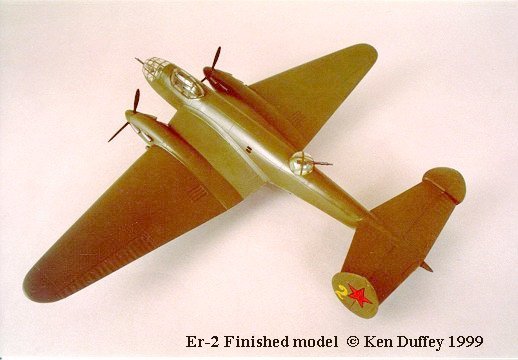
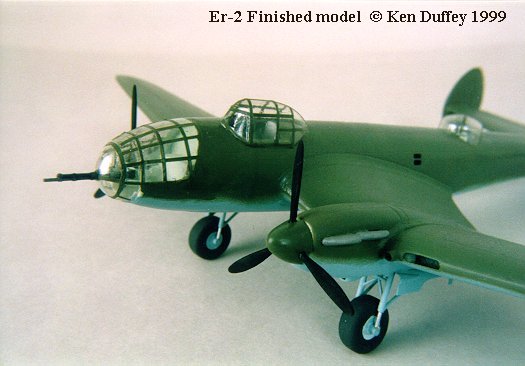
Designated DB-240, the new aircraft had twin fins and a bomber fuselage with glazed nose and a raised pilot's canopy that was offset to port to improve his field of view.
Powered by M-105 engines, the DB-240 made its first flight on 14 May 1940 and went into production in late 1940 as the Er-2.
Its wartime career was somewhat mixed, due to inadequate powerplants and poorly planned missions. In August 1941 just 3 Er-2's (from an original force of 16) attacked Berlin. Only 2 aircraft actually reached their targets and bombed the German capital.
Always underpowered with M-105 engines, the Er-2 was developed further with a variety of engines – including AM-35A, AM-37 petrol engines, M-30 & M-40 diesels and the MB-100 – an X-inline consisting of two M-103's coupled through a common reduction gearbox. With a total of approx. 458 examples being built, the Er-2 was a victim of the chaos existing in the Soviet Union during the Great Patriotic War with the move of production to the east and the Stalinist purges during the late thirties. There was nothing intrinsically wrong with the design.
For further reading about this little-known Soviet bomber, check out the book – 'Soviet Combat Aircraft of the Second World War' - Volume Two: Twin-Engine Fighter, Attack Aircraft and Bombers by Yefim Gordon and Dmitri Khazanov published by Midland Publishing Ltd. ISBN 1-85780-084-2
Note that the drawing on page 95 is wrong though – the plan view has no pilot's cockpit!
The model is a Russian vacform kit by a firm called Legion. I know nothing of about this firm and I can't even remember where I got it from!
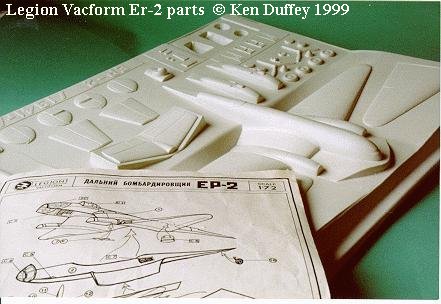
The model is moulded on a single sheet of thin plastic with a simple one-page exploded diagram showing where all the parts are supposed to go.
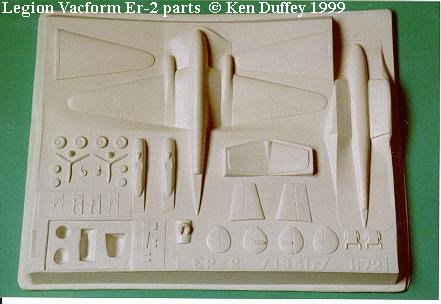
The distinct gull-wings and upper engine nacelles are moulded integrally with the upper fuselage in one large section. The horizontally split lower fuselage is moulded with the inner lower wing section while the outer lower wings are separate pieces – as are the lower engine nacelles. This method of moulding takes care of and dihedral setup problems – but it does make it difficult to sand down the mating surfaces.
The plastic is extremely thin – particularly the clear glazing, so great care has to be taken when removing the parts from their backing sheet.
The usual methods of making a vacform were employed, with strips of thin plastic card being added to the edges of the upper fuselage to give a ledge onto which the lower fuselage section could be cemented. I also added wing spars and a couple of bulkheads from scrap plastic card to strengthen the flimsy upper fuselage and wings. The nose section, cockpit opening and circular upper turret had to be cut away – again with great care and holes opened up for the windows on the starboard forward fuselage and underside of the nose.
Plastic card was used to make some representation of the bombardier/navigators position and the pilot's cockpit. These areas are purely speculative – I just added things like a floor, bulkheads, stringers, instruments, seats, control column, various 'boxes' etc – enough to give some suggestion of internal 'workings'.
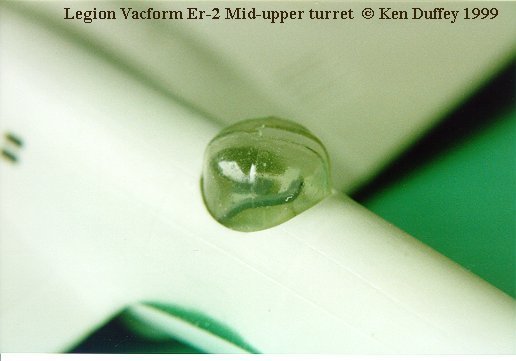
Before cementing the lower fuselage to the upper, the mid-upper turret needs to be added from below. I cut the flimsy clear part and carefully opened up a slot for a scratch-built machine gun. A tub was made from a length of appropriate diameter tube and internal detail was added – again purely speculative, but consisting of a mount for the gun, a seat for the gunner and some sort of ammunition feed. The results can be seen in the next photo.
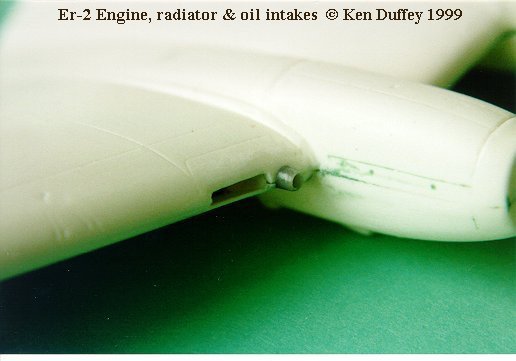
Another area that needs to be attended to are the intakes in the leading edge of the wing. These consist of a rectangular slot and a circular intake on each wing. The slots were cut and backed with plastic card and the intakes were simply fashioned from Contrail tubing cut to length and inserted into the leading edge. See the next photo.
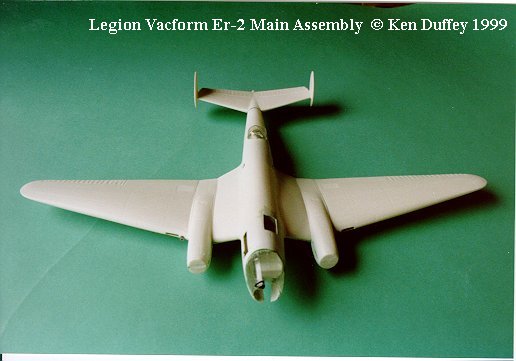
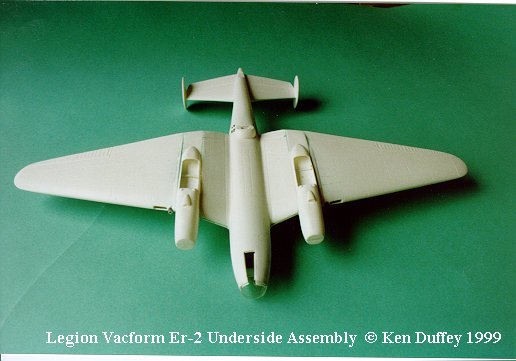
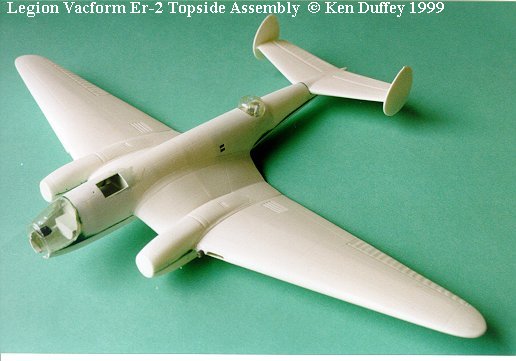
The lower fuselage can now be cemented in place – as can the lower engine after first opening up the wheel wells. The outer lower wing panels are added and the horizontal tailplane – comprising a one-piece upper section with built-in dihedral and two lower sections – cemented in place. Both two-part fins and rudders are also added – making sure that they are vertical. Quite a bit of filler was needed between the upper and lower fuselage sections – but care had to be taken when rubbing these area down to avoid going through the thin plastic. The whole model was now getting a lot stronger and less flexible – but it is extremely fragile and when held up to the light you can see daylight through the plastic! The results are in the next three photos.
With the main components assembled, it was time to tackle all the other bits – props, undercarriage, exhausts, glazing etc.
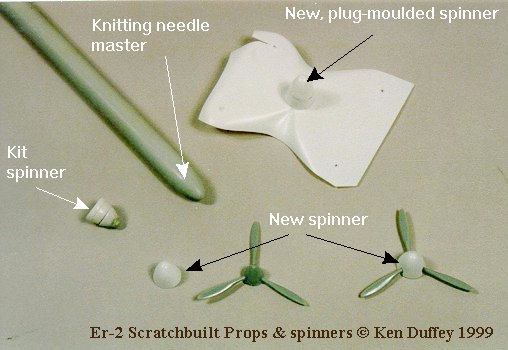
All the above components are supplied on the vacform sheet – but are mostly unusable and just provide patterns from which to make replacements. The propellers are a case in point – they consist of the blades, a backplate, and a two-part spinner – see photo 8. The parts are very flimsy and I tried filling the reverse of the prop blades and spinners with Milliput, but it just fell out when it had dried. In the end I elected to make my own props. I found a set of three-bladed props of the correct diameter in my spares box and plug moulded some new spinners using a plastic knitting needle carved to shape – see photo 9.
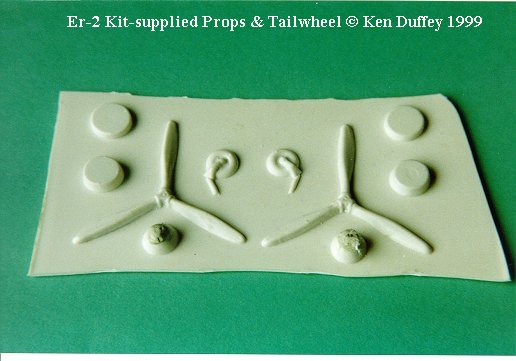
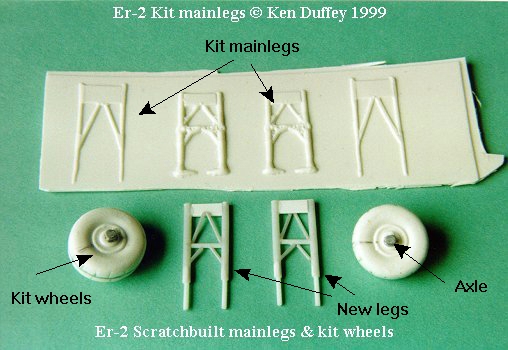
The same is true of the undercarriage legs – they are supplied but are best replaced with scratch-built items using rod and tube – see the next photo. The kit wheels are fine and only need the addition of an axle from plastic rod.
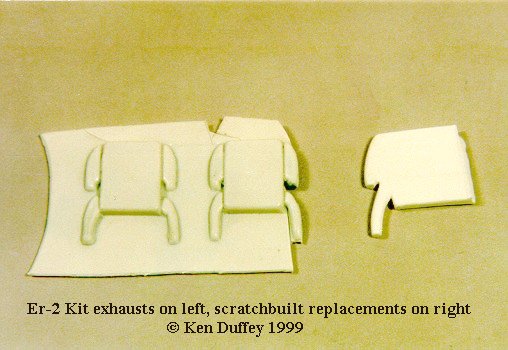
Finally, the exhaust pipes. Again these are supplied – but only as a one-piece upper section. Filling the lower cavity proved a waste of time, so I set about carving new ones from thick plastic card – four in all!
Final detailing comprised the addition of the kit tailwheel, the main undercarriage doors, three scratch-built machine guns and the glazing.
As I keep mentioning, the plastic used is very thin and the clear glazing is the thinnest of all – the same sort of stuff you get in chocolate boxes. The nose glazing consists of an upper section with a circular front. After carefully removing the glazing from its backing, the upper section was cemented in place onto ledges of thin plastic card that I had added to the fuselage opening for strength. This section was carefully blended into the fuselage nose with filler and gently sanded smooth. The circular front piece was added – after first inserting the scratch-built machine gun. The cockpit glazing was again carefully removed and cemented in place – the fit is excellent. The only other areas of glazing are the large rectangular windows in the starboard nose and the smaller windows in the lower nose. These were added from my own clear plastic card.
Although I have kept mentioning the thinness of the plastic card used in this model, providing care is taken, all the parts went together extremely well and there were no major fit problems.
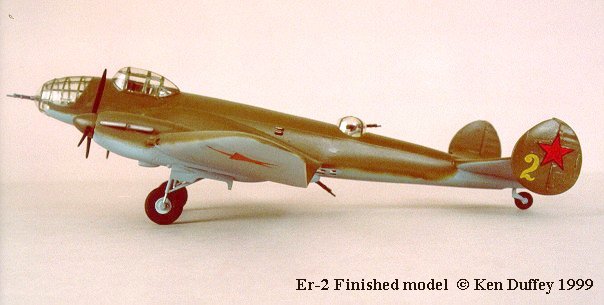
Colour options are fairly limited on this model. Because it represents an early M-105 powered machine, I couldn't find a multi-coloured camouflage machine in all my references and besides, I was in a hurry to finish the model for our IPMS UK Nationals model show. I had picked up a Russian monograph on the Er-2 in Moscow and this has some great colour profiles and excellent drawings. I opted for an Er-2 of the 420 DBAP flown by A.G. Stepanov. This is one of the aircraft that bombed Berlin and is illustrated in a colour profile on page 25 of the monograph. It is camouflaged in green top surfaces with light blue undersides so I used Aeromaster WWII colours and airbrushed their Topside Green and Lt Blue onto the model and onto some clear decal film to be used for the canopy framing.
Markings comprise Soviet plain red stars with black outlines on the rudders and lower wings and a yellow number 2 on each outer fin. Whilst the result is a fairly drab model it is a historically very significant machine.
I enjoyed making this model – even though it turned into a chore at times and I almost gave up on a couple of occasions. The basics are there and what is provided is very accurate and fits well – it is just a pain having to scratchbuild so many of the parts – but that is what modelling is all about IMHO.
Now that it is finished, some manufacturer is bound to release an injection-moulded example!