| |
|||||
ICM 1/72 Polikarpov I-16 Type 24by Michael Kendix |
|
This article first appeared at Internet Modeler, March 2001.
The I-16 was a state of the art machine during the 1930s and continued to be an effective service aeroplane for the U.S.S.R. until 1943, after which it took on the training role. In total, 9,450 of various types of I-16s were built between 1934 and 1942. The Republicans used the I-16 during the Spanish Civil War and it was also used later in the war between Finland and the U.S.S.R.
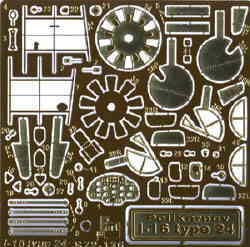
The kit contains one sprue of light grey medium plastic of medium hardness. There is little flash that is easy to clean up and the detail is good. There is also a small sprue of clear parts containing a sight mechanism and a windscreen, neither of which I used. I used the after-market photoetch from PART, which is an excellent product.
 The first order of business is the engine and the cockpit. I assembled the engine
as shown in the kit's instructions. It goes together quite well and contains
seven separate pieces, not including the firewall or the exhausts. At this point,
however, I began to have my doubts about including the engine. Part A12 represents
the push rods but I could not quite match up the rods with the engine cylinder
heads. Also, the rods were a little on the thick side, especially when coated
with paint and dry brushed by yours truly. After assembling the engine, I decided
that since I was going to have the cowling panels glued on and was going to
use the photoetch shutters at the front of the cowling, the engine would be
out of sight; therefore, including it was not worth the trouble.
The first order of business is the engine and the cockpit. I assembled the engine
as shown in the kit's instructions. It goes together quite well and contains
seven separate pieces, not including the firewall or the exhausts. At this point,
however, I began to have my doubts about including the engine. Part A12 represents
the push rods but I could not quite match up the rods with the engine cylinder
heads. Also, the rods were a little on the thick side, especially when coated
with paint and dry brushed by yours truly. After assembling the engine, I decided
that since I was going to have the cowling panels glued on and was going to
use the photoetch shutters at the front of the cowling, the engine would be
out of sight; therefore, including it was not worth the trouble.
 The kit cockpit contains no sidewall detail or instruments except for an instrument
panel, which looks quite good. I used all the photoetch material provided for
the interior, including the sidewall framework, various levers and winders on
the cockpit wall, the foot rudder, seat belts, control stick handle, and instrument
panel. The instructions in the Part photoetch packet are excellent and easy
to follow once I read them through carefully. The photoetch itself is neither
too thick to prevent easy bending, nor is it too thin, which would have made
it fragile.
The kit cockpit contains no sidewall detail or instruments except for an instrument
panel, which looks quite good. I used all the photoetch material provided for
the interior, including the sidewall framework, various levers and winders on
the cockpit wall, the foot rudder, seat belts, control stick handle, and instrument
panel. The instructions in the Part photoetch packet are excellent and easy
to follow once I read them through carefully. The photoetch itself is neither
too thick to prevent easy bending, nor is it too thin, which would have made
it fragile.
 The entire interior of the cockpit was sprayed with Aeromaster Cockpit Blue
Green. I touched up the various instruments on the sidewalls, the foot rudder
and the control stick, with black or silver where appropriate. Given that I
added a fair amount of cockpit detail, I decided to have the cockpit doors open,
so I cut away the flap-down doors, ready to be replaced with the photoetch components.
The photoetch instrument panel is extra nice. I painted it Scale Black, glued
the clear plastic instrument dial behind it and painted its back white so the
dials stood out. Once the various interior sub-assemblies were done, I gave
them a burnt umber and black oil wash, mixed from oil paints and Turpenoid (odourless
turpentine substitute).
The entire interior of the cockpit was sprayed with Aeromaster Cockpit Blue
Green. I touched up the various instruments on the sidewalls, the foot rudder
and the control stick, with black or silver where appropriate. Given that I
added a fair amount of cockpit detail, I decided to have the cockpit doors open,
so I cut away the flap-down doors, ready to be replaced with the photoetch components.
The photoetch instrument panel is extra nice. I painted it Scale Black, glued
the clear plastic instrument dial behind it and painted its back white so the
dials stood out. Once the various interior sub-assemblies were done, I gave
them a burnt umber and black oil wash, mixed from oil paints and Turpenoid (odourless
turpentine substitute).
Once the fuselage halves (A2 and A3) were glued together I inserted the instrument panel. Unfortunately, the instrument panel is so far forward that it is difficult to see the details looking through the cockpit opening. Once that was set, I glued on the underside sub-assembly containing the seat onto the fuselage.
 The next step was a bit trickier. This kit has come under some criticism for
the structure of the cowling. The cowling contains five pieces making up the
sides and another piece for the front facing part. My guess as to why ICM chose
this design is that it allows any of the panels to be removed so the engine
can be displayed. I noticed that A28 and A29 appeared to be reversed in my instructions;
the error is fairly obvious but it would have been good to know before the fact.
The next step was a bit trickier. This kit has come under some criticism for
the structure of the cowling. The cowling contains five pieces making up the
sides and another piece for the front facing part. My guess as to why ICM chose
this design is that it allows any of the panels to be removed so the engine
can be displayed. I noticed that A28 and A29 appeared to be reversed in my instructions;
the error is fairly obvious but it would have been good to know before the fact.
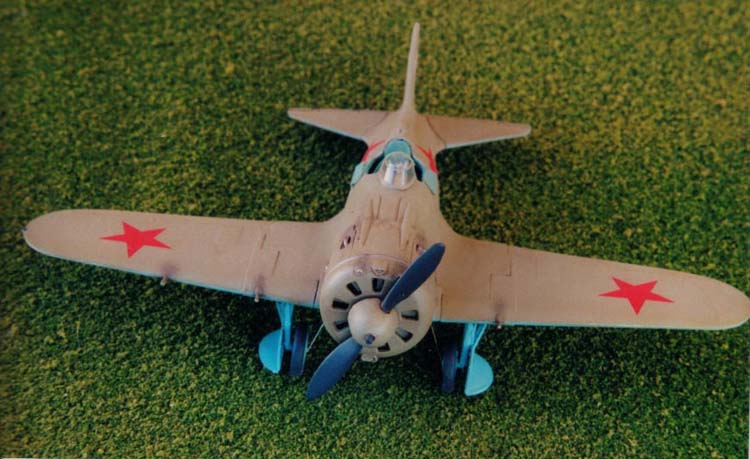
I used Testors regular plastic cement in order to give me plenty of time to push the glued parts into parts into position. Anyone using super glue for this section of the model would be really up against it. I used as little glue as possible, placed the components into position and gradually prodded them until the assembly took on a cylindrical shape and the seams matched up. Prior to adding the front component, I had inserted the photoetch shutter wheel device on the inside of it. I left it half open to give a more dynamic effect. I then added the front part, again pushing and adjusting to get the fit right. After leaving this to dry overnight, I glued on the wings, again using Testors glue. The wing to fuselage join is conveniently located at a panel join, so no puttying is necessary.
 The tail parts contain great detail but the tail elevators do not fit correctly,
and I had to perform some minor surgery, widening the slots so that the elevator
could be glued on. The conical shaped end piece is quite poorly done. It simply
does not fit and I had to hack bits off it in order to get it on the end of
the fuselage. After all this was done, I puttied and sanded the fuselage to
prepare it for painting. A significant amount of putty was required for the
conical end piece. I used Squadron White for the large seams and typewriter
correction fluid for the smaller, secondary blemishes.
The tail parts contain great detail but the tail elevators do not fit correctly,
and I had to perform some minor surgery, widening the slots so that the elevator
could be glued on. The conical shaped end piece is quite poorly done. It simply
does not fit and I had to hack bits off it in order to get it on the end of
the fuselage. After all this was done, I puttied and sanded the fuselage to
prepare it for painting. A significant amount of putty was required for the
conical end piece. I used Squadron White for the large seams and typewriter
correction fluid for the smaller, secondary blemishes.
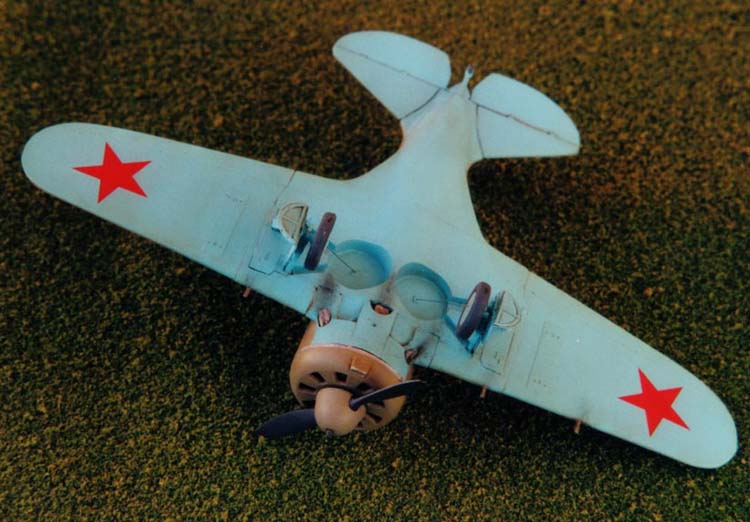
First I sprayed the upper side Polly Scale U.S.S.R. Topside Green. No doubt the name of this colour provides false comfort to modellers who believe it must be correct. I harboured no such complacency, but given the strain on the U.S.S.R.'s resources at the time of production, there is more than a possibility that non-standard greens were used. The paint is excellent and went on well. At that point, I noticed two sink marks on the upper side of each wing's leading edge, next to the fuselage. A similar pair appeared on the underside. I removed the paint from the area and puttied it up with Squadron White. After letting that dry, I re-sprayed and all was well. I then assembled the undercarriage, including the photoetch parts.
 Once again, these photoetch parts fit well and were straightforward to use.
I chose not to use photoetch parts 36L and 36R because this would have required
peeling off the corresponding plastic from kit parts A24 and A23. I did not
think I would have been able to accomplish that without ruining the undercarriage
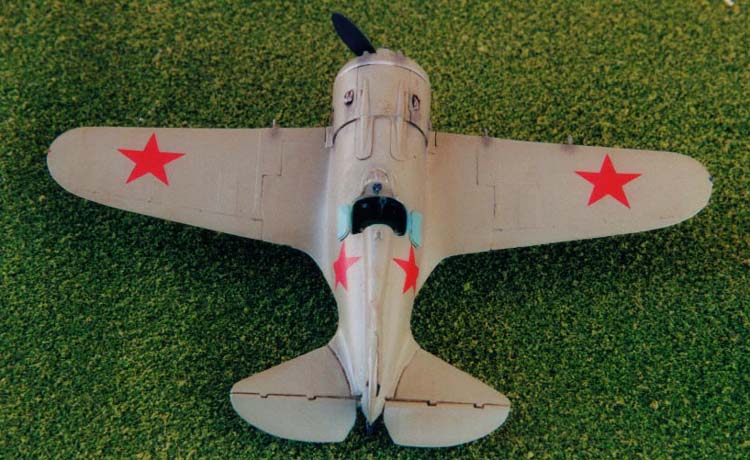
legs. I then masked off the upper side and sprayed the under side with Polly
Scale U.S.S.R. Underside Blue. I would caution folks that the latter is somewhat
bright, to say the least, however, this matters less if you are going to add
a fair amount of weathering.
Once again, these photoetch parts fit well and were straightforward to use.
I chose not to use photoetch parts 36L and 36R because this would have required
peeling off the corresponding plastic from kit parts A24 and A23. I did not
think I would have been able to accomplish that without ruining the undercarriage
legs. I then masked off the upper side and sprayed the under side with Polly
Scale U.S.S.R. Underside Blue. I would caution folks that the latter is somewhat
bright, to say the least, however, this matters less if you are going to add
a fair amount of weathering.
After painting, I added the propeller and the rear wheel; I painted these and the main landing gear tyres Scale Black. I added the kit exhausts, cutting them down to size so that they fit into the fuselage holes. I would add that the instructions show the exhausts attached to the engine, and then poking through the fuselage holes. How this would be accomplished in the real world, I do not know. Possibly, if you chose to show off the engine by leaving a fuselage panel off, the exhaust should still be attached to the engine. Otherwise, this appears to be an exercise in frustration. The photoetch provides replacement for the flap-down doors that are excellent. I painted these and added them after the painting was complete.
 First, I covered the kit with Future to prepare its surface for the decals.
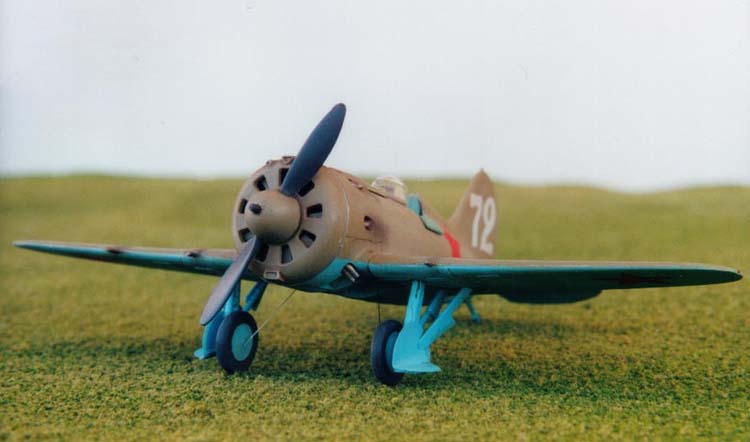
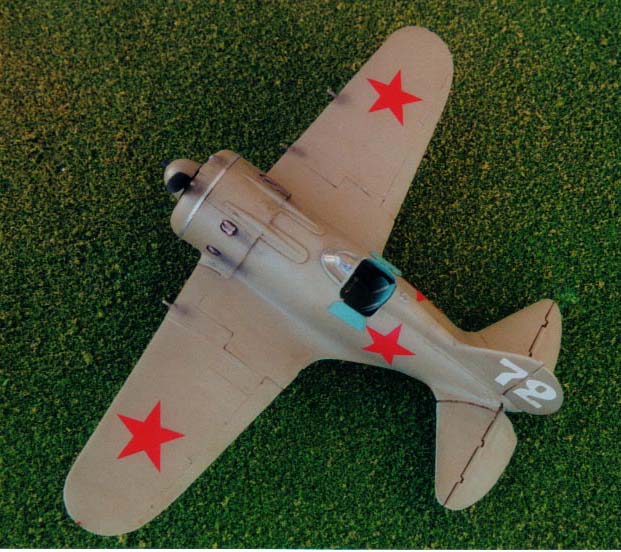
I chose to do 'White 72', Captain P. Savenko of the 67th Fighter Regiment assigned
to the Odessa Military region in June 1941; a tough time for the Soviet Union.
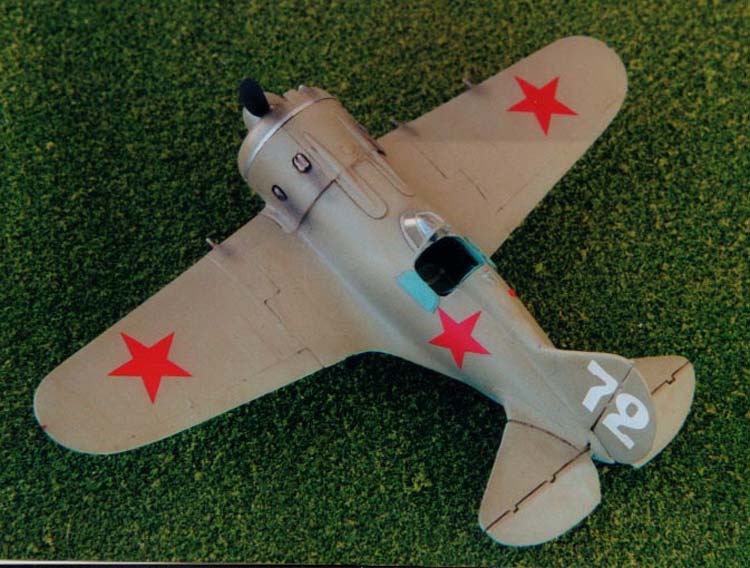
This design has red stars on the upper and lower surfaces of the wing. The kit's
red stars are not too bad but are a little washed out and faded. I used some
brighter coloured red stars that were extras from the RPM MiG-3 kit. These stars
were slightly larger than those in the ICM kit.
First, I covered the kit with Future to prepare its surface for the decals.
I chose to do 'White 72', Captain P. Savenko of the 67th Fighter Regiment assigned
to the Odessa Military region in June 1941; a tough time for the Soviet Union.
This design has red stars on the upper and lower surfaces of the wing. The kit's
red stars are not too bad but are a little washed out and faded. I used some
brighter coloured red stars that were extras from the RPM MiG-3 kit. These stars
were slightly larger than those in the ICM kit.
I have always found ICM's decals 'exciting', primarily because you never know if they are going to shatter and break up when you put them in water. This sheet was excellent but I did test it on a decal that I knew I was not going to use. The kit's '72' decal is wonderful. I cut and trimmed the '7' and the '2' into separate pieces because they were going either side of the vertical tail, with one digit on the rudder. The clear part of the decal is ultra thin and the white parts is nice and solid. The silver ring around the front fuselage was made from decal paper sprayed silver and cut into a thin strip with a number 11 Exacto knife. All the decals settled down well using a combination of Microscale's Microset and Microsol.
I sprayed the kit with Testors Clear flat and then gave the whole thing a burnt umber and black oil wash. Using foam tipped make-up applicators; I wiped off most of the wash, leaving it in the seams and around the kit's details. Once this was dry, I used pastel chalks to represent the gun and engine exhausts.
Once all this sprayed with Testors Clear Flat, I used a Falcon vacuform canopy to replace the kit's, which was thick and incorrectly shaped. I sprayed decal film with U.S.S.R Topside Green and cut strips to make the canopy frame.
This is a fine, detailed and inexpensive kit. The molding is good with little flash, the detail is excellent and the fit is mostly good. The conical tail part, the canopy, the multi-piece front fuselage, and a few minor sink marks are drawbacks but hardly insurmountable obstacles. The kit goes together well and fairly quickly; I recommend it.