| |
|||||
Valom 1/72nd Sukhoi Su-6 AM-42By Matt Bittner |
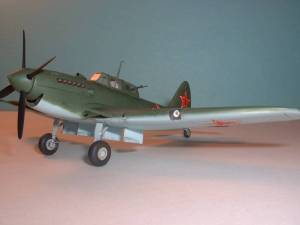 |
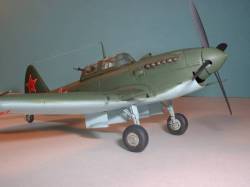
According to the instruction sheet, the Su-6 AM-42 was Sukhoi's answer to replace the ageing Il-2. They took their Su-6, mounted the more powerful AM-42 engine on it and entered it into competition. In all truthfulness, the Il-10 was the better machine so it beat out the Su-6 AM-42. There were six Su-6 AM-42s made.
 Valom
is a new kit manufacturer out of the Czech Republic. The Su-6 AM-42 is their
first of two releases (the other being a Japanese-type) and is extremely well
done in the 'short range' variety. If the level of quality is this high in all
of their kits, then Valom is a kit manufacturer to watch.
The Su-6 AM-42 kit consists of 45 injected molded kits in gray, a vac formed sheet consisting of two canopies (in case one is ruined during assembly - thank you for the spare Valom!) and covers for the leading edge lights, a sheet of nickel steel photoetch and a decal sheet consisting of six stars. Overall the plastic is extremely well done and the decals are in register. While the panel lines may be a little deep, it's nothing to be concerned about as a coat or two of paint will help fill them.
One thing I definitely want to mention up front. Valom is a short run, injected molded company. They are not - nor do they claim to be - a Tamigawa "wannabe". What they have provided is a short run, injected kit of a subject others would be hesitant to tackle in other medium. And for that I am extremely grateful.
 Naturally
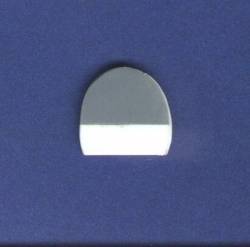
construction starts in the cockpit. While most of the parts fits will - and
the photoetch pieces are aspects that will enhance the cockpit - the rear bulkhead
(part 6) needs some enhancements to make it fit. Please refer to the accompanying
photograph. You'll also want to add some sheet plastic to the edges of the cockpit
tub; otherwise it won't meet up with the fuselage sides.
Once that was all accomplished, the fuselage halves were assembled, trapping the cockpit. I left off the photoetch gun sight because I had difficulty with it and couldn't figure out where it went. My own problem, I'm sure.
Now that the fuselage halves are assembled, the little bit of seam work commenced. Luckily there was very little to do, the majority of it around the fin.
From here I strayed a little from the instructions. Normal construction
has you glue the upper wing panels to the wing underside piece; however, I decided
to add the underside piece (part 10) to the fuselage prior to adding the upper
panels (parts 11 and 12). I was able to get a decent fit on the 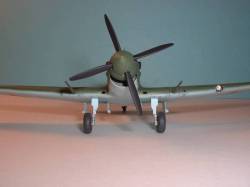 underside
doing it this way. Plus, I was able to box in the wheel wells (by just adding
a "shelf" of plastic on top of the wheel well box on the "inside")
and add the undercarriage prior to gluing on the upper wing panels. Due to the
design of the kit, the main landing gear will have to be added prior to painting
(not a problem if you're careful during the rest of assembly). Now the upper
wing panels can be glued in place.
The worst fit on this entire kit was in the wing root area. A little bit of muscle with an application of CA took care of most of the problems. After sanding the CA away I restored the wing root panel line using a scriber. Now the horizontal tailpieces can be added, which I glued on using brass pins for strength. Only a little filler was needed to blend in these pieces.
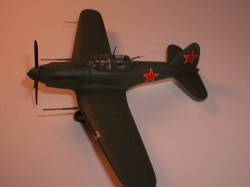 Since
the landing gear was on prior to painting anyway, I decided to add all parts
of the undercarriage, doors included. This way everything can get a coat of
underside blue in one shot. The photoetch grill for the nose intake is a very
nice touch, adding a lot to this area. Some filling in this area to blend it
in and I was ready to paint.
A set of bombs come with the kit, but since I liked the looks of the Su-6 better without - it appeared more "clean" that way - I decided to leave them off.
Since I had to deviate from the norm, I sprayed the upper green (Testors Model Master Acryl Russian Armor Green) first, thinned with Future. After drying for two days, I tried to mask to spray the underside Polly Scale RLM 64 Blue. No luck. I truly dislike MM Acryl as it always peels on me, no matter what I do to the plastic (outside of spraying an enamel or lacquer primer coat). I have no problems with Polly Scale or Mister Kit, but always have a problem with Acryl.
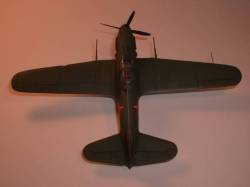 So,
after fixing the peels on the upper surface, I freehanded the underside blue.
Some more touch ups between green and blue, and it was all sprayed (again, thinning
the Polly Scale blue with Future). After drying for two days, I then sprayed
a coat of Future, to prep for the decals and oil wash. I mixed a darker green
using green and black oils, and used that as a wash over the panel lines. After
drying I thought it came out too stark, so decided to go over the panel lines
with thinned Acryl. Much better, although the panel lines don't appear to be
washed in the images (trust me, the are).
I also mixed a medium gray oil wash for the undersides, applying that to the panel lines. This time it was just right.
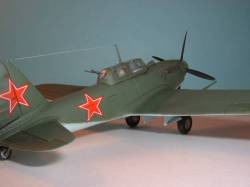 Using
the kit decals, I stuck all in place in a puddle of Future, squeezing the Future
from the center of the decal to the edges using a Q-Tip (cotton bud). I have
found that applying decals in this fashion I can get rid of all traces of decal
film.
A coat of Future over the decals, let it dry another two days, then an application of Polly Scale Flat to seal it all in and give it a consistent look. Some slight weathering with an oil wash on the undercarriage and some gray pastel chalks around the exhaust and guns, and time to move to the final bits.
Since I broke the kit-supplied antenna (and subsequently threw it away before I realized what it was) I had to scratch a new one out of plastic rod. After gluing it to the canopy I then used invisible thread for the antenna wire. I also added an MV Lens for the landing light and made the cover out of tape. I now have a completed Su-6 to sit to my almost complete Il-2.
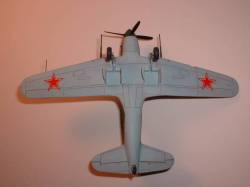 As
long as you go into the project thinking it's a short run kit, which means you'll
use your modeling abilities, the Valom Su-6 holds no surprises. I am extremely
grateful to Valom to bring out this subject in injected form, something I'm
sure we would have never seen otherwise. It's a very handsome aircraft and will
look great sitting next to the other Shturmoviks that flew for the VVS during
the GPW. Maybe Valom can be convinced to come out with the Su-6 M-71 version,
which is the radial (versus the in-line AM-42) engine variant.
My thanks to Valom for the review kit.