An Officer and a Gentleman II
Spitfire Mk. IX Under the Red Star
by Ilya Grinberg
An Officer and a Gentleman IISpitfire Mk. IX Under the Red Star
|
|
The Airplane
I am not planning to discuss the history of development of this outstanding aircraft as much was written in numerous sources. I would just mention that 1182 of Mk.IXs were delivered to the Soviet Union. All of them were assigned to air defense units and did not see actual combat.
The Model
 For
a long time I was attracted to Red Stars Spitfire Mk.IX. Especially attractive
were the machines of the 26th Guards Fighter Aviation Regiment (GIAP) shown
in the famous book by C.F. Geust, Red Stars.
For
a long time I was attracted to Red Stars Spitfire Mk.IX. Especially attractive
were the machines of the 26th Guards Fighter Aviation Regiment (GIAP) shown
in the famous book by C.F. Geust, Red Stars.
After completing Tamiyas Mk.V I started to prepare materials and supplies for my next project. It was no doubt which kit would serve as a base for this journey: definitely Spitfire Mk.IXC by Hasegawa as the most accurate kit in 72nd scale of this type. After opening a box with the kit the following conclusions were made: panel lines are good and completely satisfied me; the canopy is good but rather thick, so it either should be left in the closed position or should be replaced; the cockpit interior is of the toy quality (most likely, Hasegawa is caring of the well-being of aftermarket manufacturers!). I decided to substitute the canopy by vacuumformed one and to detail the cockpit to the maximum possible extant. The most important feature that had to be done in order to represent the desired subject was to modify the armament because the model represents version C while the Soviets received mainly version E machines. Well, as I went on the spending spree I decided to get all possible aftermarket accessories available: Moskit exhaust pipes, Squadron vacuumformed canopy, True Details wheels, PE set by Part, and Aries resin interior set (although for Mk. XIV kit by Fujimi).
Having all these items lined-up and psychologically getting ready for the unknown and dangerous journey, I started the work.
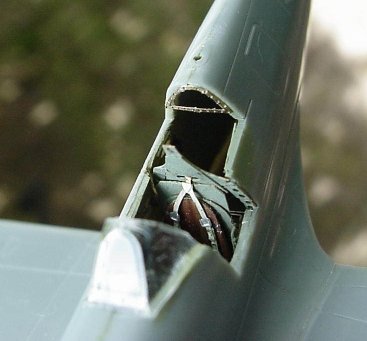
Fuselage
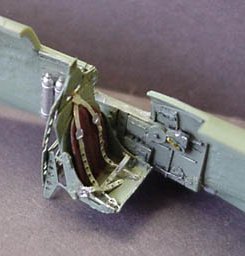
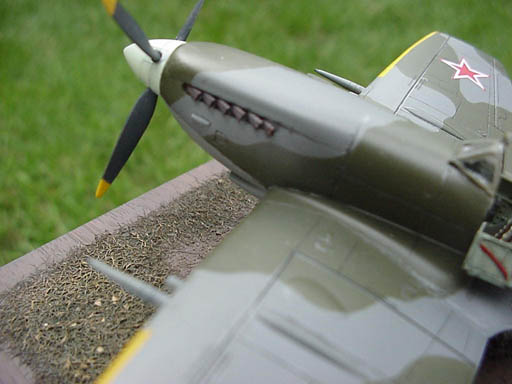
As I mentioned before I decided to use Moskit exhaust pipes.
The most convenient way to install them is to perform this operation after the
model is painted and coated. I cut the front wall thus leaving a big opening
in front (this place would be covered by the spinner anyway). The exhaust stacks
would be installed through this opening at the final stage of construction.
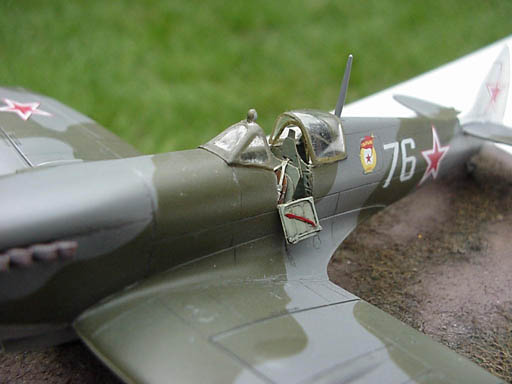
I also removed plastic from the port side fuselage half where the access door
is located.
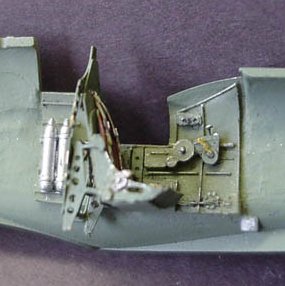
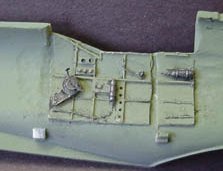
The nest step was to superdetail the cockpit. Part PE set is fantastic as usual
but lacks the ribbing and 3-D feel. I decided to try resin walls from the Aries
set. I thinned the plastic of the fuselage halves from the inside. The resin
walls were also thinned to the thickness of the paper and affixed to the appropriate
places. I supplemented them by photoetched levers of the throttle and propeller
pitch control.
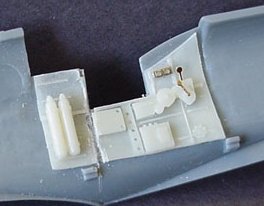
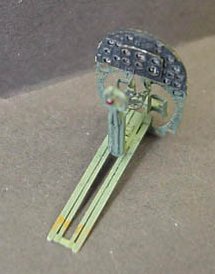
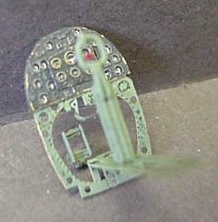
After everything was placed inside the interior was painted RAF interior green and washed. The fuselage halves were glued together and the instrument panel with the floor was inserted from below. It was at this point when the brass tubes were added to the floor structure.
 |
 |
 |
 |
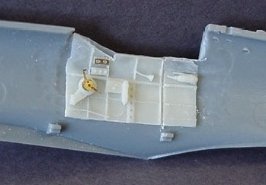
Wings and Further Assembly
I decided to make the LF IXE version with clipped wings. The wings halves were
glued and attached to the fuselage. The seams were treated with Zap-A-Gap.
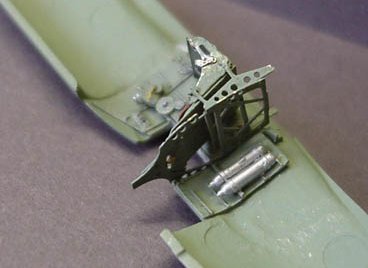
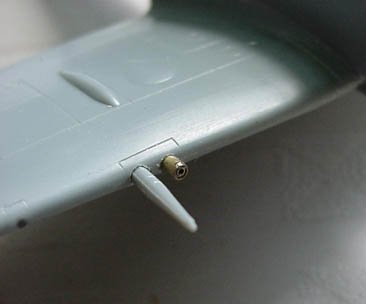
The next step was to make changes to the armament. The holes for the .30 cal
machine guns were filled and the gun barrels were carefully cut from the wing.
The same procedure was repeated for the plugged .50 cal. machine gun ports.
 |
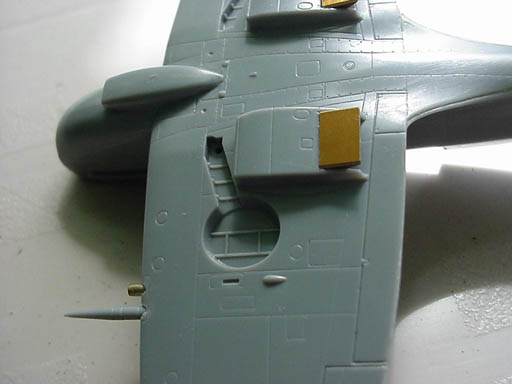 |
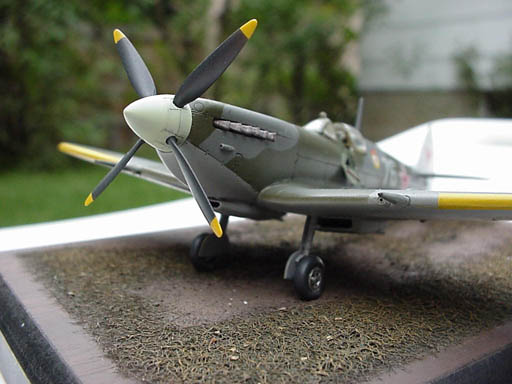
The gun barrels were relocated to the outer position. The .50 cal machine guns
were made from brass tubing and mounted in the wing where the cannons resided
previously. I have to admit that I did not change anything on the wing panels
although the bumps on the wing above the guns should be repositioned as well.
Navigation lights were made from colored resin sprue from the Aries navigation
lights set. To my surprise it worked better than color plastic. I also used
Part PE details for radiator doors and matrices.
The horizontal stabilizer was installed as well as the tail wheel and the windshield.
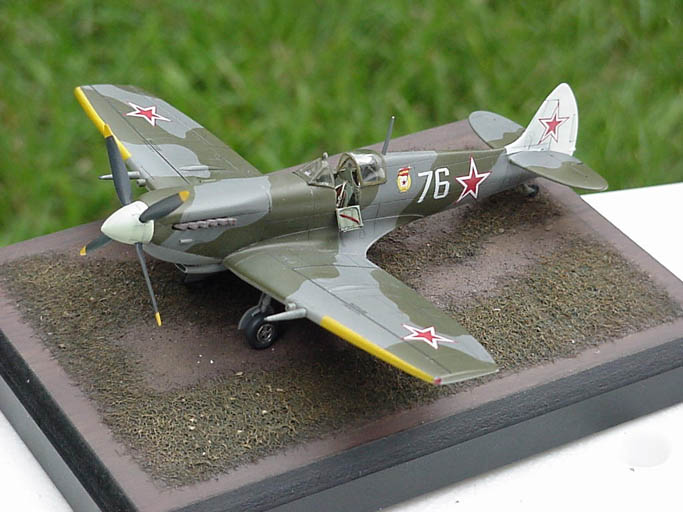
Painting and Markings
 The
model was painted in appropriate RAF colors (I use Polly Scale acrylics). Yellow
stripes on the wing leading edges were painted as well. Masking for camouflage
was done with the aide of Eduard express mask (really saves time and adds to
authenticity).
The
model was painted in appropriate RAF colors (I use Polly Scale acrylics). Yellow
stripes on the wing leading edges were painted as well. Masking for camouflage
was done with the aide of Eduard express mask (really saves time and adds to
authenticity).
The model was sprayed with Future and the wash was applied to panel lines. Another
coat of Future sealed the panel lines and prepared the model for decals.
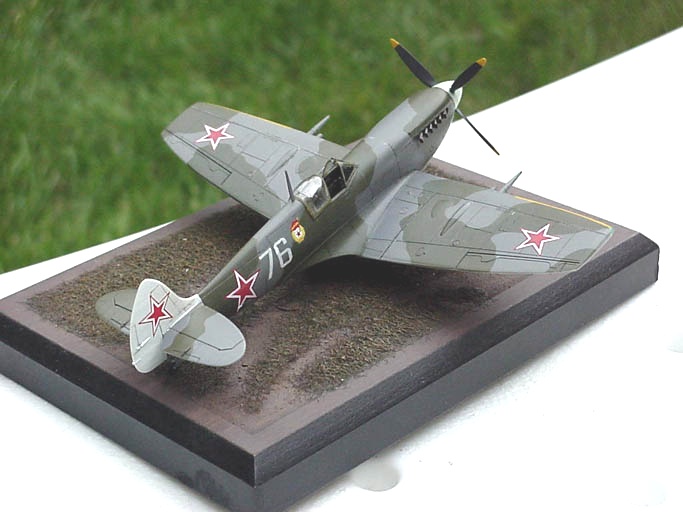
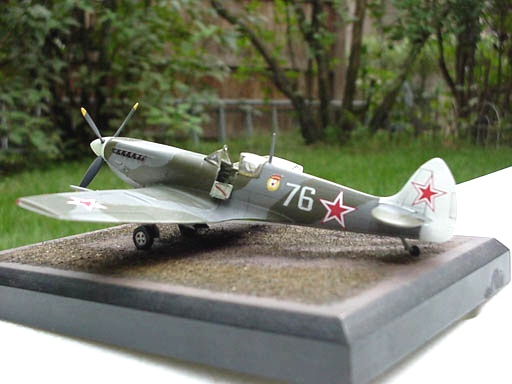
The stars and the Guards emblem were borrowed from the spares box (actually,
it is an envelope in my case). Tactical number White 76 decal was kindly printed
for me by EP (many thanks, Erik!).
 Few
words about the choice of the tactical number. On the photograph published in
the Red Stars the airplane on the foreground is with the clipped wing but the
tactical number is not visible at all. The second machine in the line bears
the white tactical number 78 but, unfortunately to me, it has normal unclipped
wings. A modelers choice took effect: if the regiment had the number 78 why
wouldnt it have 76 as well?
Few
words about the choice of the tactical number. On the photograph published in
the Red Stars the airplane on the foreground is with the clipped wing but the
tactical number is not visible at all. The second machine in the line bears
the white tactical number 78 but, unfortunately to me, it has normal unclipped
wings. A modelers choice took effect: if the regiment had the number 78 why
wouldnt it have 76 as well?
The model was coated with flat coat and the landing gear was installed. The wheel covers were used from the Part set as well as the oleo scissors and landing gear doors. Antenna mast was installed. Exhaust stacks were inserted at this stage followed by the airscrew with the spinner and, finally, the cockpit access door was installed. This door was wrapped from the Part set.
Conclusions
The results were very satisfactory. It was interesting and challenging to super-detail the cockpit interior using a variety of media. The rest of the construction was pretty much traditional and straightforward.
Hasegawas kit is pretty good but for super-detailing addict like myself it was the Part PE set that saved the day (or should I say many days?).
 |
 |
 |
|