One generalization about life that I can make is that joy comes in small packages. Such was also the package that came to me from England. Inside was a zip-lock bag with the new 1:48 I-16 Type 5 modification set from Airwaves.
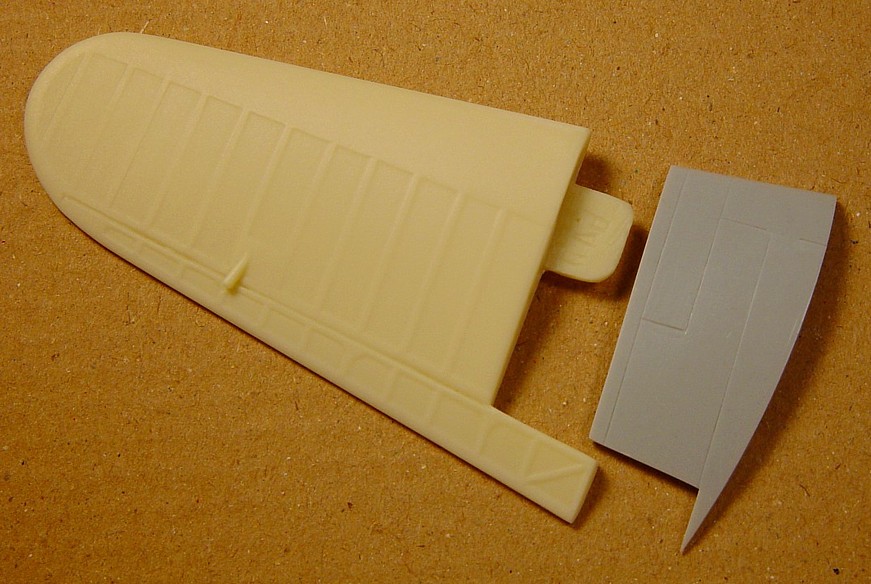
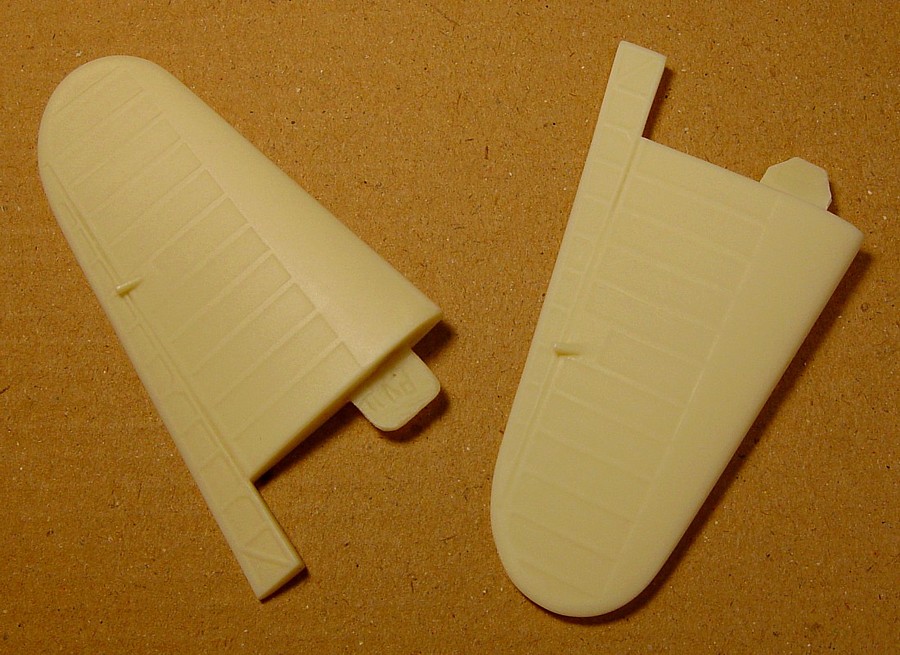
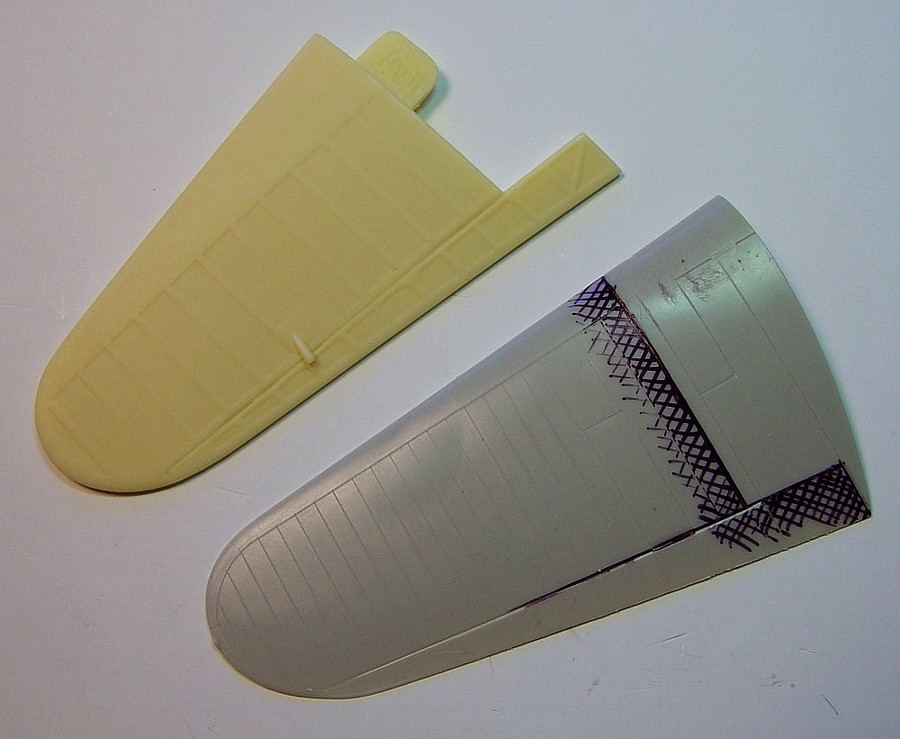
The set consists of 6 parts done in vanilla colored resin. Starting from the front, there are: spinner, front cowling, shutter ring, main cowling, and two outer wings with longer ailerons. In short, all necessary changes to build early (pre 1938) Type 5 aircraft, using Hobbycraft/Academy kit. This set offers total accuracy and great finesse. Even the spinner is an upgrade to the kit part, with a nice starter rod connection. My pre-production set came with no instructions, but if one has the need for this set, one should already know what to do with the parts. [Editor's Note: the retail Airwaves set actually comes with some nice instructions, so fear not.] The only confusion might be what is the left and right wing. References show that the aileron actuator horns (at least thats what I think these are) should be on top side on the wing, and there is only one way to install wings in this fashion.
One thing that immediately becomes obvious is that there are no annoying casting blocks! Surfaces are very smooth and there are no air-bubbles even after sanding. Resin is soft and cuts and sands almost like the styrene plastic. Details are crisp, with radial exhausts on the side cowling being really impressive.
Cooling slots on the front cowling and shutters had some flash film, which parted company on the very thought of applying a sharp scalpel blade.

Wings are also very impressive with convincing ribs and correct aileron detail. There is a nice connection tab, where the resin part is supposed to meet inner panels of the wing, but I found this to be of a very little use. With everything assembled, this tab floats in the cavity between the upper and lower surfaces. It is all too thin to touch anything. There is an almost invisible seam along the edges of resin wing, which disappears completely after few passes of sanding paper.
I was really hard pressed to find something unflattering to say abut this set, but Peter Vill insisted that I should be harsh and critical. So here it is:
1) thickness of the wing trailing edge is somewhat more than desired for this scale,
2) Hinge line of the ailerons is also on a soft side, but nothing that few strokes of scribing tool wouldnt solve. I wonder if casting separate ailerons wouldnt solve both mentioned problems.
And that is really it. The set comes ready for installation. So lets see how
it works...
Terminus Est
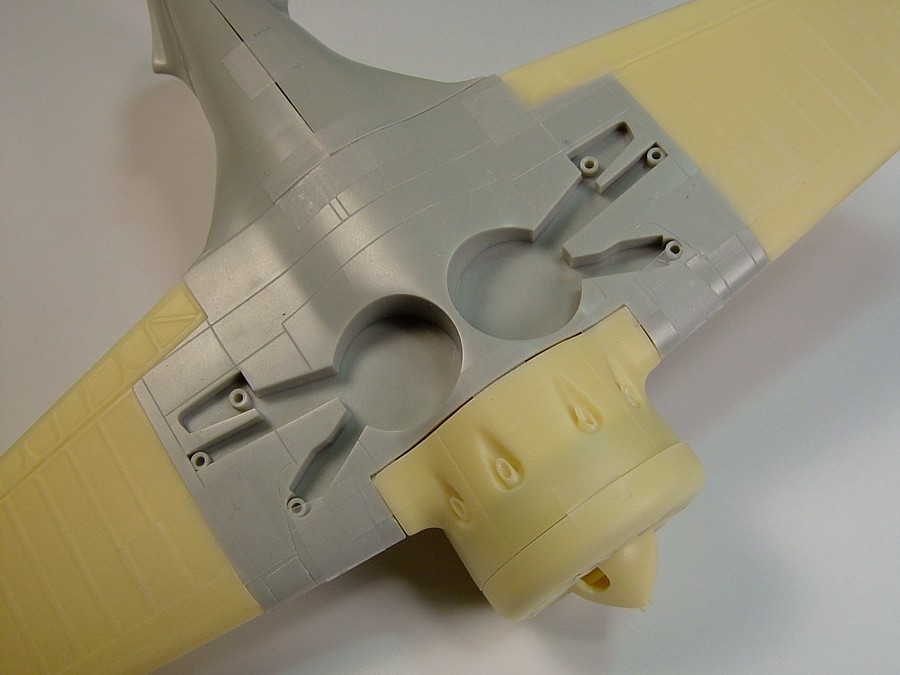
To install the nose plug and corrected outer wings there are several cuts one needs to make in the kit's plastic. Material needs to be removed from bottom wing surface, upper wing surfaces, and fuselage sides.
The modification of the bottom wing is the most complicated: two cuts will remove the outer wing panels, and another cut for the central section in front of landing gear bays, to make way for the cowling plug. On the picture below I already made this central cut, and marked the line for cutting the outer wings. Pay attention to the kit's wing fastener panel (which runs along the wing chord, where inner panels meet with the canvas-covered outer wing) and cut just outside of it.

Similarly, the upper wings need to be cut and only the inner panels will be
of use. I marked the extensions for the longer ailerons. Make sure that you
leave a small fillet on the end of the aileron relief (dont cut
all the way through the part along the aileron hinge line) as you need to mate
it with the fuselage side.
When I start to cut, I try to stay off the actual line and leave some meat for potential mistakes. Remember, you will keep only the inside wing panels, and outer panels will become scrap. After the crude cut is made, parts look like this.
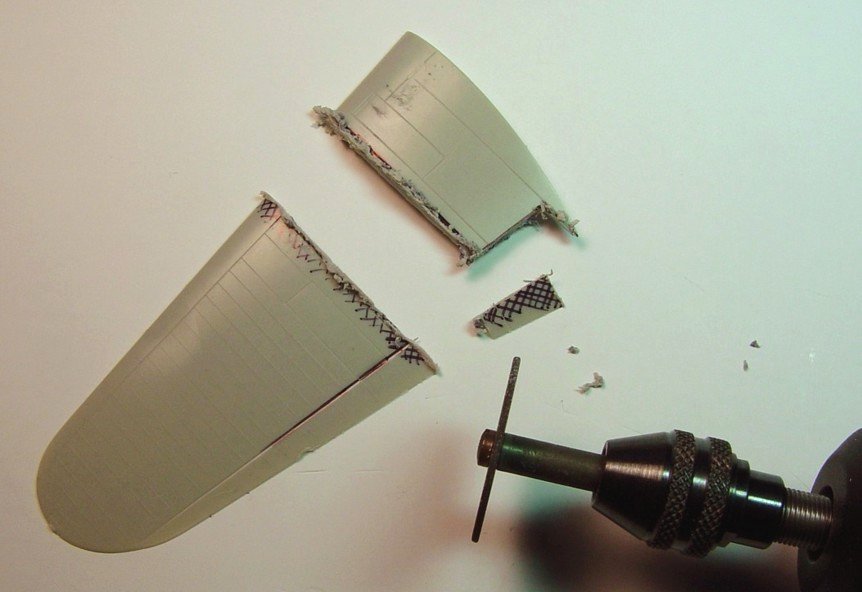
Depending how light-handed you feel, you can decide to go on, and clean the edges with the motor tool, or resort to the safety of a scalpel blade and sanding paper. Final matching should be done between resin and styrene part, with successive dry fitting and sanding. When everything is done properly, the parts should look like this.
The cut of the fuselage sides is the simplest. Just follow the line of the cowling. I also sanded down the inside of fuselage sides after making the cut, to give more room for the resin plug. This will help with alignment of parts.

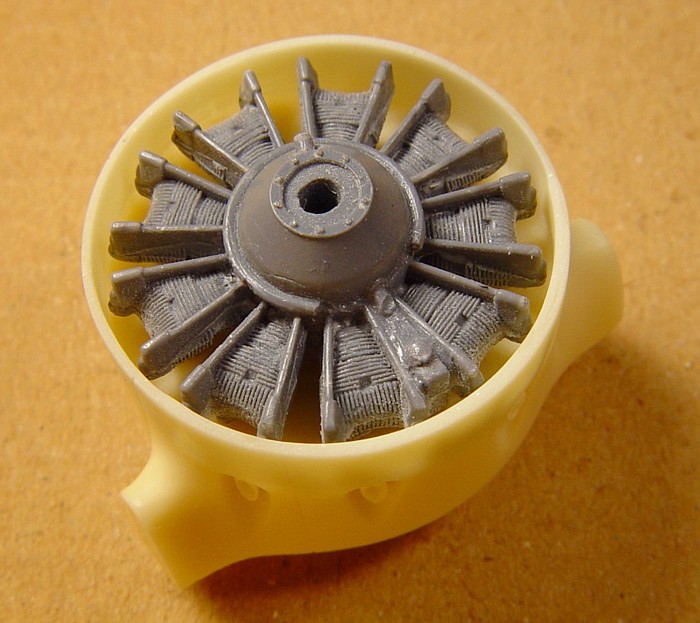
For this model I also acquired the Engines & Things Shvetsov M-25 radial engine. It is somewhat better than the kits offering, but the main reason I have it is that I already used the kits engine for my I-153 model. The resin cowling provides a positive mount, and cavity for the kit engine. I needed to sand the mount down, and also to remove details behind the cylinders on my resin engine. These details were not that good to start with, and they would be completely useless on this model anyway. After this operation the engine fits just right. Of course, there is always an alternative of closing the shutters and cooling slots, and forgetting altogether about the engine.
Assembly
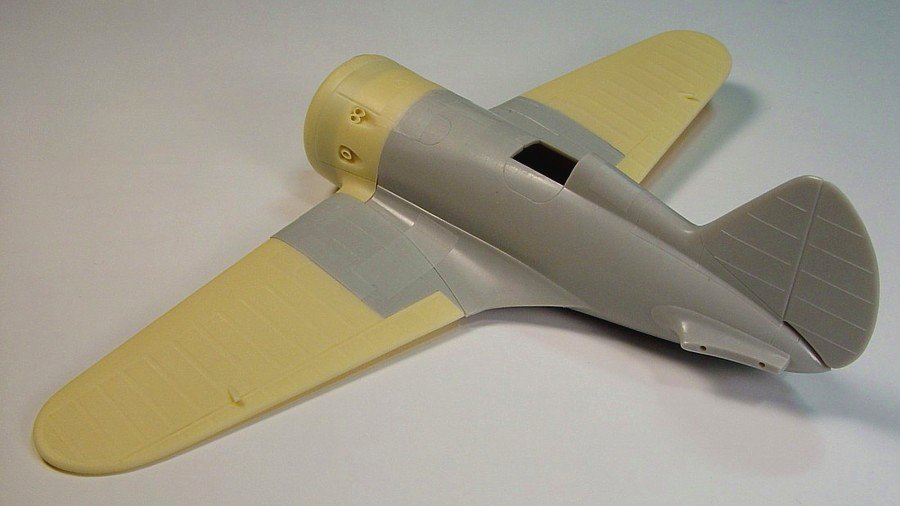
After all that is done, it is finally the time to see how everything fits together. Put all the resin and styrene parts in the box, add some Scotch Magic tape, take it to the top of the tower, and apply electricity. When you open the box ... oh my god, the monsters alive! Well, maybe it is not this simple, but the assembly is very straight forward.
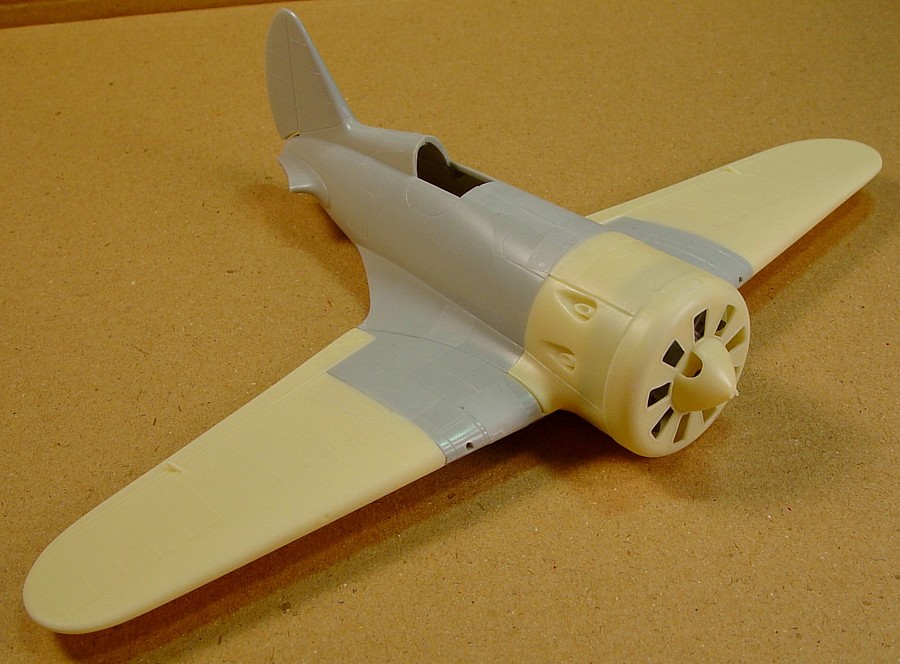
As for the fit of resin parts, I will let you be the judge. Again, this model
is held together by few small strips of adhesive tape, but it already looks
like it should. I will say that the preparation is crucial. If you
pay attention, you can make Airwaves parts fit better than some kit parts themselves.
Hmm, before I take this model to the contest I might need to apply some glue,
but for shadow dog-fights this should do just fine.
Conclusion
If you are building a Bf-109 F-4 this set wont be of much use to you. But, if your goal is an accurate Polikarpov I-16, early Type 5 in 1:48 scale, Airwaves correction set is at least as important as the Hobbycraft/Academy kit itself. What I showed here can be done in only few hours of a pleasant Saturday afternoon. Taking these pictures and writing the article actually took longer.
The age when the I-16 design was conceived was called the Golden Age of Aviation, and the age when the Airwaves I-16 sets come to life can be called the Golden Age of Scale Modeling. I hear that more exciting surprises are rolling behind the hills. I would like to thank Airwaves crew, especially Peter Vill, as well as Erik Pilawskii of VVS Modeling, for providing this fine set to me.
Happy model building!