Hasegawa 1/72nd I-16 Conversion and CorrectionBy Matt Bittner |
|
Hasegawa 1/72nd I-16 Conversion and CorrectionBy Matt Bittner |

|
 Entering
service early in 1935, the stubby little I-16 was in fact, at that time, the
most advanced fighter anywhere in the world, and remained so until well into
the latter parts of the decade. Though none of its innovative design features
were, by themselves, revolutionary, their introduction into a single package
comprising a tiny high-speed fighter was shattering, and marked a significant
leap forward in the history of aerodynamics.
Always an aircraft requiring precise handling, the tiny 'Mosca' was as beloved by its experienced pilots as it was feared by novices. By 1941, the latter types of I-16 were powered by the M-62 and M-63 engines, and could exceed 300 mph. Extremely maneuverable, and with an excellent zoom climb, the I-16 was by no means as outdated during the initial months of Barbarossa as has been alleged, and in fact accumulated in many Regiments an outstanding record against the German invaders during 1941-42.
 The
Hasegawa I-16 Type 18 consist of 41 injected pieces molded in typical Hasegawa
gray and one clear injected windscreen. Markings are for two aircraft, one from
the 72 AP with bogus silver markings (which should be white) and the other from
an unknown unit. The molding is very well done but does have some outline discrepancies.
More on those in the rest of the article.
I also used the Eduard photoetch set, #72-177, which consists of approximately 41 photoetch pieces and a piece of clear film representing the instrument faces. Also needed for the Hasegawa kits are the NeOmega resin I-16 wing replacements.
 Since
the kit I used was the Hasegawa Type 18, and since the plane I was building
was a Type 17, I had to outline what changes were necessary to convert the Type
18 into the Type 17. The changes were as follows: replace the ShKAS machine
guns in the wings with ShVAK cannon; change the spinner type; and finally, fill
the starboard cockpit entry door's panel lines, since the Type 17 and "lower"
had only the door on the port side. Since the machine I was modeling did not
have the spinner, I was lucky and didn't have to track down the different spinner.
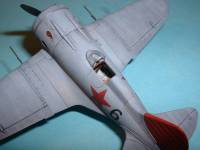
Now that I knew what had to be done for the conversion, I started work on the model. First, and in natural order, was the cockpit. Since some of the Eduard cockpit pieces make no sense according to their instructions, I ended up not using a lot of the pieces. After having the cockpit mostly finished, I looked again at the Eduard instructions, and my conclusion was what Eduard has you put on the port side actually belongs on the starboard side. The unusual looking "contraption" (technical term) appears to me to be Eduard's take on the landing gear raise and lower lever, and all the pieces associated with it. In addition, the instruments on the port side should be mounted on the starboard side. However, I was only able to find one photo of the cockpit with the instruments on the starboard side, so it may be indicative of this one example only.
 Since
there is plenty missing from the Hasegawa cockpit sidewalls and the Eduard photoetch
set, I scratched some of the missing pieces using sprue, wire and Reheat photoetch
pieces (levers, etc.). Once I had all of the pieces on the sidewalls, I painted
the cockpit sides Metal-Use Primer. Before I painted the floor, though, I cut
off the pieces on the side of the floor that Eduard has "depressed" since this
area of the floor actually didn't exist. Once everything was painted I then
glued the fuselage halves together before adding the floor and the instrument
panel. Since the underside of the kit's fuselage is "hollow" I decided to add
the floor and the instrument panel after the fuselage halves were together and
seams eliminated.
I again strayed from the Eduard instruction sheet using the more accurate kit seat rather than the photoetch seat. To the kit seat I added the seat belts then glued that to the fuselage.
 Now
that the cockpit was finished, the fuselage halves together and all seams eliminated,
I turned my attention to the wings. In order to get the NeOmega resin wings
on the Hasegawa kit, you have to cut the "outer" wings off at the strap joint.
I made the cuts prior to adding the "inner" wings to the fuselage. I cut a little
bit further outboard from the strap joint so I could sand down the area to ensure
a smoother fit. Once the "outer" bits were cut off I then glued on the "inner"
surfaces to the fuselage and worked on those seams. The "inner" wing to fuselage
joint was decent, requiring only a small amount of CA to blend it in. However,
the joint on the underside, where the lower "inner" surface meets the aft end
of the fuselage required a little more attention. I also corrected the panel
lines on the upper "inner" wings to better match the Armada plans. After all
seams were eliminated and the NeOmega wings were sanded off their "pour blocks"
attention now turned toward the tail.
Yes, I deviated a little from normal construction process because I wanted something that I could use to "true-up" the resin wings to the rest of the airframe. So I glued on the horizontal tailpieces, which required very little in terms of seam removal.
 Now
that the horizontal tailpieces were on and true, I used those as a guide to
glue on the NeOmega replacement wings. The Hasegawa wings are totally inaccurate.
You could try to sand the corrections yourself, but there isn't enough plastic
for the surgery. You would have to add some plastic to make the correct transition.
In addition you would have to reinstate the fabric effect, so it's much easier
to use the NeOmega replacement wings. In this area I did a lot of dry fitting,
using the plans in the Armada book to full advantage. Once I was certain the
joint was good enough to require very little in terms of filler - and was true
- I used gap-filling CA, which dries a little slower, to attach the wings. I
had to sand down the resin wings a little to meet the Hasegawa plastic - which
resulted in losing the small "bumps" on the strap. Those were replaced with
CA.
Once the wings were sanded and dried completely I added the ailerons offset a little and continued with the rest of the kit. I also scratched the ShVAK cannons using hollow brass tube and glued those on prior to painting. The ShKAS guns still in the cowling were replaced with syringe needles.
 Since
the wheel wells, landing gear and landing gear doors of the I-16 were painted
the same blue as the rest of the underside, I deviated from normal model building
practice and installed both the landing gear and the Eduard p/e landing gear doors.
The I-16's doors were very thin on the real thing, and the Hasegawa gear doors
are too horridly thick for 1/72nd. So replacing them in some fashion I feel is
a must. The Eduard p/e doors are very well done and very much look the part. One
more note about the Eduard p/e pieces. The I-16 did not have a "v" where
the oleo strut is on the landing gear, so leave off those small "v's".
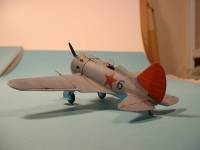
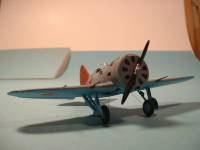
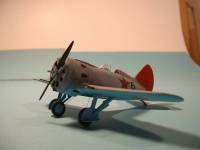
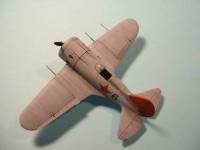
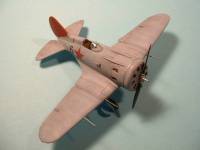
Now I was ready to paint. I started by spraying Polly Scale's Haze Gray on the uppersurfaces. Once this dried for a day or two I turned my attention to streaking on the other grays. I used a combination of Polly Scale's Light Gray and lightened Haze Gray for the streaking, dry brushing it on. Once this was dry I masked the fuselage and sprayed the fin/rudder red. After this dried for a day I masked the upper surfaces and sprayed the undersurfaces with Polly Scale's USSR Underside Blue lightened just a tinge with white.
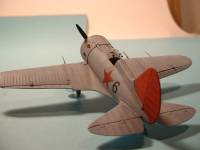 After
all paint was dry and masks removed I sprayed a coat of Future over the entire
model. I let this dry for two days (better to be safe than sorry) then started
with the panel lines. Lately I've been feeling that subtle panel line highlighting
is more accurate - and too scale - than overly dark panel lines. With this is
mind I mixed my own dark gray oil to flow in the panel lines. I then lightened
it a bit and applied that to the underside. Once this was all dry I then darkened
the "dark gray" even more, and used that in the control surfaces joints to pop
those out more.
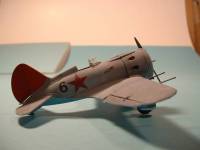
Decals are ALPS generated on the upper side, while the lower surface wing stars are taken from a Toko LaGG-3. After the decals were dried I sprayed a Polly Scale dull coat over the entire model, and then scratched a new gun sight, painted the frames of a "squash-cast" windscreen flat aluminum and added the windscreen. Pastel chalks were used for more weathering and then I added the Hasegawa, natural metal cowl ring decal after the dull coat so it would remain shiny.
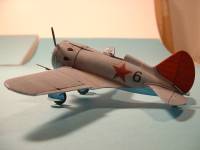
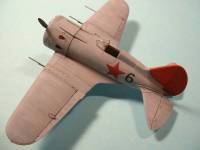 Once
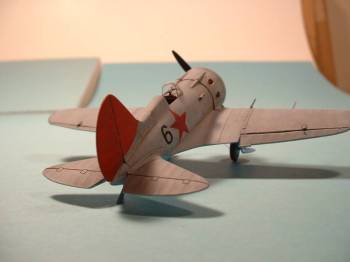
I saw the excellent Art
Deco article, I knew I had to build at least one of them. Since I had an
extra Hasegawa Type 18 laying around along with the NeOmega wings and Eduard
photoetch, I decided to build "Black 6" found at the bottom of the page. Yes,
there is work to bring the Hasegawa kit up to standards I feel, but it was well
worth it. I feel it is necessary to replace the Hasegawa outer wings - since
they're inaccurate - as well as the landing gear doors and the kit supplied
windscreen with either a vac or "squashed" example. However, doing all that
will result in a most accurate and very good-looking Polikarpov I-16. Now to
convert the new ICM Type 24 into a Type 28 . . .
My thanks to Erik Pilawskii for all the help.