Text & Images by Aleksandar ekularac
Text & Images by Aleksandar ekularac
My View
Over time, the Polikarpov I-16 has become my favorite modeling subject. There, I admitted it. I realized this only recently, and it was the sheer numbers that convinced me. Id rarely build same aircraft type twice. By spending a long time on each model I get saturated with the subject, and simply cant get around building it again. But when looking at my shelves I can see three of these small fighters already, and I still have zeal to build at least two more! My only explanation for this is the simplicity and the appeal that I-16 carries with it, along with involving history and interesting variety of camouflages. This combination drives me back to model little Mosca again and again.
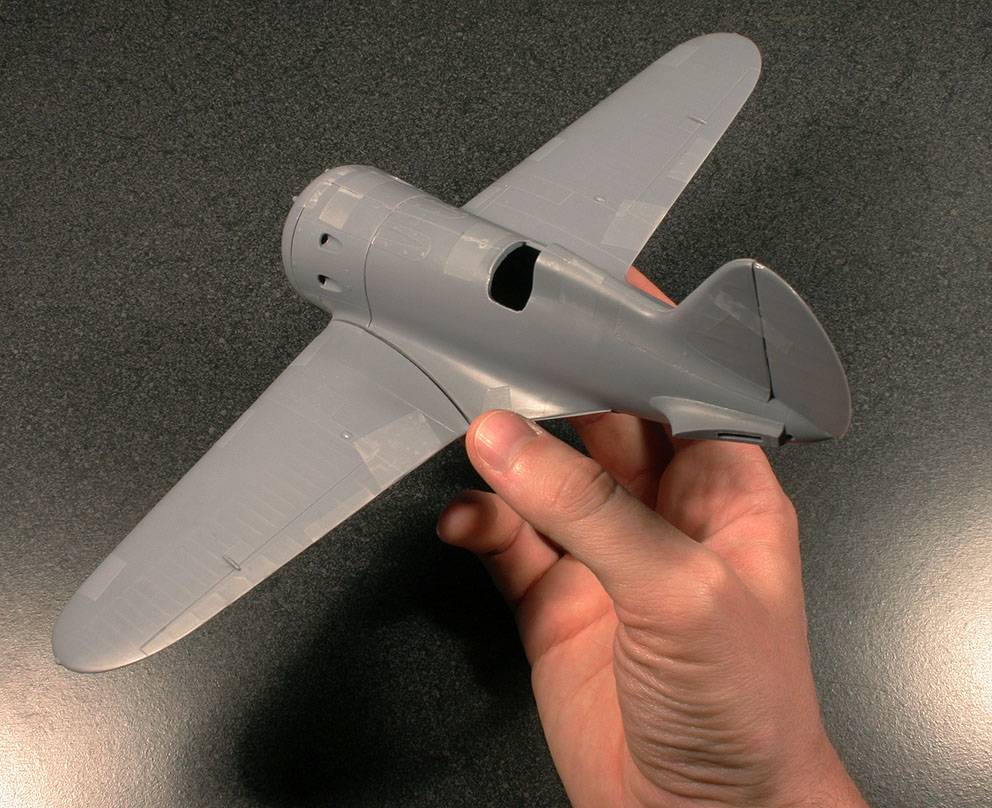
I-16 is a perfect candidate for a large-scale model. This compact aircraft is just big enough to fill ones hand in 1:32 scale, and it will not take more shelf space than, say, 1:48 P-47 Thunderbolt. The ones I already built were in 1:72, and 1:48 scale, and I remember that there was always something left to desire in terms of manageable detailing, or space available. For example, a typical modelers excuse for not bothering with cockpit detail is that the opening is too small to see anything inside. Just close the side door, and forget about it. Well gentlemen, now you have Mosca in the large scale, and there is definitely enough space to peek inside, so how about taking some time and detailing that landing gear retraction winch?
Kit Description
As I understand, Azur is a brigade of MPM responsible for interesting, but overlooked aircraft kits in large scale. Their focus is on simplicity and accuracy. This is similar approach to Hasegawas new 1:32 releases, admittedly with less amount of sophistication in Azurs case.
Before I say more, I would like to state that I like this kit a lot, and appreciate the fact that Azur made the effort to bring it to life. All my following criticism is on a constructive side, and its aimed to spark some thought, and at times to give a nudge to the aftermarket industry, still fast asleep regarding this kit. Ok, enough of that.

Starting from the box, most will not be thrilled to find that it is one of those side-opening contraptions. Made of wobbly, not too thick cardboard, it doesnt offer too much comfort to whatever is inside. Indeed, some of the parts in my sample were rattling loose, with scuffed plastic surfaces, and some sprue gates torn off. I wish all the kit manufacturers would make their boxes like Trumpeter. These look capable of withstanding tactical nuclear attack, and provide enough space inside to be used while constructing the models. This is how I want my boxes: big, robust, and with a top opening.
 ....
....
 ....
....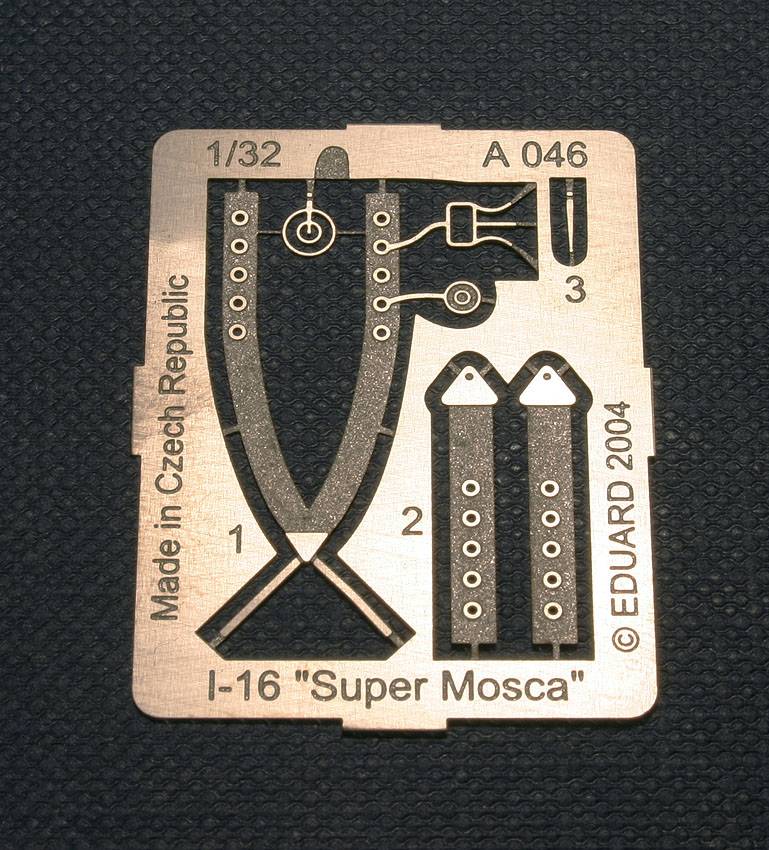
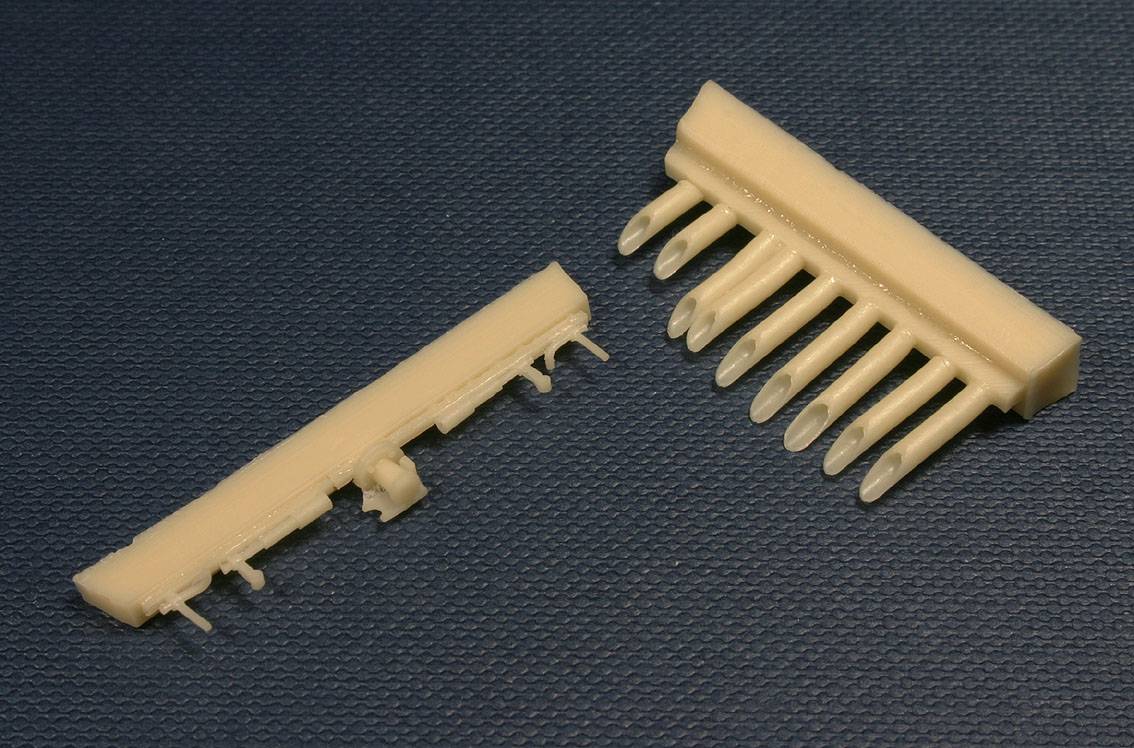
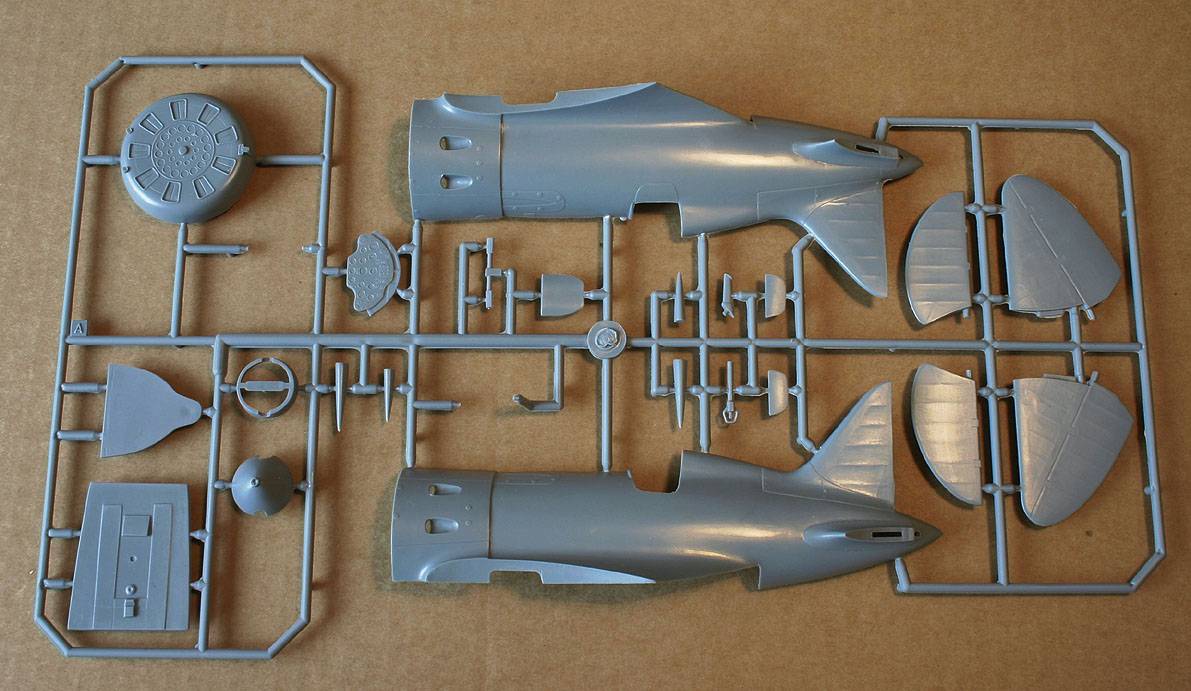
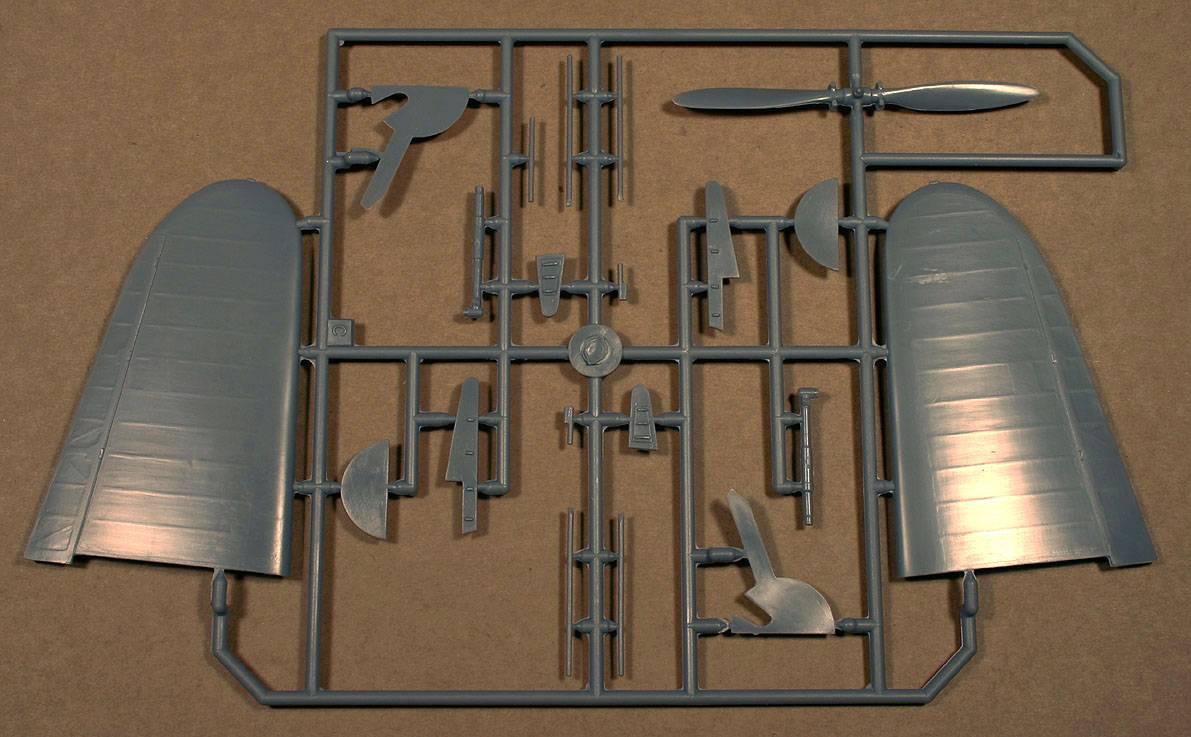
All the injected plastic is packed in only one bag, with additional bags for resin bits, decals and a small photo-etched fret. There are in all 3 big sprues of darkish-gray injection plastic, and a small clear sprue containing main windscreen and a small, thin rectangle for the gun-sight.
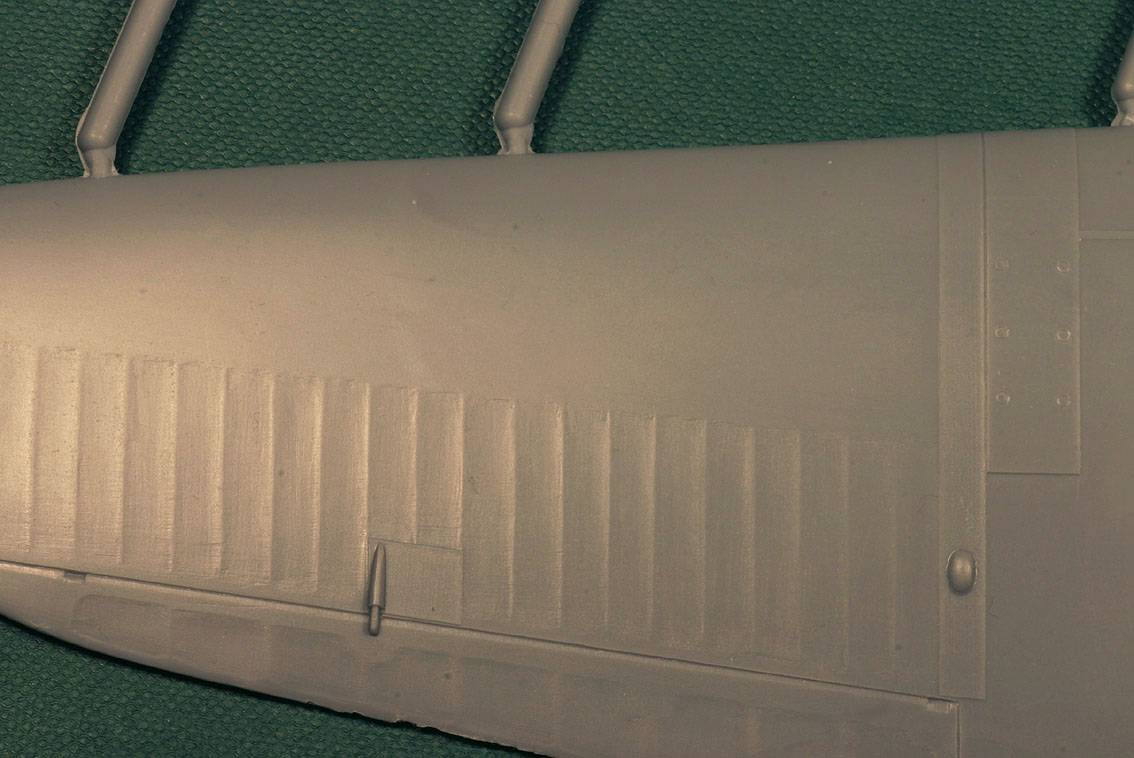
This is definitely a short run kit with low-pressure moldings. Sprue gates are wide and they require some effort to separate cleanly from the parts. There is enough flash to keep one busy, and some orange-peel effect at places, to spice things up. Luckily, I-16 is sparse in surface detail and paneling, so the cleanup process should be a straightforward task. Canvas covered surfaces look very realistic, with just right amount of ribs showing (at least for my taste).
 ....
....
There are few locator pins on the fuselage halves, but I strongly recommend deleting them, and then sanding all the matching surfaces, by laying the parts sunny side up on a sheet of sand-paper (320 grit is what I use for this task). Wings and rudder halves should receive the same treatment, sans the locators, of which there are none here.
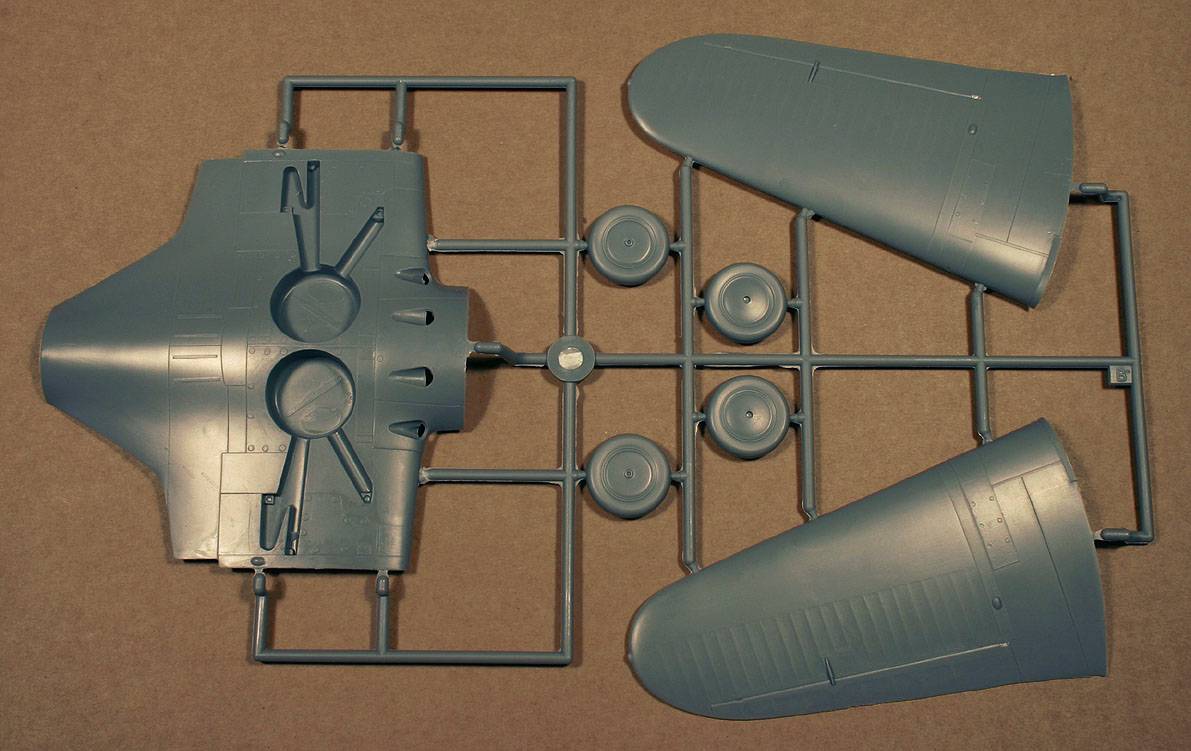
Horizontal tail surfaces are one piece for each side, and this is a big letdown in my opinion. I would much prefer to have separate elevators, each having two separate halves. Firstly, elevators are molded in a non-drooped position, while all the photographs of I-16 at rest show elevators dropped almost to the ground. Secondly, I like to make trailing edges razor sharp, by sanding the plastic halves from inside. These parts are not too bad in respect of trailing edge thickness, but if the wings and rudder are all made of two halves, why not the elevators too? When I make this model I will undoubtedly cut the elevators from horizontal tail, and this will require a lot of repair work. Oh well
Cockpit is a mixed bag. There is a potential to make a nice cockpit, but much scratch-building is needed.
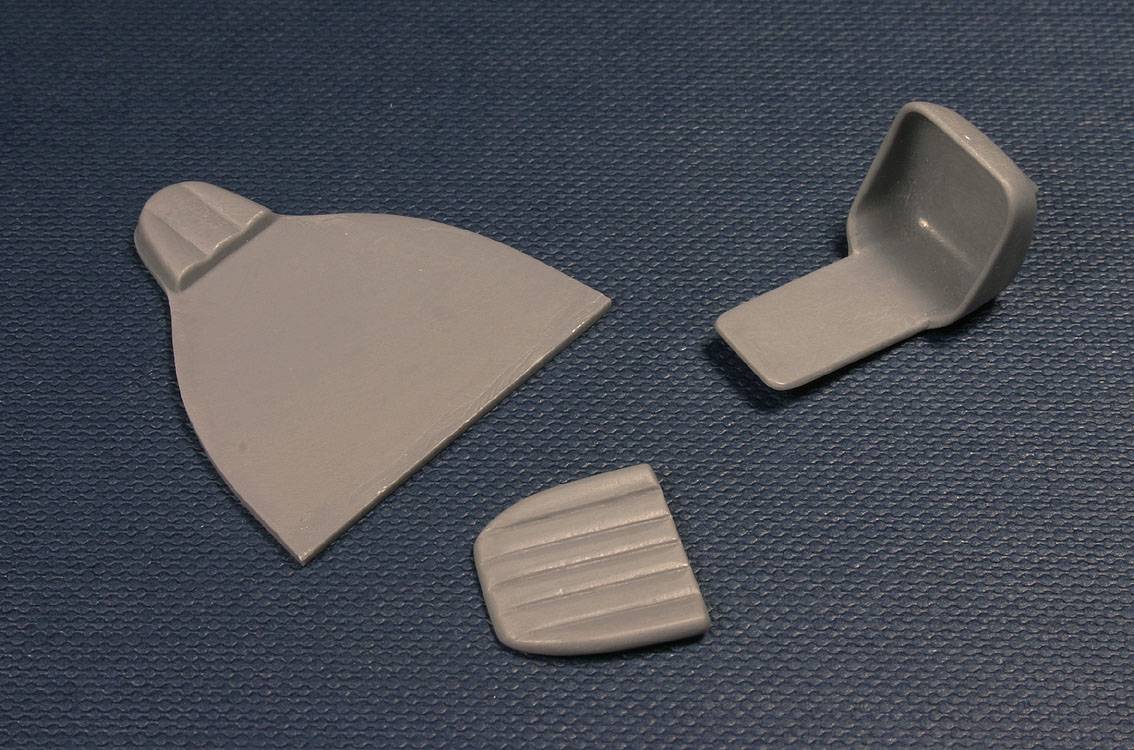
The seat is well represented with separate tub and backrest padding, while headrest is integrated with the back cockpit wall. There is also a photo-etched pilots harness that will look nice curled up on the seat, or thrown over the opened door. So the pilots chair is really fine.
Aforementioned solid back-wall is actually only fuselage frame on the real aircraft. The view to the back should be open on both sides of the seat. Ill leave everybody to his/her own devices on how to tackle this problem. The cockpit floor is also represented solid, in contrast to the actual aircraft, where there is only a central bridge under the seat and the controls, and the sides are again hollow. Flying stick and pedals are correct, but basic. Instrument panel is also correct, but made in plastic with recessed instruments, and has a bad case of orange-peel all over.
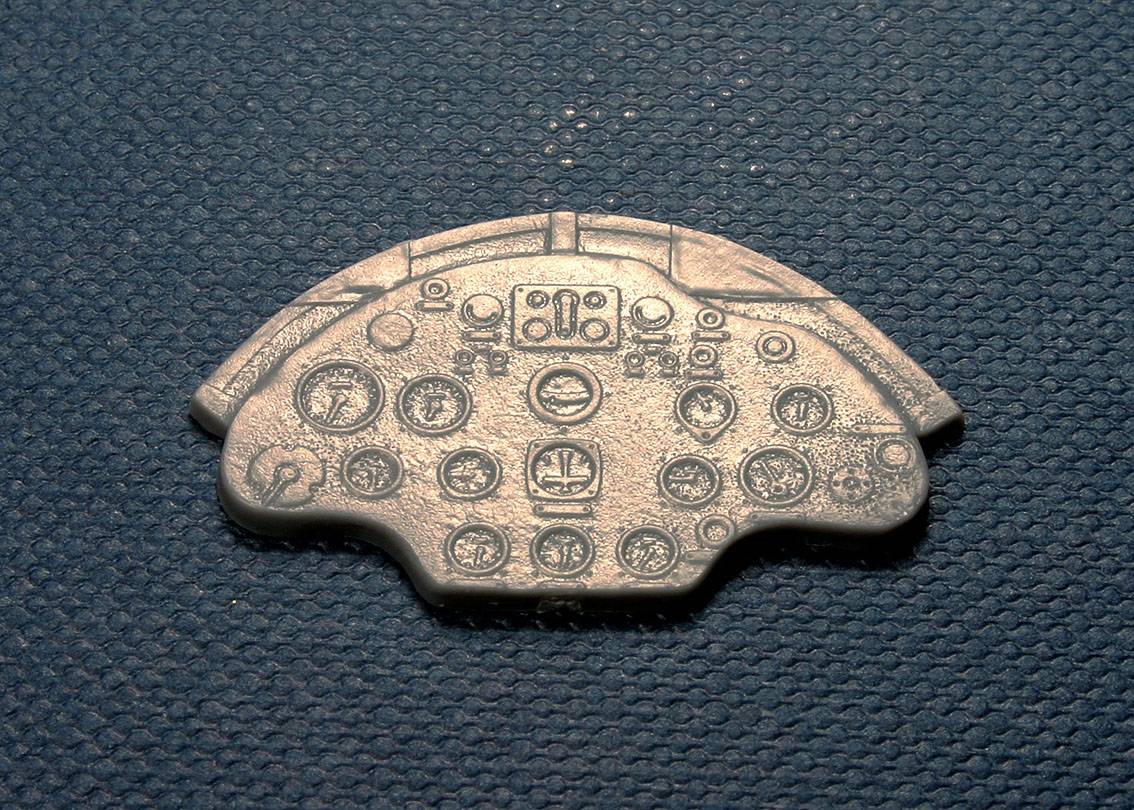
Why Azur didnt include photo-etched instrument panel with instruments printed on film, or even decal, remains a mystery to me. There are structural details on both inner fuselage sides, but they extend only to the edge of the solid floor. If one wishes to open up the floor, the problem will arise of what to do with the gapping hole that will show up under it.
Gun-sight is a true marvel. It consists of several resin, photo-etched and clear parts. If the whole kit was detailed to this level, it would have no peer.
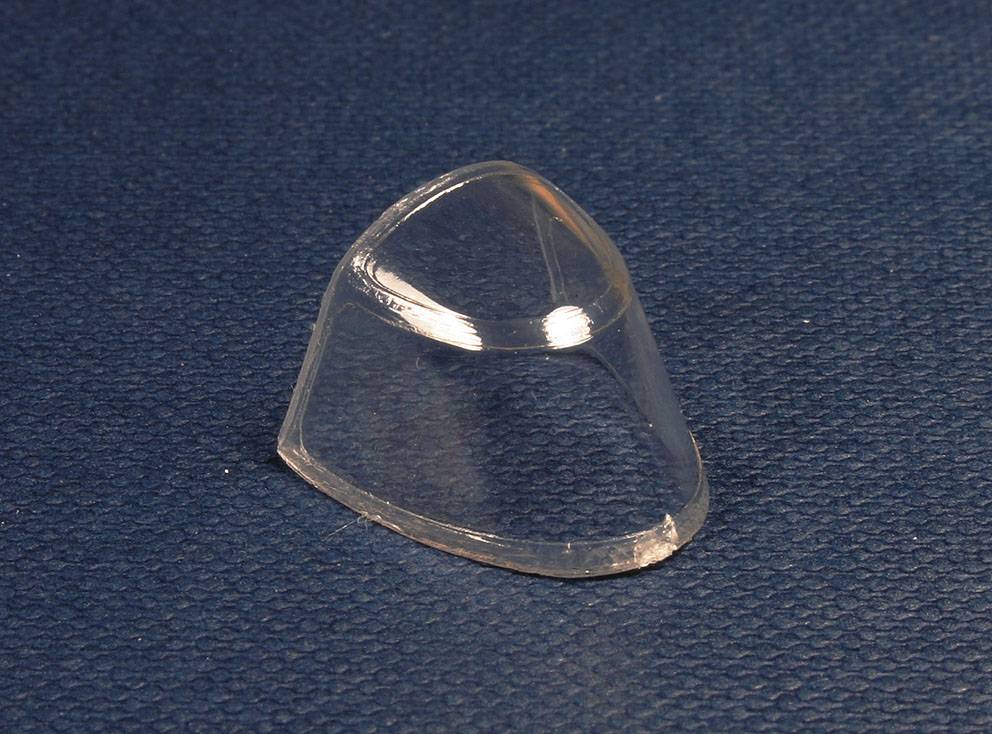
Windshield is a single piece of clear injected plastic, accurately shaped, very transparent, without scratches, and sufficiently thin.
 ....
....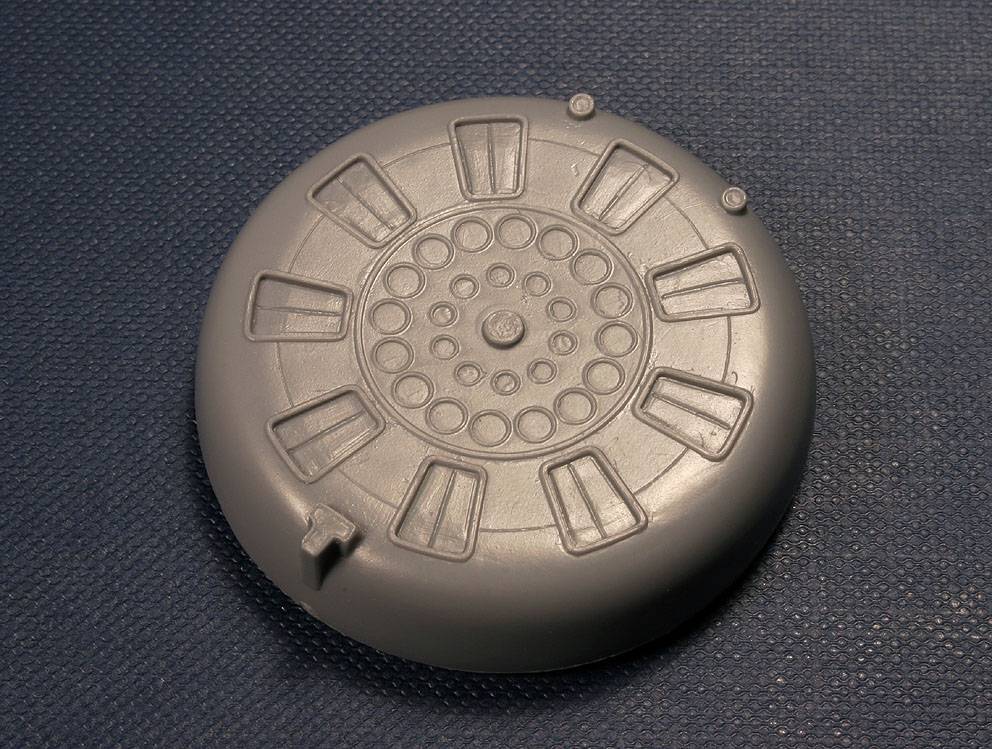
Front cowling has accurate details for I-16 type-10; alas both gun-troughs and T-shaped oil cooler inlet are full plastic, having no depth at all. It will be easy enough to drill out the gun-toughs, but making that T-shaped inlet hollow will require a lot of finesse. If you plan to build an aircraft without the spinner (number of I-16s operated without it) be advised that you should delete all the little circles that exist in the central section of the cowling, as these are spurious. The cooling louvers for the engine are also molded shut, which eliminates the need to have an engine behind. Economic and simple solution, no doubt, but disappointing to me never the less. I would really like to build the engine and open up the louvers, especially considers the big scale
Superfluous & Missing
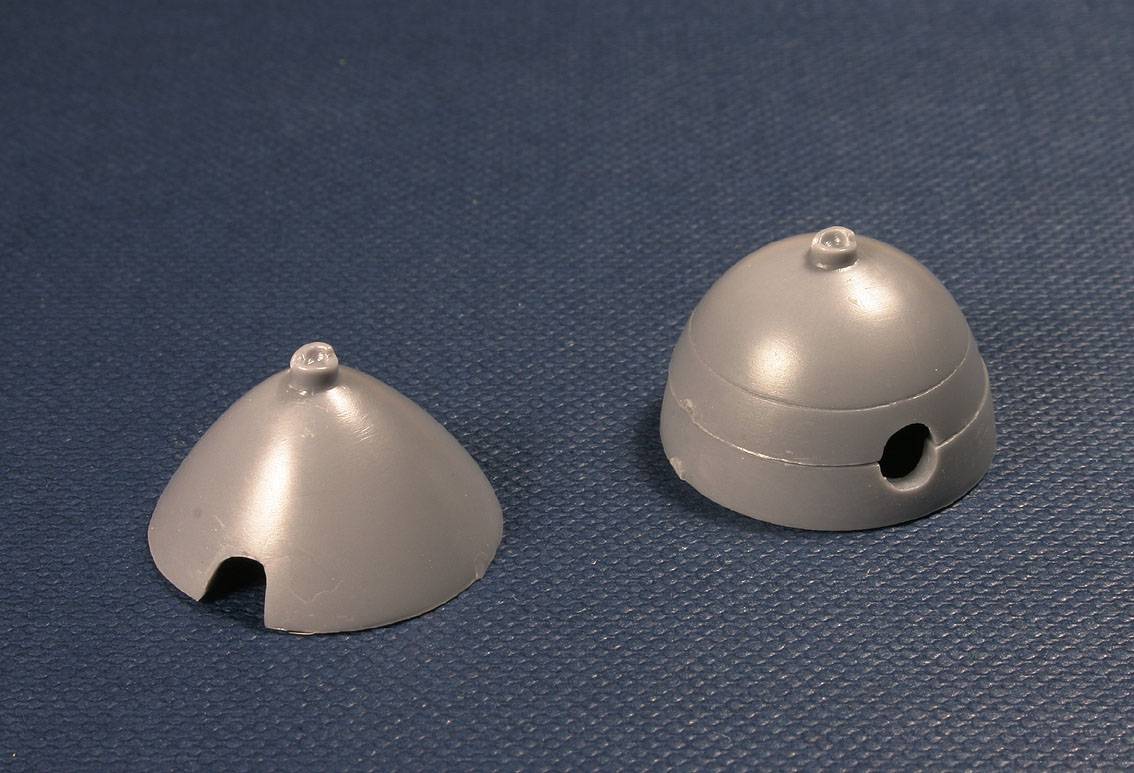
There are two propeller spinners included in the kit: early, conical spinner, appropriate for building the type 10 aircraft, and later, rounded spinner. This is a nice provision, as it allows for more variety of choice. However, to build any type later than 10, one would have to make some serious modifications to the bottom of the engine cowling. All newer types had only six, instead of eight exhaust ports around the cowling, and additional landing-ski recesses built into the front bottom.
This is a great opportunity for some aftermarket resin to appear, with simple one-piece plug that would transform the bottom cowling to the accurate geometry for later type I-16.
If someone is confused with this talk about different types within the I-16 family, I would encourage a visit to an excellent online article by Erik Pilawskii, explaining detailed genesis of this aircraft. Here is a direct link to this page: http://vvs.hobbyvista.com/ModelArticles/I-16/index.php
There is also an outline for the right cockpit door on the starboard fuselage side, appropriate for later I-16 types. This door did not exist on the type-10, for which the kit is intended, and therefore this detail should be removed completely.
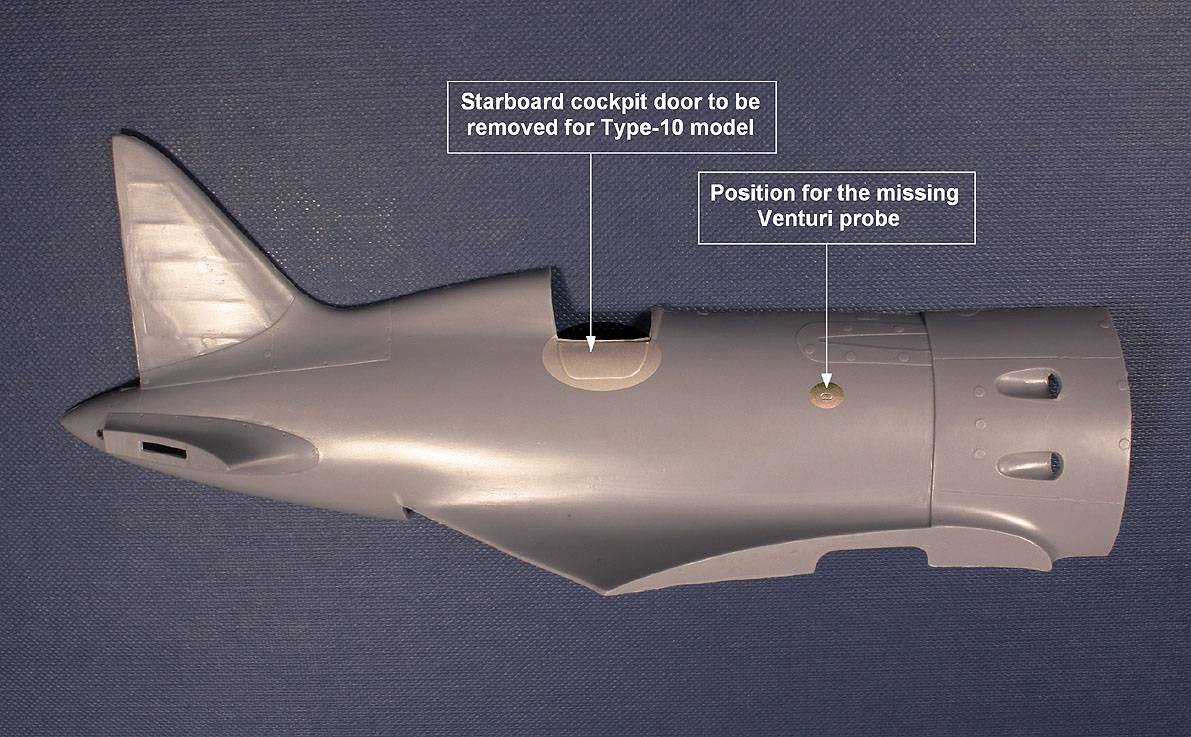
All the types of I-16s had a small Venturi probe attached behind the cowling to the starboard side of fuselage. This obvious detail is missing from many I-16 kits, and Azur is no different in this respect. It wont be hard to scratch-build this gadget, but it would be nice if this was included in the kit.
Further missing detail is a small window inside the right main landing gear bay that allowed pilot limited view to the ground bellow, during take-offs and landings.
Accuracy
This is where the Azur kit really shines!
I used drawings from the book Soviet Air Force Fighter Colors 1941-1945 for the comparison with the parts. I first scanned the drawings, enlarged them to 1/32 scale, and finally printed them. I-16 is small enough that even the plan view still fits onto single A4 paper
 ....
....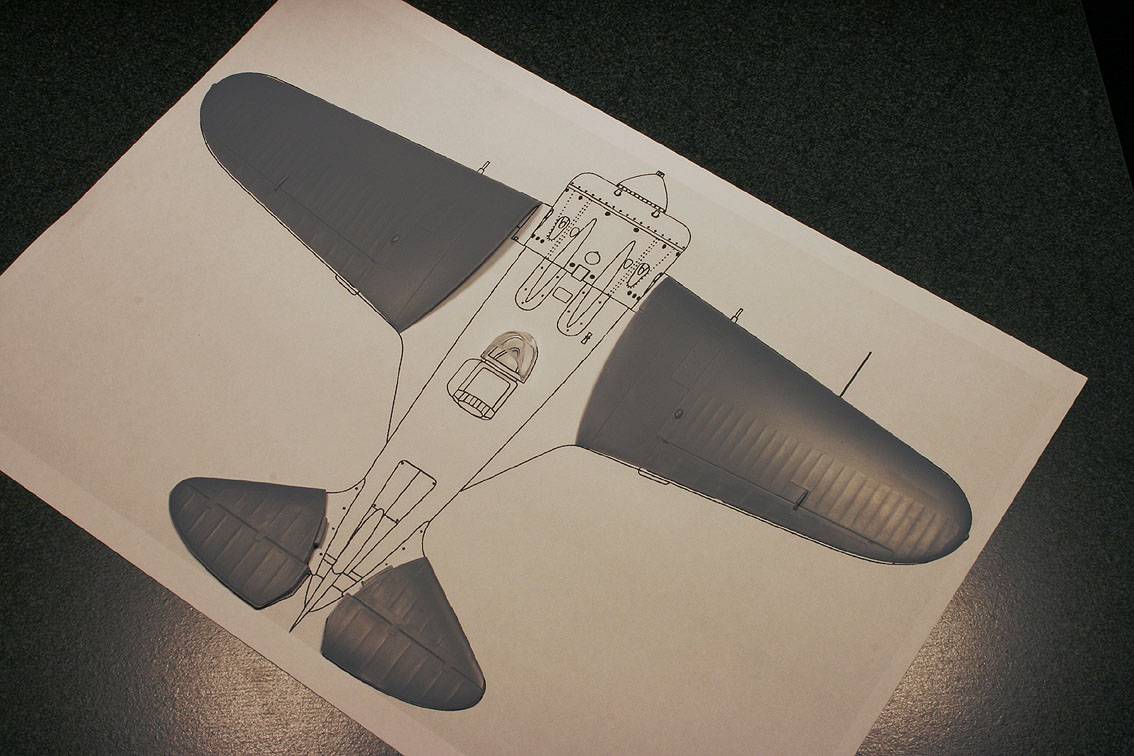

All major components match the drawings to near perfection. Panel lines, and surface detail is also very accurate Even the smaller parts, like the windscreen and spinner are shaped properly, and to the scale.
I have nothing more to say here, but to commend Azur for job well done in this respect.
Fit & The Look
 ....
....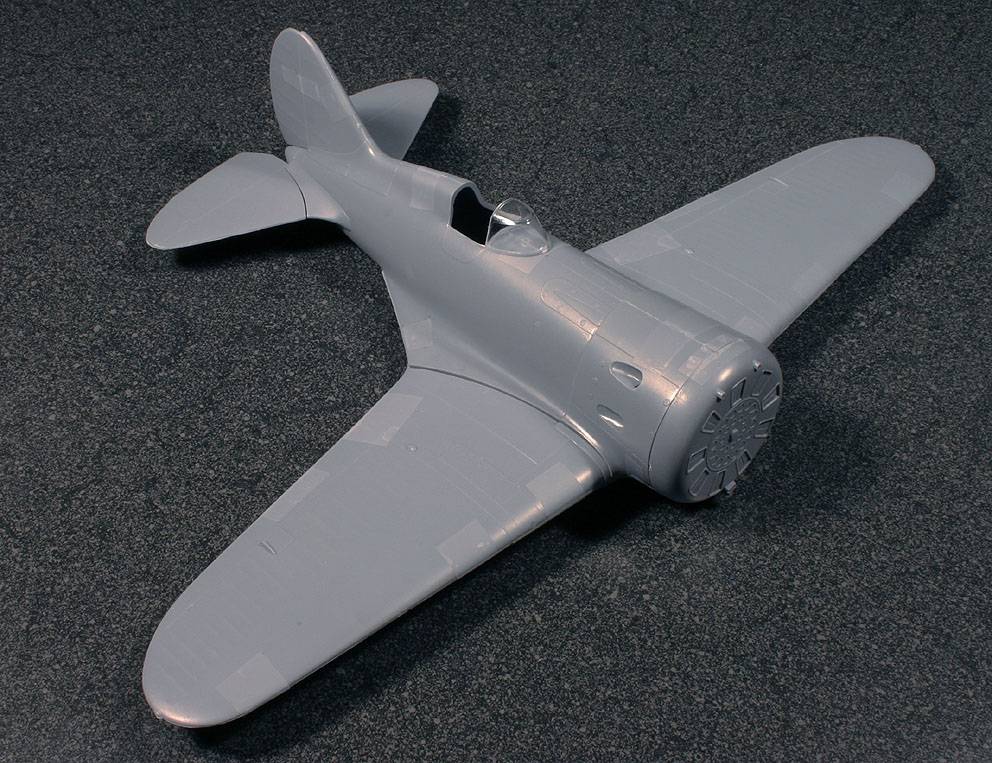
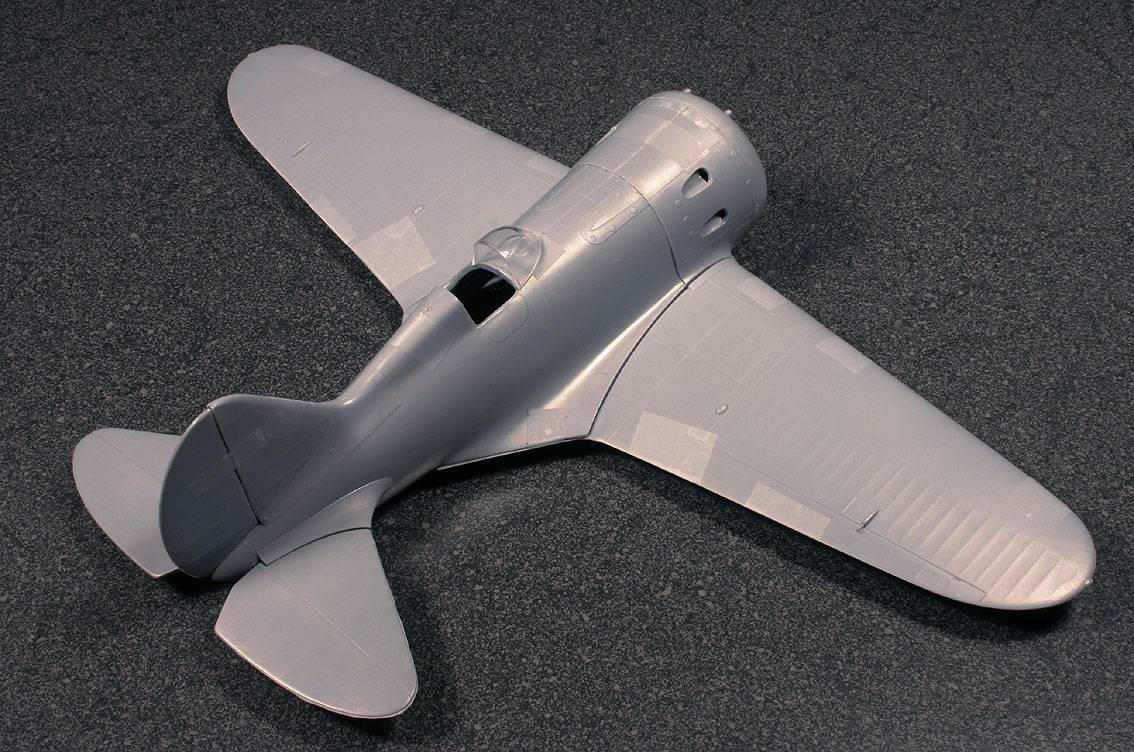
Final acid test for every kit is the fit, and appearance when assembled. I had no doubts that Azur kit captures the look of Polikarpov I-16. It indeed looks very convincing! In smaller scales extra effort is needed for this model not to look like a toy, but 32nd scale brings amount of volume and seriousness to it. Again, I think that this is the perfect size for I-16.
 ....
....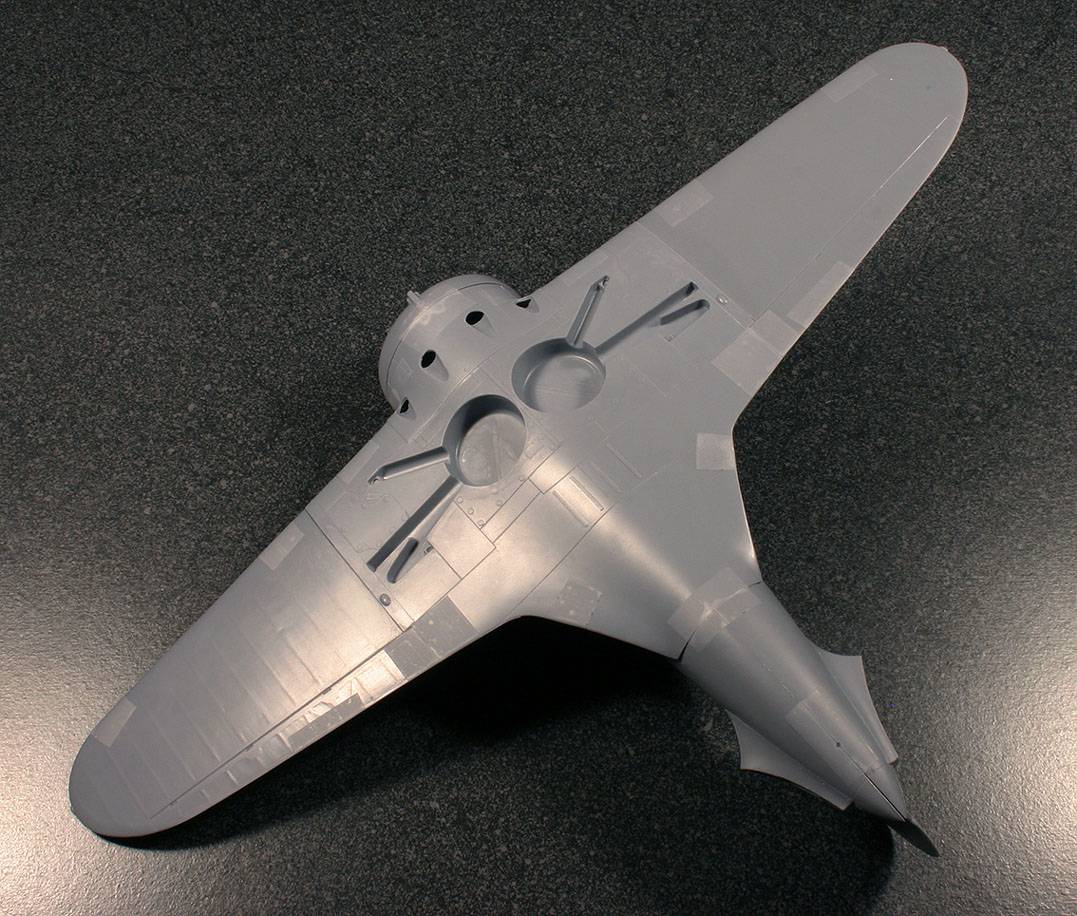
Fit of the major parts is not great. All joining surfaces need to be sanded and dry-fitted, prior to assembly. I found the biggest problem to be wing-to-fuselage joint. There is a significant gap on the upper wing-fillet surface, and the central bottom panel also shows a nasty step at the point where it meets the rear fuselage. Basically, this central part is wider than joined fuselage halves. One way to avoid a lot of putting and sanding here would be to add a shim in a form of a wedge along the bottom rear fuselage seam, to bring it to the same dimension with the central wing element. This will also help to fill the upper wing-to-fuselage joint. In any case, I recommend repeated sanding and dry fitting sessions before committing this kit to the glue.
Decals

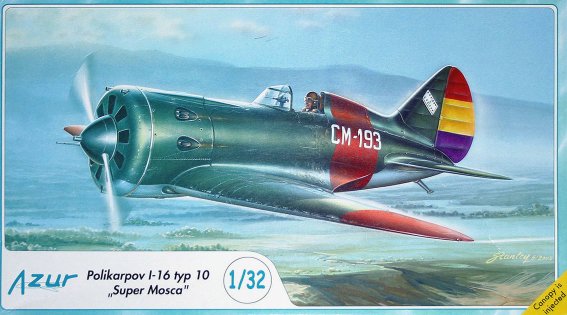
Spanish Civil War was a major conflict in the 30-ies Europe, and in some ways an overture for the Second World War. This is also where Polikarpov I-16 coined its fame, and entered history. In this respect it is not surprising that Azur pays tribute to this era by including 3 different markings for Spanish-used Moscas: two Republican, and one Nationalist.
On the other hand, I-16 played important role in conflicts in Far East, Finish Winter War, and finally in GPW (Great Patriotic War). Some of the most illustrious Soviet pilots flew the type, and many interesting and unusual camouflage schemes exist for I-16 in its native markings. Therefore, I would have liked to see at least a couple of Soviet-flown airplanes included on Azurs decal sheet.
Be it as it may, here is another great opportunity for aftermarket hobby industry, especially with new authentic research done in the field of the VVS GPW subjects. Unfortunately, there is still no choice of alternative decal sheets for this kit. Data Decals have announced an interesting collection of schemes for large I-16 sometimes last year, but sadly this release was canceled due to lack of interest, and finally Data Decals closed its shop. I find it fascinating that people are still spellbound with 1001 different extra bits for their Bf-109s, while some other equally important subjects get totally ignored. But I guess this teaches us about power of marketing and trend setting, even in a small niche such as our hobby.
Conclusion
If you read this far I hope that you share my enthusiasm for this kit. It is far from perfect, but it is also by far the most accurate I-16 type-10 available, and the only one kit of this groundbreaking Russian design in 1/32 scale. I am grateful that it exists! With a typical price of $33 (or 30 Euros) it is also a cheap kit, especially when one considers prices that some short run manufactures ask for similar quality in 1:48 scale. Kudos to Azur for subject selection, and the job well done! How about an accurate Lavockin La-5 in the same scale next?
I will definitely enjoy building this I-16 kit, and those with enough patience
can expect a full build-up review when Im done with it. For the end I would
like to thank Internet Modeler and Chris Banyai-Riepl for providing this kit
to me.