Republican Fighter "CM-262"
by Hector Mirasol
Republican Fighter "CM-262"
by Hector Mirasol
But lets start from the beginning....
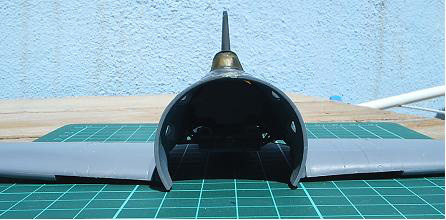
The Interior
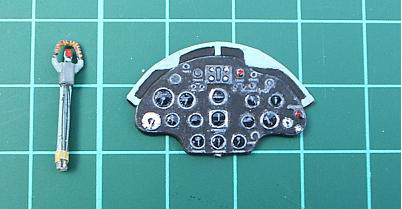
This is the area were more improvement needs to be done. When finished it is quite difficult to see, but what the heck! The instrument panel is fine-- I just painted it black, the frame of the dials in silver (just to reinforce the visual effect), the relief in white (dry brush) and finally a drop of gloss varnish to represent the glass.
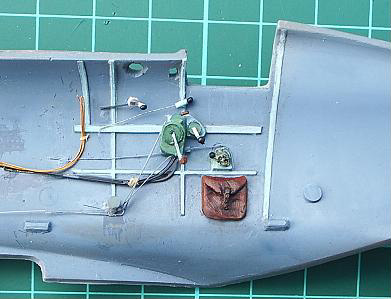
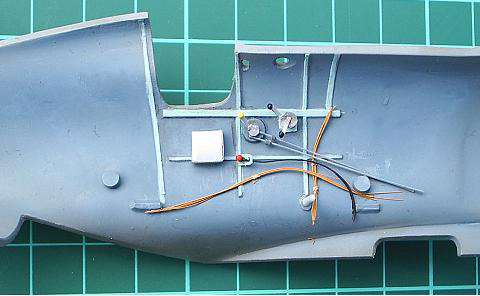
The side walls are fine. I decided to scratch build the bits and bobs, which is one of the few thing that I can manage to scratch, and I enjoy doing it. I used as a base the engraved detail in the sides, but be careful when locating the details, particularly the landing gear crank mechanism.
 |
 |
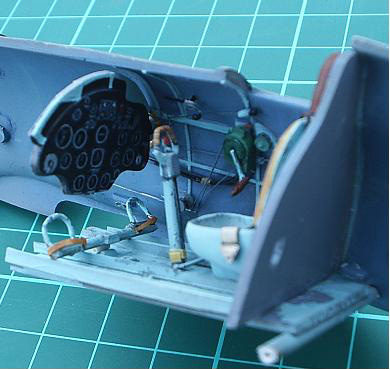 |
The floor needs to be completely redone, because it was somehow suspended from the frame. The seat is quite nicely done and the back of the seat should include the armour plate but not a solid wall as the kit has. I did not noticed it, and this is one of the mistakes I have done and realized only when it was too late.
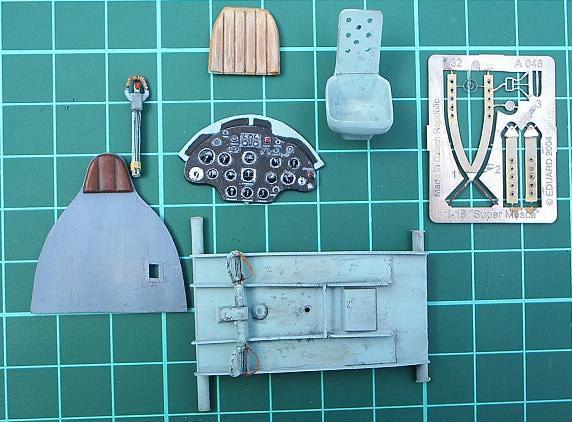
Generally speaking, I would say that this kit is screaming for a detailing set (such as the ones that masters Vill and Partidge do). Another one would be the engine. If anybody can send me a radial engine for this scale, I promise that my next one will feature an open engine compartment ( has anybody got an engine from the Gee Bee or the Williams Wedell racer in 1 /32?? ). To paint it, I used Wood universal primer and Metal universal primer for the floor, armour and seat, and then a few colour touches.
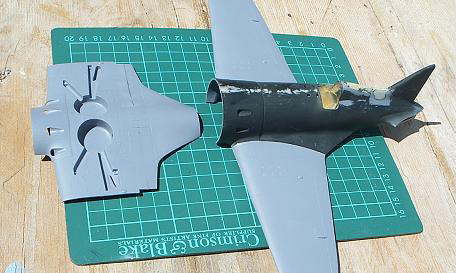
Construction
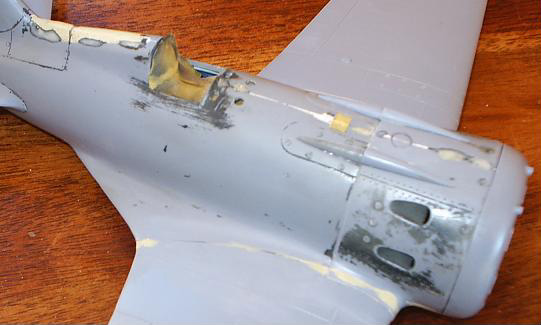
Before going any further it also advisable to engrave the details in the fuselage. That means to work on the rivets and screws that are mostly around the engine compartment and nose. Have a look at those fine details at the drawings in Erik's book [SAAFC] or in Maslov's book [Istrebitel I-16] if you have it. Also, drill the window in the wheel well of the starboard side.
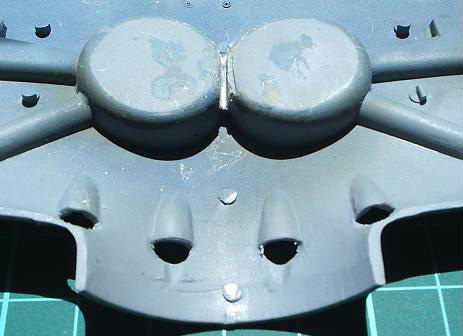
Let's think that the interior is finished. Now is time to prepare to close the fuselage (easy) and attaching the wings to the body. That is a bit more complex. This kit, funny enough, has the same tendency as the Hobby Craft 1/48 kit, which is to drop down the wingtips. That will give your Mosca a tired look, not at all as it should be. I have not bothered to measure the exact dihedral angle of the wings, but the visual affect is that the wings go slightly upwards. To achieve that it is better to cut between the wheel wells, push upwards the section ends and use some super glue to stick together the wells keeping the position right.
 |
 |
Now the Ishak is taking shape. At this stage I kept looking to the spine of the plane, and I kept finding it a bit anorexic . Please do not misunderstand me-- it is not that I can not appreciate a slim waist, in fact I quite like it, but I was not sure that was the right look. At this stage I decided to make it grow. Well, let's go to the point.... There were a few ideas in my mind. I thought on gluing plastic card and sanding it down to the real shape. Or perhaps using filler, and then sanding . That is clever. Well if you want my opinion, after spending a lot of time swearing in different languages, sanding and priming to see the effect, is not worth it. I have decided that I did take these decisions as a result of the well known Spanish heat, which is badly affecting me....

The main assembly work is now finished. The engine cover also needs some detailing. The front engine cover is nicely moulded. I-16s frequently had the ventilation openings closed in the ground, at least most of the pictures I have seen show it, but you can also see them opened. The thing is that, closed, they make the nose look too 'solid'. So, I drilled them out and scratch built the shutters in a nearly closed position (there is no engine, remember).
Finish
It is now painting time.
Before I start even gluing the first parts, I need to know which is going to be the subject. I had it clear in my mind this time.
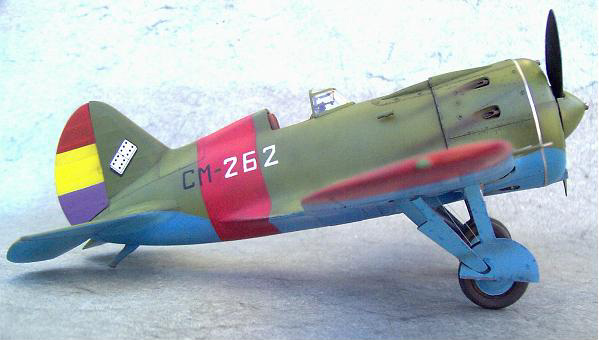
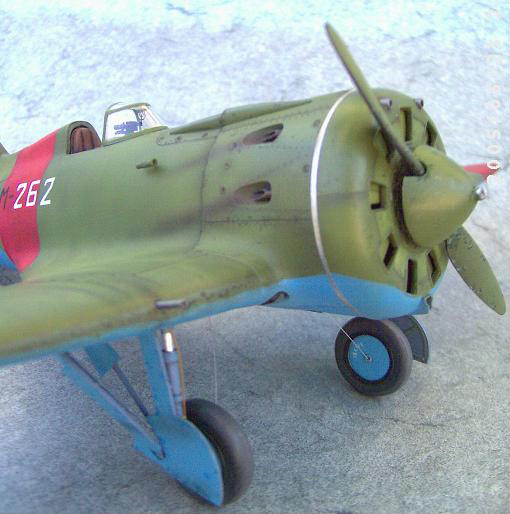
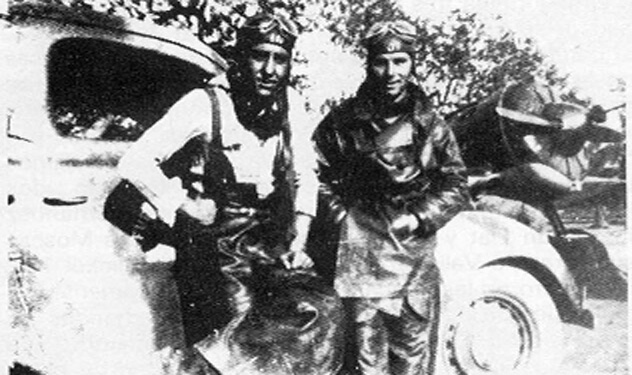
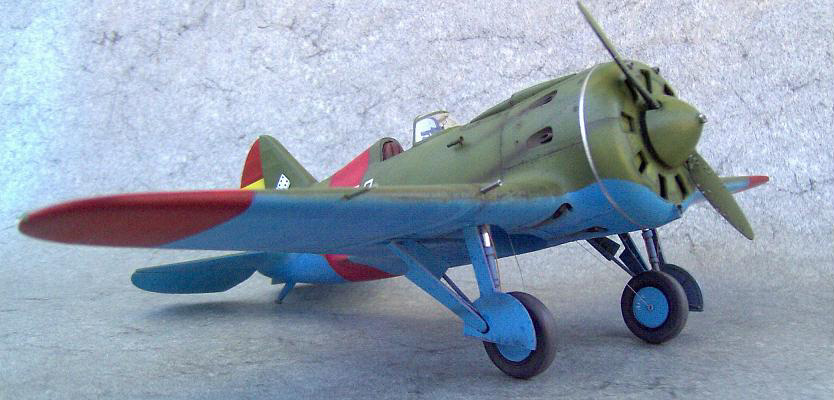
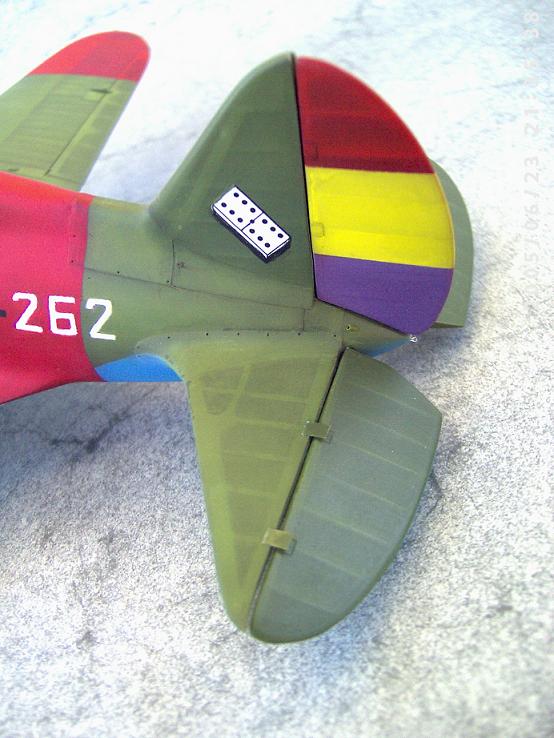
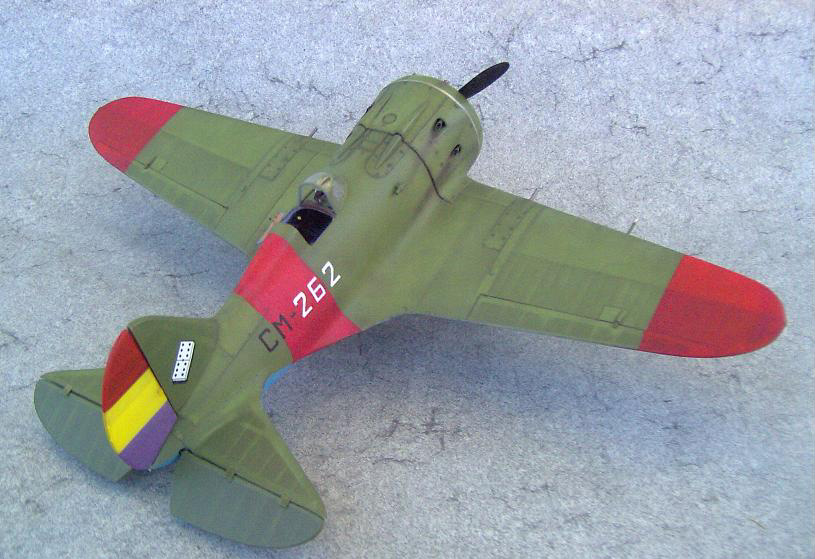
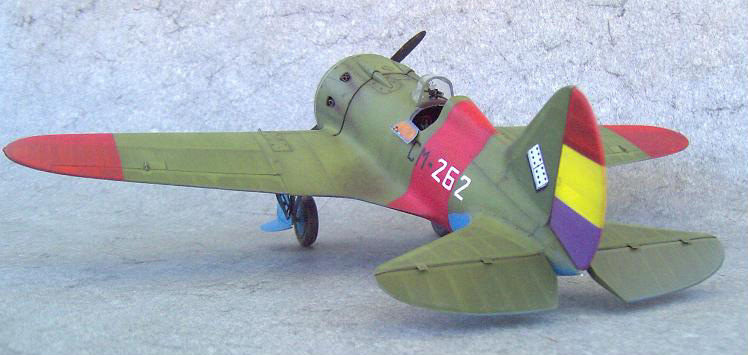
My Type 10 was going to be the Republican Spanish Mosca "CM 262". This was a Type 10 that was piloted by Angel Sanz, nicknamed 'Vallecas' (his birth place) by his friends. He trained as pilot in Kirovabad when he was just 18. He flew from 1937 to the end of the war, and was quite successful. He never forgot he was fighting a war for freedom and justice, but a civil war never the less. He does not like to talk about victories. He knew well that every time the he send down a plane, there was a man who was not going back home. But he did well his job and many Fiats and Messers could tell it. He fought during the entire Ebro Battle until the bitter end and was never downed. He was the last in command of the famous 3rd Esquadrille (the Domino double-six). After the war, as with many Spanish Republicans, the fight was not over-- he was a red, and he still is, much to his suffering in Spain. He was a good pilot, and more important, he is a good man, and I am proud on being his friend. At 83 he dances tango incredibly well.
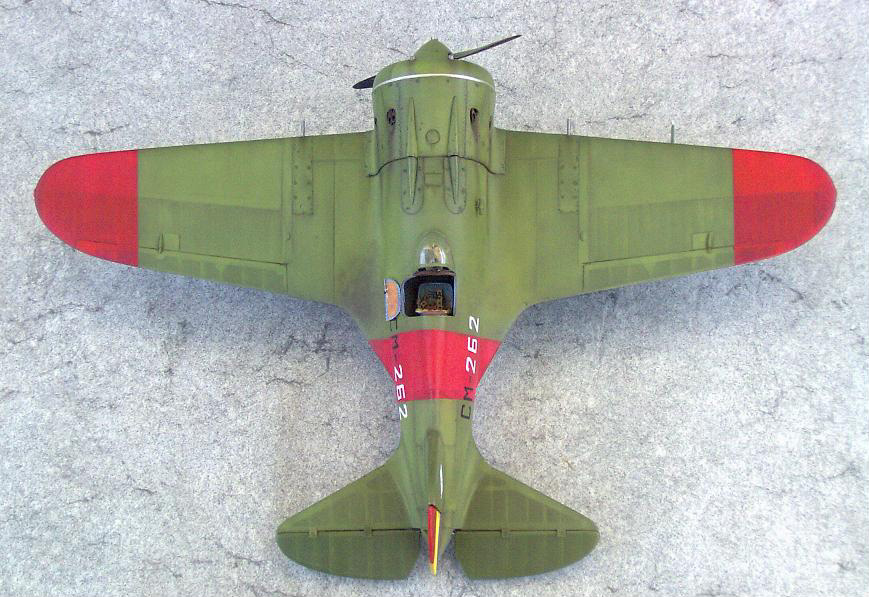
The scheme I painted was quite an easy one. Topside green and blue underneath with the Republican red bands.
There is a lot of debate about in which colour were Spanish I-16 painted. The Spanish historian Isaac Montoya has shown me several parts of wrecks painted in green which has the distinct shade on Russian green ( with a hint of yellow) but of a darker shade than AII Green. On the other hand, several mechanics and people that was actually assembling the planes and even making them have told me that the paints they were using were Soviet paints in Soviet cans. So, I can not really say and better leave this interesting theme for the experts. I have chosen to paint my model in AII Green and AII Blue, with the red bands, and moderately weathered.
My idea was to work with different shades and colour effect as I have described in previous articles. I did the paint mix myself, following the Munsell chart specifications commented in Erik's book. The blue is the typical AII shade (it seems that there is general agreement on that). Most of the effects are done free hand or using Tamiya masking tape.. I had no decals, so the numerals are hand painted. I used the double six emblem coming with the kit but painting the black base that is missing.
The model has not been varnished.
 |
 |
 |
 |
 |
Conclusion
I do recommend this kit. I think it is a very good basic model, but waiting for some nice detailing sets.