ICM 1/72nd "re-tooled" Polikarpov I-152 (I-15bis)
By Matt Bittner
ICM 1/72nd "re-tooled" Polikarpov I-152 (I-15bis)By Matt Bittner |
|
Because of not only time constraints, but also because you can find the information elsewhere, I’m forgoing a “history” on the type this time. Instead I refer the reader to the excellent book on the Polikarpov I-152 put out by Mikhail Maslov. Yes, unfortunately, it’s all in Russian, but it’s still a must. Excellent drawings and plenty of photos help with any model. While it’s not an easy book to find, I do know that Linden Hill Imports has it in stock, as does Tushino-Aviapress.
Not only will this article be a preview of the new-tool ICM Polikarpov I-152, but it will also compare it with the old-tool kit, which can also be found under the Encore label. I will show, even though the old-tool is still buildable, tracking down the new-tool kit is a must.
 The
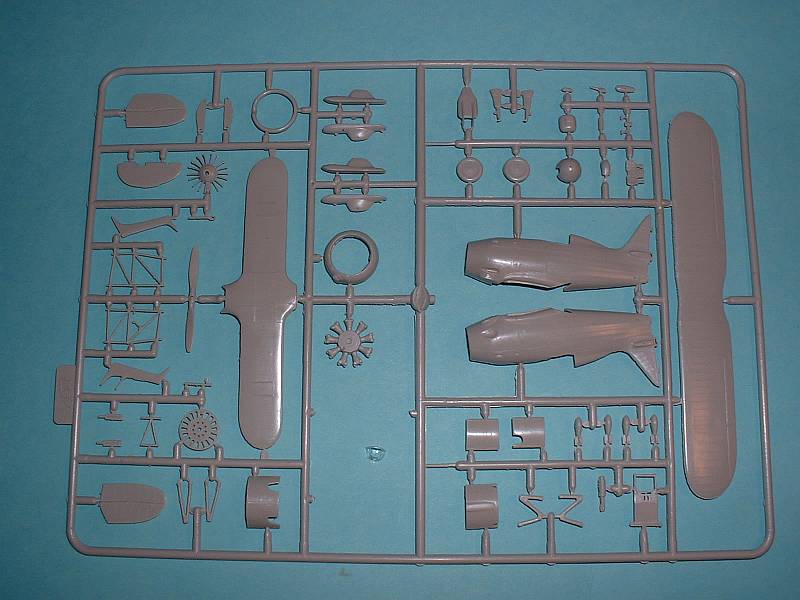
new-tool (NT) ICM Polikarpov I-152 consists of 56 light grey, plastic injected
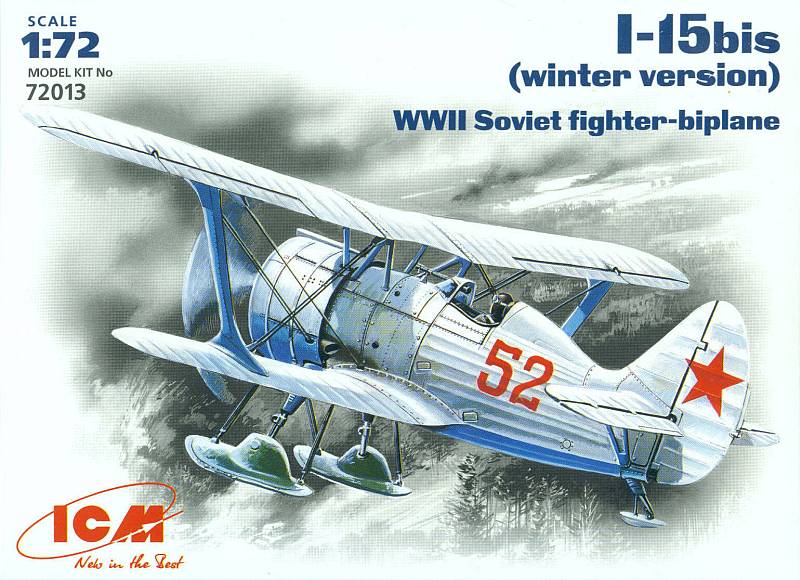
molded parts, with one clear windscreen. The kit I have – the “winter
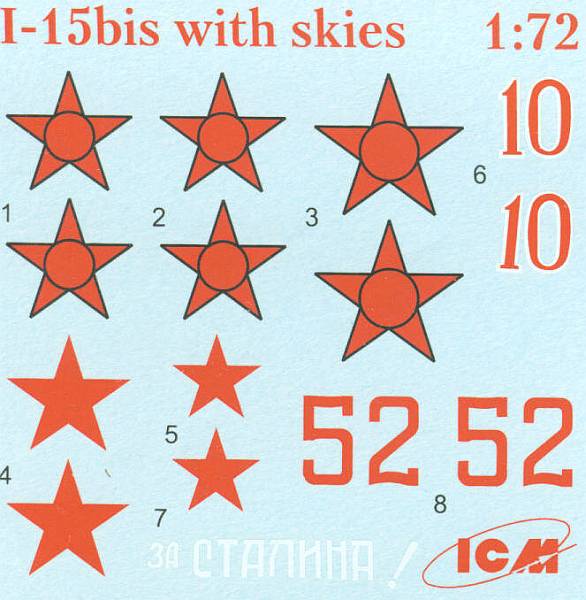
version” – consists of two sets of decals, one for a “winter
white” machine, “Red 52” during the winter of 1941-1942; the
other scheme is for “Red 10”, an AII Green over AII Blue machine of
the 13th OAE (Independent Squadron) of the Baltic Fleet Air Force, December
1940. Decals are in-register and wonderfully printed.
The
new-tool (NT) ICM Polikarpov I-152 consists of 56 light grey, plastic injected
molded parts, with one clear windscreen. The kit I have – the “winter
version” – consists of two sets of decals, one for a “winter
white” machine, “Red 52” during the winter of 1941-1942; the
other scheme is for “Red 10”, an AII Green over AII Blue machine of
the 13th OAE (Independent Squadron) of the Baltic Fleet Air Force, December
1940. Decals are in-register and wonderfully printed.
 First
I’ll highlight the NT kit. Construction naturally starts with the cockpit
that consists of 14 exceptionally detailed parts that build up into a very comprehensive
and complete cockpit – sans seat belts. While the instructions have you
glue the tailskid on prior to closing up the fuselage halves, I personally would
leave it off until close to last, if not after all painting has been accomplished.
First
I’ll highlight the NT kit. Construction naturally starts with the cockpit
that consists of 14 exceptionally detailed parts that build up into a very comprehensive
and complete cockpit – sans seat belts. While the instructions have you
glue the tailskid on prior to closing up the fuselage halves, I personally would
leave it off until close to last, if not after all painting has been accomplished.
 Once
the fuselage is assembled then construction continues with the addition of the
rudder (not sure if the fit warrants leaving this off until after painting,
if the machine you’re modeling had a different color rudder) and all the
pieces (12) that make up the engine and the cowl. After that is accomplished
than the rest of the bits are added, wings, struts, wheels/skis, etc. If you’ve
built biplanes before you know that you want to leave off the upper wing until
painting is finished. There is another area that needs to be checked. On the
OT kit the interplane struts didn’t fit well and needed to be blended in
and repainted. As I have yet to build the NT kit I’m not sure if this is
an issue or not.
Once
the fuselage is assembled then construction continues with the addition of the
rudder (not sure if the fit warrants leaving this off until after painting,
if the machine you’re modeling had a different color rudder) and all the
pieces (12) that make up the engine and the cowl. After that is accomplished
than the rest of the bits are added, wings, struts, wheels/skis, etc. If you’ve
built biplanes before you know that you want to leave off the upper wing until
painting is finished. There is another area that needs to be checked. On the
OT kit the interplane struts didn’t fit well and needed to be blended in
and repainted. As I have yet to build the NT kit I’m not sure if this is
an issue or not.
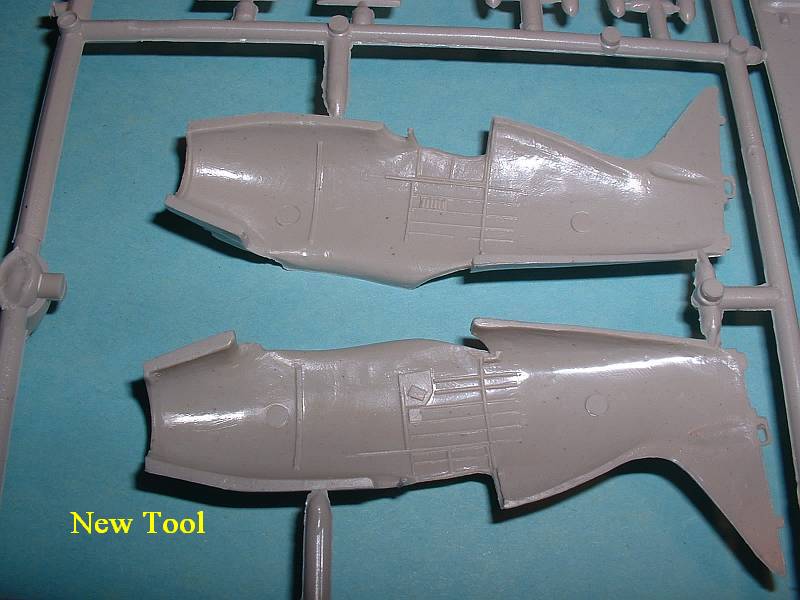
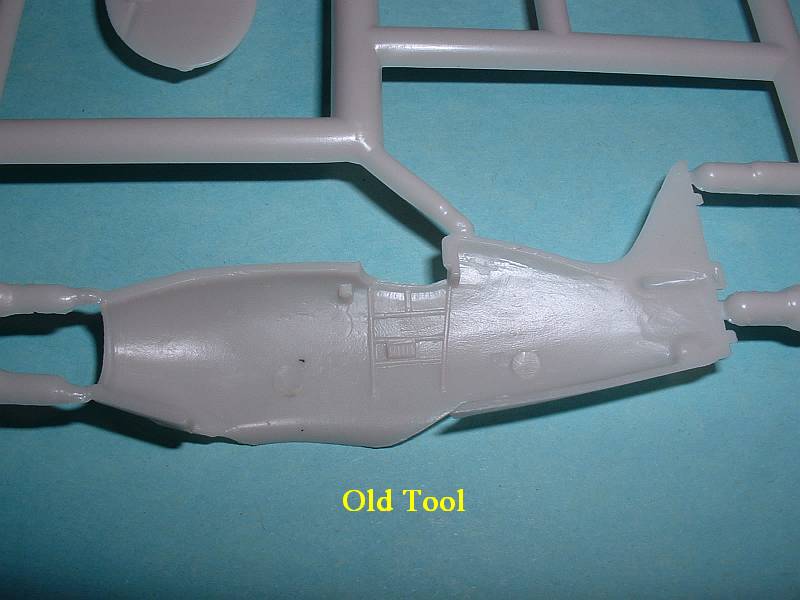
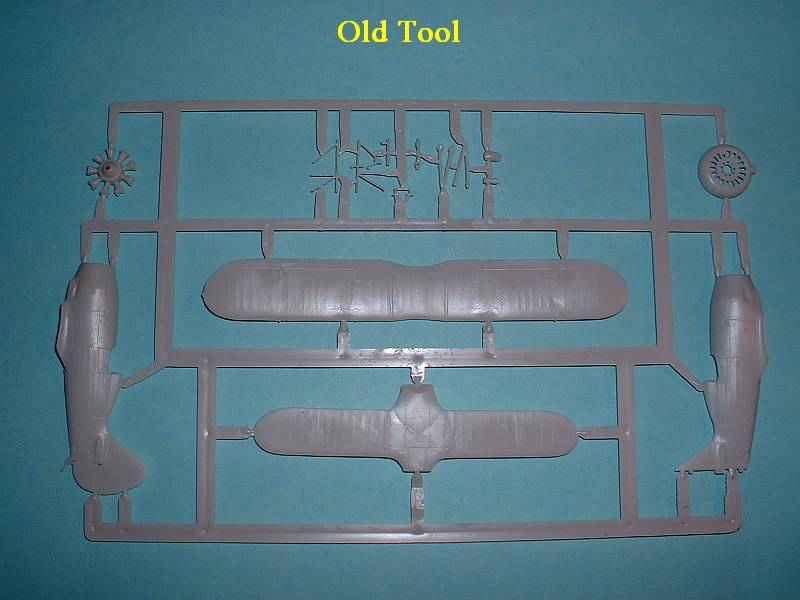
Now I’ll compare the NT against the OT kit. The first noticeable difference is that this mold does not have the molded-in fabric effect which made the OT suffer. All surface detail is exceptional on the NT and is done too scale.
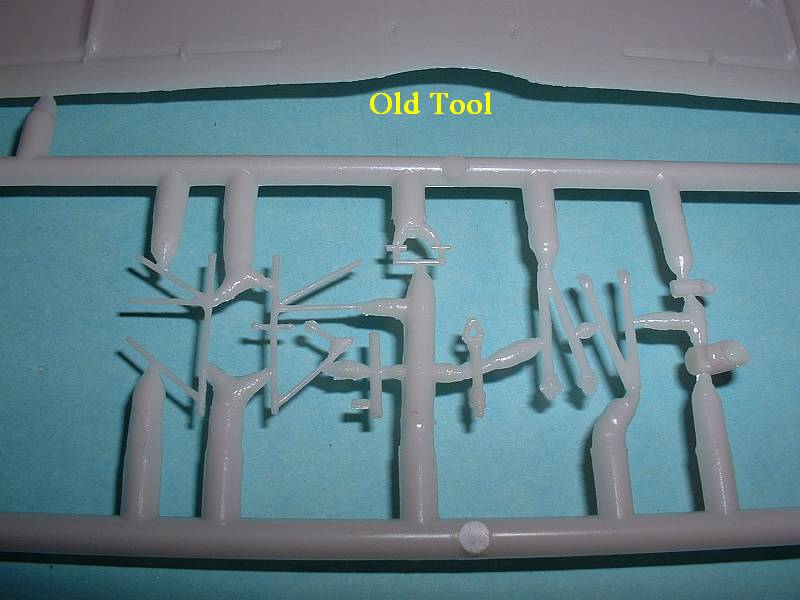
 I’ll
turn next to the cockpit and cockpit pieces. The NT is much more comprehensive
and much more too scale. Like the OT kit, though, you’ll have to take your
time and carefully remove the cockpit pieces – especially the side tubular
structure – from the sprue. Best to use a saw and do not cut these pieces
from the sprue with the nippers. Not only are the extra parts exceptional but
also so is the sidewall detail.
I’ll
turn next to the cockpit and cockpit pieces. The NT is much more comprehensive
and much more too scale. Like the OT kit, though, you’ll have to take your
time and carefully remove the cockpit pieces – especially the side tubular
structure – from the sprue. Best to use a saw and do not cut these pieces
from the sprue with the nippers. Not only are the extra parts exceptional but
also so is the sidewall detail. 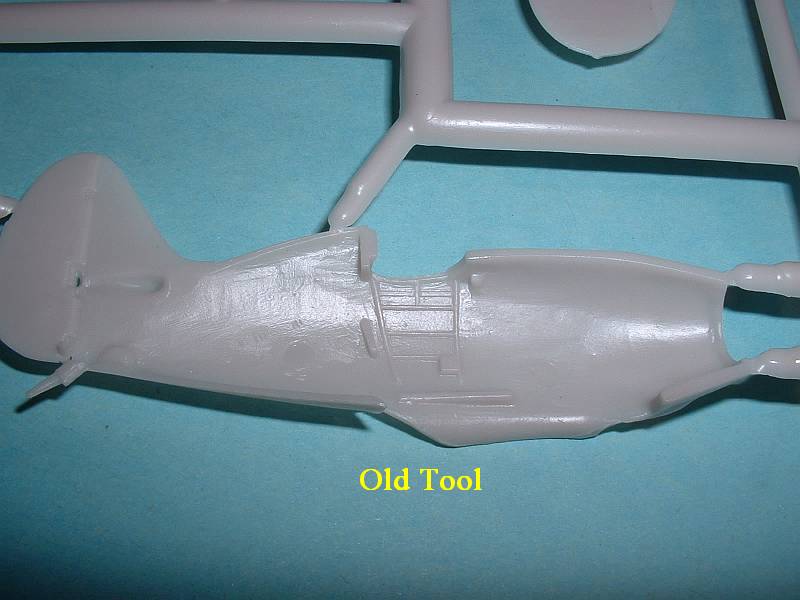 The
NT kit really shines in the cockpit area and the only thing missing are seat
belts. Due to the small nature of the I-152 cockpit nothing else is needed.
However, if someone were to come out with a photoetch set for the NT kit than
it would at least need to contain a new instrument panel (with the prerequisite
clear film for the instruments), as well as seat belts and bomb sway braces
(more on this later).
The
NT kit really shines in the cockpit area and the only thing missing are seat
belts. Due to the small nature of the I-152 cockpit nothing else is needed.
However, if someone were to come out with a photoetch set for the NT kit than
it would at least need to contain a new instrument panel (with the prerequisite
clear film for the instruments), as well as seat belts and bomb sway braces
(more on this later).
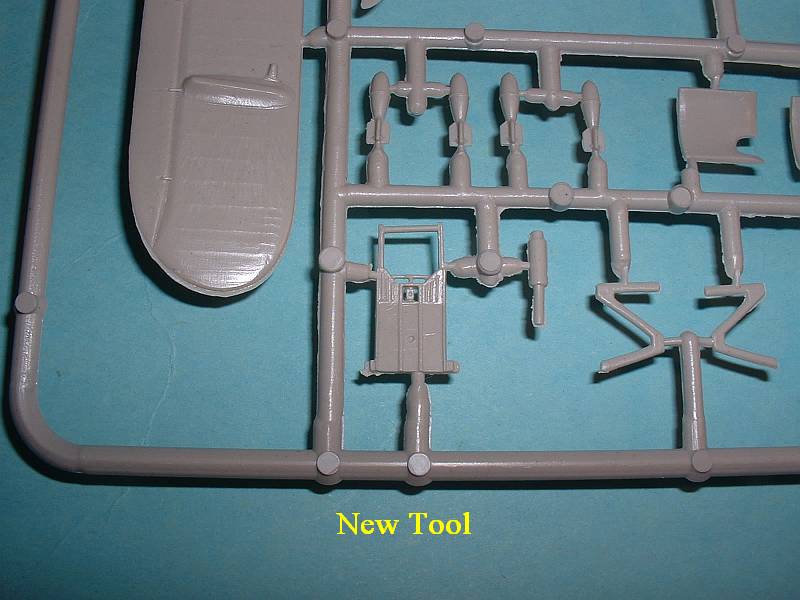
Moving onto the forward fuselage assembly – cowl and engine – again
the NT kit really shines. There are a few more parts on the NT kit, but more
importantly everything is much finer and looks 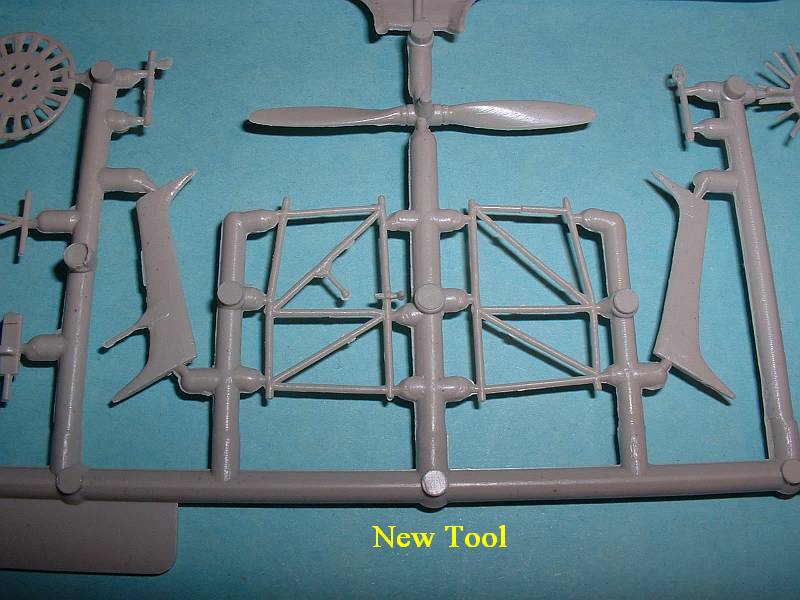
 much
better. The NT comes with a separate “wiring harness” as well as a
separate “face plate” for the front cowl, making it much more too
scale. In addition, while not completely hollow, both the exhaust and the oil
cooler intake are “dimpled in” giving the impression that these are
hollow. (For the truly AAMS afflicted Moskit
offers their trademark hollow metal exhausts (and oil cooler intake) for the
I-152.) One item of importance I realized too late in my OT
build, the oil cooler intake is just that – an intake – and should
not have any exhaust stains in nor around this area. The exhaust is on the port
side while the oil cooler intake is on the starboard side.
much
better. The NT comes with a separate “wiring harness” as well as a
separate “face plate” for the front cowl, making it much more too
scale. In addition, while not completely hollow, both the exhaust and the oil
cooler intake are “dimpled in” giving the impression that these are
hollow. (For the truly AAMS afflicted Moskit
offers their trademark hollow metal exhausts (and oil cooler intake) for the
I-152.) One item of importance I realized too late in my OT
build, the oil cooler intake is just that – an intake – and should
not have any exhaust stains in nor around this area. The exhaust is on the port
side while the oil cooler intake is on the starboard side.
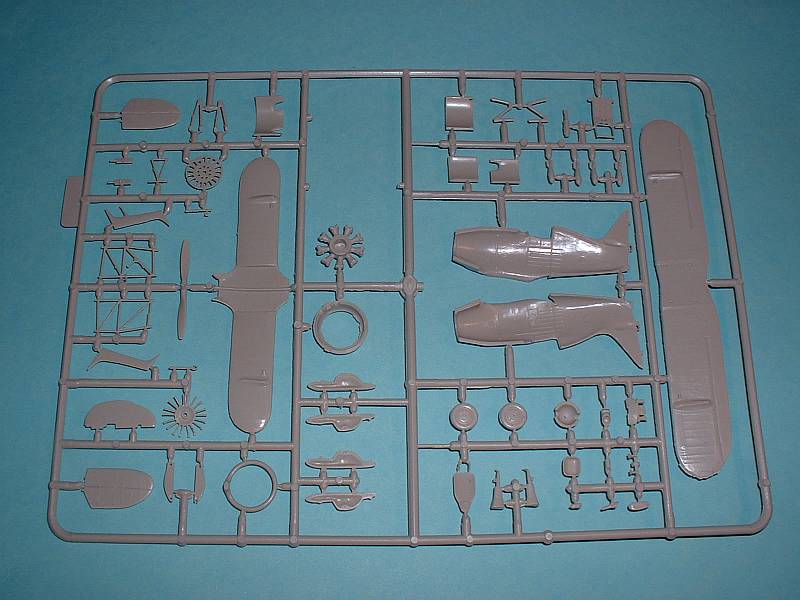
 Now
it’s time to look at the rest of the kit. As I already mentioned the external
detail and appearance of the NT kit is far superior to the OT. The rudder is
separate in the NT kit thus eliminating the surgery I performed to bring this
area up to standards. The skis are definitely molded better and contain the
mounting brackets for the forward and rear bungee that were completely left
off the OT kit. The struts are nicer and much more fine than the OT kit.
Now
it’s time to look at the rest of the kit. As I already mentioned the external
detail and appearance of the NT kit is far superior to the OT. The rudder is
separate in the NT kit thus eliminating the surgery I performed to bring this
area up to standards. The skis are definitely molded better and contain the
mounting brackets for the forward and rear bungee that were completely left
off the OT kit. The struts are nicer and much more fine than the OT kit.
There is one addition and one removal from the NT kit. First, the addition is four nicely molded FAB-50 bombs, the only thing missing are the sway braces (although ICM does try to mold a semblance of them on the bombs themselves). The removal from the NT kit is the spats for the wheels – the OT kit has them, the NT does not. This is actually not a big deal because the majority of I-152s flew without spats.
 Even
though the Encore reboxing of the ICM OT kit is usually found for around US$.99
- US$1.99 each, there is plenty of work to bring the OT kit up to the NT level
that spending the extra money on the NT kit is worth it. While not yet available
for purchase in the US, I suspect the NT kit will go for around US$8 each. Not
a bad price considering how expensive other kits are lately, and likely to be
more expensive given the rising rate of the price of oil.
Even
though the Encore reboxing of the ICM OT kit is usually found for around US$.99
- US$1.99 each, there is plenty of work to bring the OT kit up to the NT level
that spending the extra money on the NT kit is worth it. While not yet available
for purchase in the US, I suspect the NT kit will go for around US$8 each. Not
a bad price considering how expensive other kits are lately, and likely to be
more expensive given the rising rate of the price of oil.
I personally feel the latest ICM kits – starting with the Polikarpov I-5 and continuing with the Polikarpov I-152 – are better than anything Tamiya or Hasegawa has to offer. When was the last time you saw a complete cockpit in a Hasegawa kit? I have yet to find one.
All in all the NT Polikarpov I-152 by ICM is an awesome kit, and I cannot wait
to start it. They have taken something they already produced and improved it
200%. Some companies have  remolded
parts of their kits due to accuracy issues, etc., but when was the last time
you saw a major kit producer retool an entire kit? ICM is to be commended on
this and their effort definitely shows in the final product. If biplanes and/or
VVS-types are your “cuppa”, then you must track down and purchase
the NT I-152. I have about six OT kits and definitely will be replacing all
of them, even though I’m out that money. I feel it’s better to be
out that money than to be out of the time spent on getting the OT kit “up
to snuff”. The ICM NT I-152 is definitely highly recommended.
remolded
parts of their kits due to accuracy issues, etc., but when was the last time
you saw a major kit producer retool an entire kit? ICM is to be commended on
this and their effort definitely shows in the final product. If biplanes and/or
VVS-types are your “cuppa”, then you must track down and purchase
the NT I-152. I have about six OT kits and definitely will be replacing all
of them, even though I’m out that money. I feel it’s better to be
out that money than to be out of the time spent on getting the OT kit “up
to snuff”. The ICM NT I-152 is definitely highly recommended.
The ICM catalog shows them doing the Polikarpov I-15. Excellent!! If done to the degree of their I-5 and NT I-152 than it’s going to be a stunner and far better than the Pavla or the Azur/Special Hobby kit. I am extremely looking forward to it.
The last bit I have to offer is a huge plea to ICM. Please, please, please produce a Polikarpov I-153. Please? There exists no accurate 1/72nd I-153 kits and the ones that do exist only produce one version of the aircraft. The 1/72nd VVS world desperately needs a new I-153 and given how their I-5 and I-152 came out, ICM is the most logical choice for producing a new kit. What do you say, ICM?