|
Chayka Comparison - 1/72nd Polikarpov I-15sBy Matt Bittner |
|
|
Chayka Comparison - 1/72nd Polikarpov I-15sBy Matt Bittner |
 I've
decided to forgo a typical history section this time because I want to bring
everyone's attention to an excellent historian - whom just happens to author
the definitive history on the Polikarpov I-15. So far, each and every one of
Mikhail Maslov's titles have been goldmines of information. He has a title out
on each of the I-15 series (I-15, I-152 and I-153) as well as a few others (for
example, idigenenous Russian WW1 designs) that are top-notch and well researched
pieces of history. Unfortunately only the WW1 book has been translated into
English, but that should not stop anyone from purchasing his books.
I've
decided to forgo a typical history section this time because I want to bring
everyone's attention to an excellent historian - whom just happens to author
the definitive history on the Polikarpov I-15. So far, each and every one of
Mikhail Maslov's titles have been goldmines of information. He has a title out
on each of the I-15 series (I-15, I-152 and I-153) as well as a few others (for
example, idigenenous Russian WW1 designs) that are top-notch and well researched
pieces of history. Unfortunately only the WW1 book has been translated into
English, but that should not stop anyone from purchasing his books.
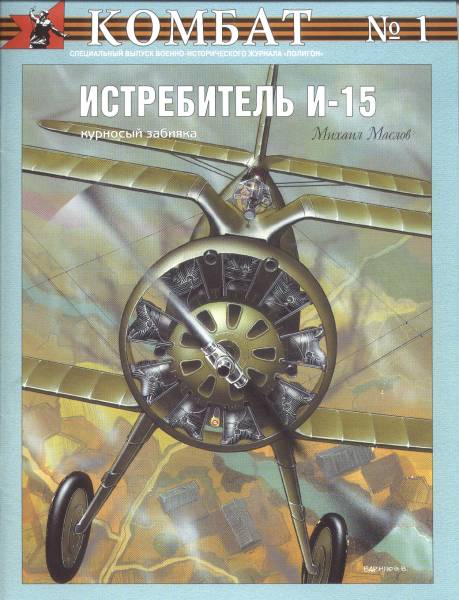
To keep on topic, Maslov's I-15 book not only covers the full history written in Russian, but also contains numerous period photographs and - most importantly - scale drawings that are considered the best and most accurate. Another unfortunate is that most of his books are difficult to obtain and you have to be willing to look for them. Two web sites I know of that carry his books are Linden Hill Imports (LHI) and Tushino-Aviapress out of Russia. LHI shows this I-15 book - as well as the I-152 book - as being in stock (unfortunately the I-153 book isn't in stock). Tushino-Aviapress lists all three (I-15, I-152 and I-153) as being in stock.
This is not going to be a standard Internet Modeler review. What I want to present in this review is an overview of the three 1/72nd I-15s that are currently on the market today - Aviation Usk, Pavla and Azur. Each has its own merits - and each has its own faults, as well. I will show that there exists no one perfect 1/72nd I-15 out of the box, but one can get there with the information I hope to provide.
 |
 |
 |
When I first show the contents of each kit, I will present the images contiguously. That way one has a sense of what comes in each of the packages. In addition, I also provide images of both sides of the sprue. That way you can see exactly what the plastic shows on both the "outside" and "inside".
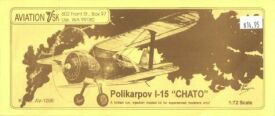
 Starting
with the first released, the Aviation Usk (AvUsk) kit is a few years old. The
one I was given by them a few years ago was one prior to them adopting their
new box style (as opposed to just the header card I show here). I was also given
a set of their I-15 decals. I'm unsure of their availability now but they could
be worth trying to track down. The AvUsk kit consists of 32 white injected molded
plastic as well as six clear vacuformed pieces (everything being doubled in
case the knife slips). That's it. No bells and whistles in this kit which isn't
entirely a bad thing.
Starting
with the first released, the Aviation Usk (AvUsk) kit is a few years old. The
one I was given by them a few years ago was one prior to them adopting their
new box style (as opposed to just the header card I show here). I was also given
a set of their I-15 decals. I'm unsure of their availability now but they could
be worth trying to track down. The AvUsk kit consists of 32 white injected molded
plastic as well as six clear vacuformed pieces (everything being doubled in
case the knife slips). That's it. No bells and whistles in this kit which isn't
entirely a bad thing.
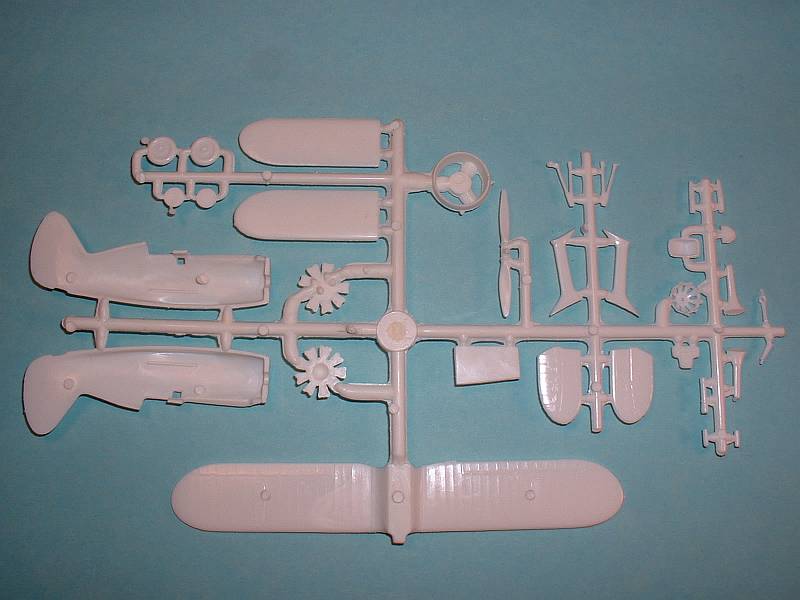 Surface
texture is fair with detailing decently represented. The most unfortunately
molding "blemish" are the two injected "mounds" on the underside
of the upper wing close to where the interplane struts meet. These will have
to be sanded away and unfortunately you'll lose a little bit of the surrounding
detail. However, I'm hoping that with careful enough sanding the loss will be
minimal.
Surface
texture is fair with detailing decently represented. The most unfortunately
molding "blemish" are the two injected "mounds" on the underside
of the upper wing close to where the interplane struts meet. These will have
to be sanded away and unfortunately you'll lose a little bit of the surrounding
detail. However, I'm hoping that with careful enough sanding the loss will be
minimal.
Now don't let the lack of most interior pieces push you away from this kit. Lately the ICM/Encore I-152 has been on sale from either US$1.99 to US$.99 each. Well worth the money to pick up one or two to be used just as pieces-parts for other I-15x series aircraft. In fact I already have done that and whenever I get to the AvUsk kit my plan is to use those pieces.
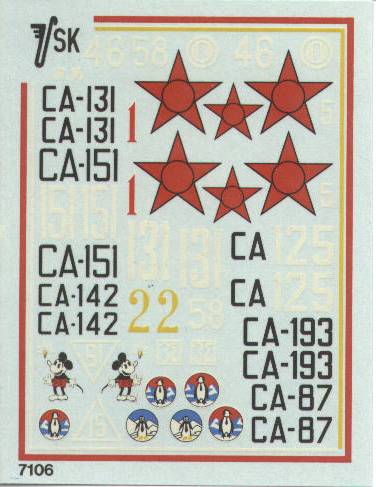 The
separate decals consist of markings for 9 Republican Spain aircraft as well
as 3 Soviet. However, only one set of red stars are provided, so if you truly
want to build all three, you'll need to track down stars elsewhere.
The
separate decals consist of markings for 9 Republican Spain aircraft as well
as 3 Soviet. However, only one set of red stars are provided, so if you truly
want to build all three, you'll need to track down stars elsewhere.
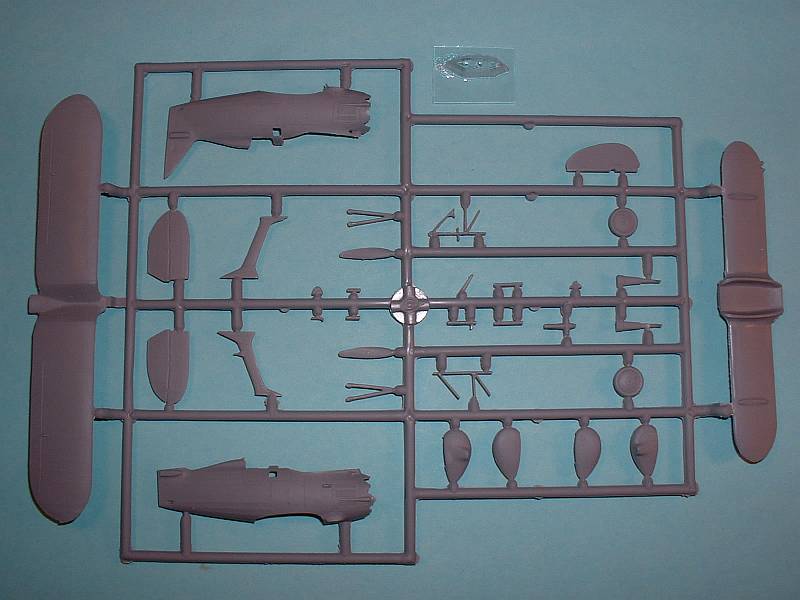
Next up is the Pavla kit. This was released a few months ago and comes with 30 injected plastic pieces, 2 vacuform (for the windscreen only - the smaller windows to give light into the cockpit will have to be either scratched out of clear sheet or the use of something like Kristal Kleer filling the holes), and 10 superbly molded resin.
Surface detail on the plastic pieces is nicely done; however, the entire surface has a "pebbly" texture to it that may or may not be able to be hidden with the proper application of paint. I would hate to have to sand off all this texture which will undoubtly sand all the surrounding detail as well.
 |
 |
 |
I could find no pinholes are airholes in any of the resin pieces and the quality of Pavla resin has increased tremendously since they first showed up on the market.
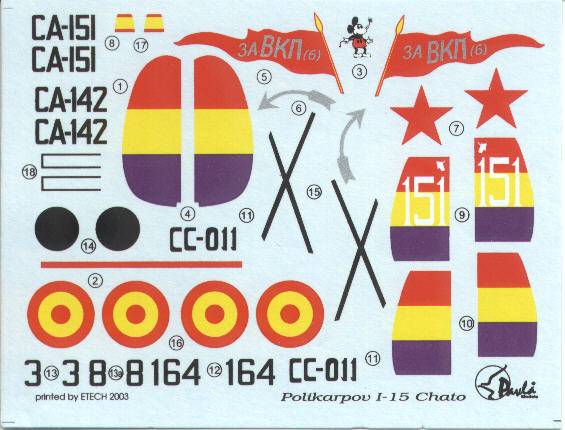 Markings
are for three Republican Spain machines, one Nationalist captured example as
well as Pavlov's AII Aluminum-Dope and red Soviet example. Decals are well done
and in register. However, I'm still researching if the arrow and wording on
the red banner of Pavlov's machine were in silver, like represented on the decals,
or were actually white. According to the color profile in Maslov's book these
should be white and not silver.
Markings
are for three Republican Spain machines, one Nationalist captured example as
well as Pavlov's AII Aluminum-Dope and red Soviet example. Decals are well done
and in register. However, I'm still researching if the arrow and wording on
the red banner of Pavlov's machine were in silver, like represented on the decals,
or were actually white. According to the color profile in Maslov's book these
should be white and not silver.
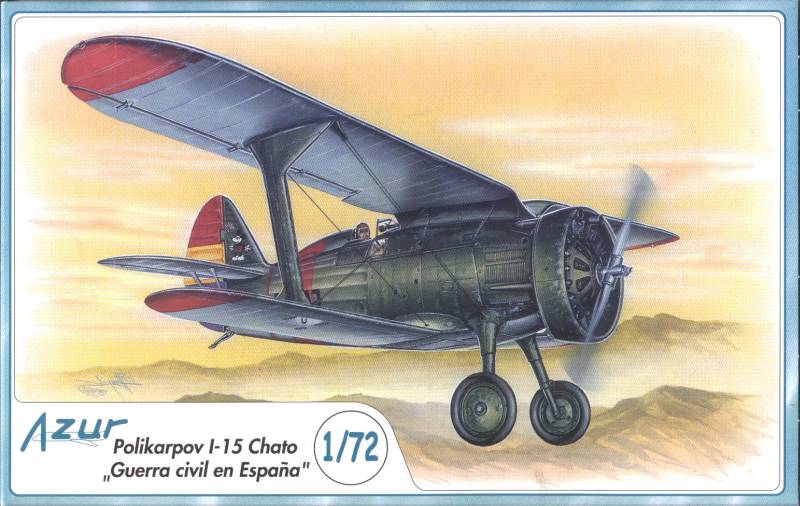
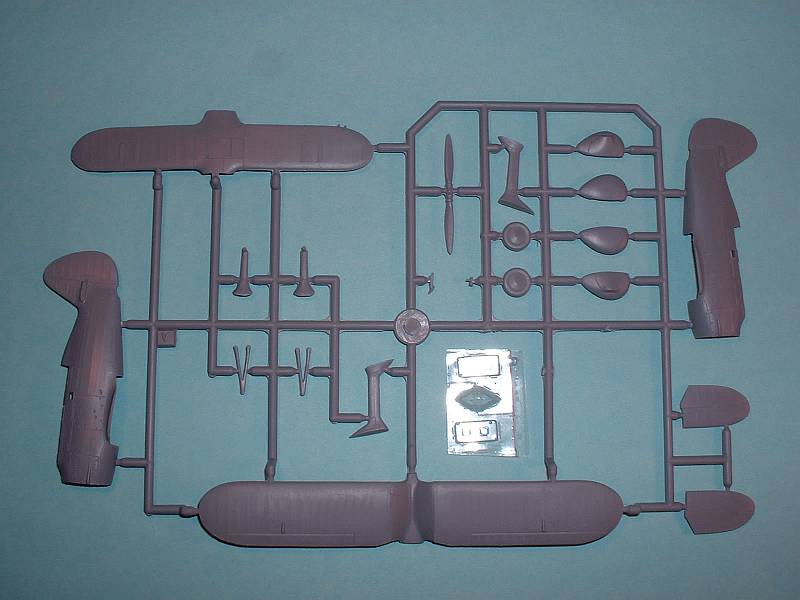
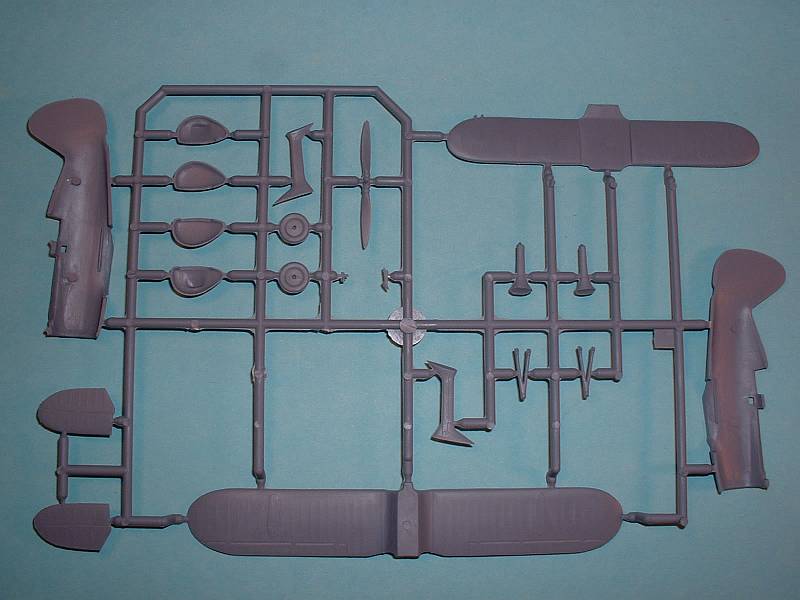
Azur is the most recent release, being out for only a couple of months. This kit consists of 21 injected plastic pieces, six vacuform (they provide doubles for everything, including the smaller windows), 9 resin pieces, one photoetch fret (of 9 pieces of brass) and one clear film (for the instrument dials).
 |
 |
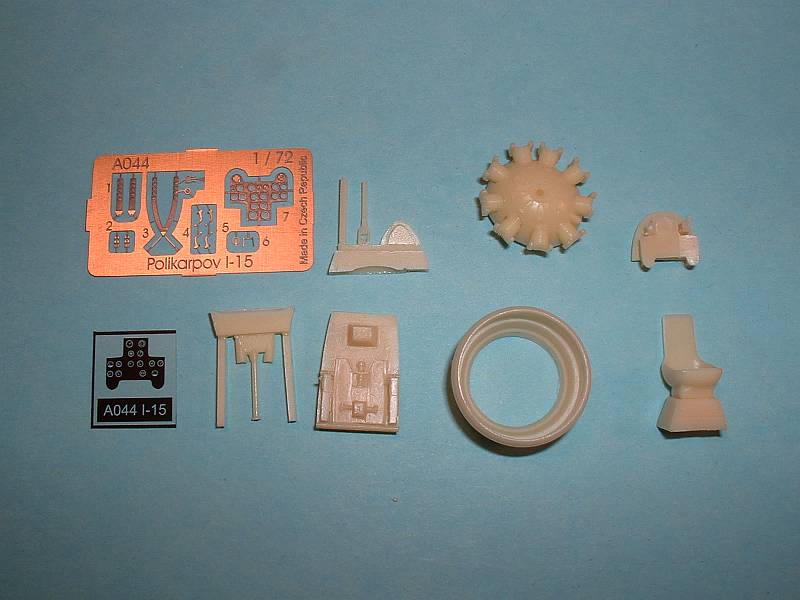 |
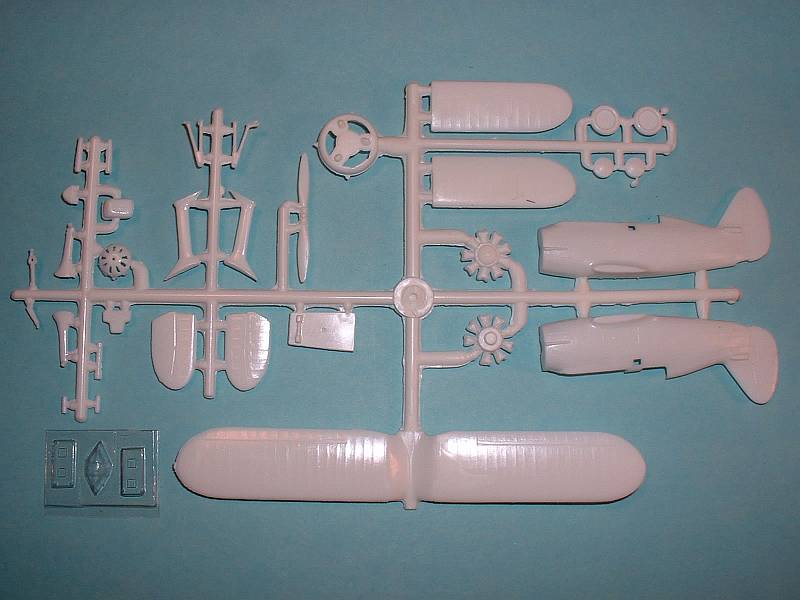
 Surface
detail on the plastic pieces is very well done and has a smooth finish. I could
not find any pinholes nor airholes on these resin pieces as well. Parts on the
brass fret include seat belts, instrument panel and a few other smaller pieces.
Surface
detail on the plastic pieces is very well done and has a smooth finish. I could
not find any pinholes nor airholes on these resin pieces as well. Parts on the
brass fret include seat belts, instrument panel and a few other smaller pieces.
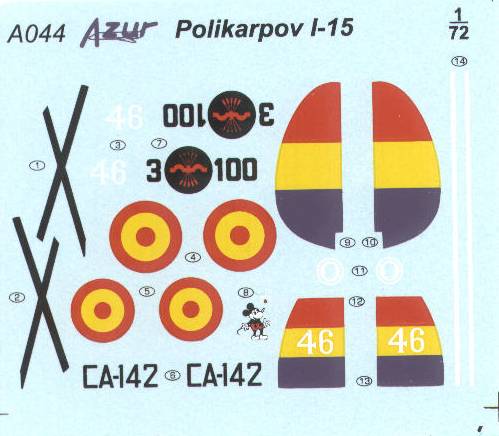
Decals are for two Republican Spain machines as well as one of the Spanish Francoist air force, post Spanish Civil War.
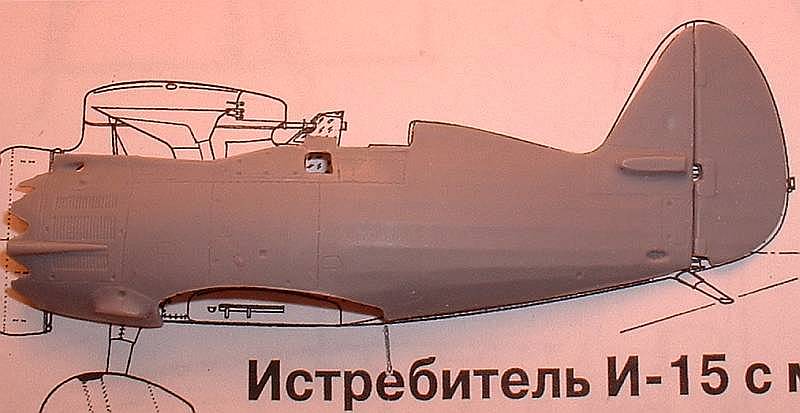
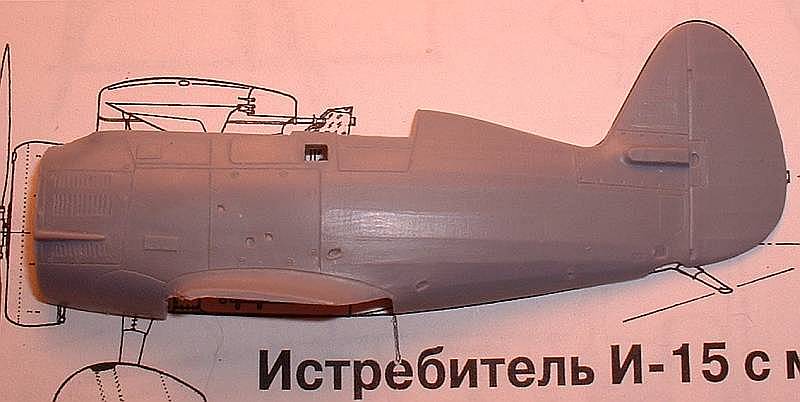
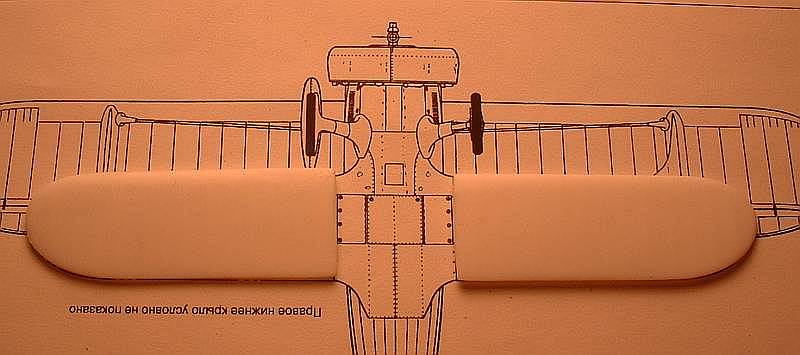
After scaling down Maslov's drawings to 1/72nd (naturally measuring them to be sure they were accurate) I used them to show just how the kits stack up, outline-wise. You can see in the images the results of placing one fusleage half on the drawing.
The worst offender is the AvUsk kit - it is too small in the rear most, upper fuselage area as well as the fin and rudder. If you build the AvUsk kit will it look like an I-15? You bet! However, if you place it next to one of the other kits then it's obvious (at least for the fin/rudder) it's a little smaller.
|
AvUsk |
Pavla |
Azur |
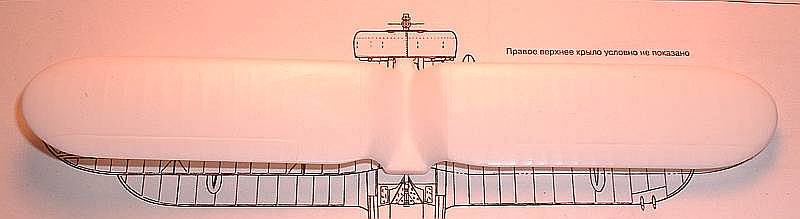
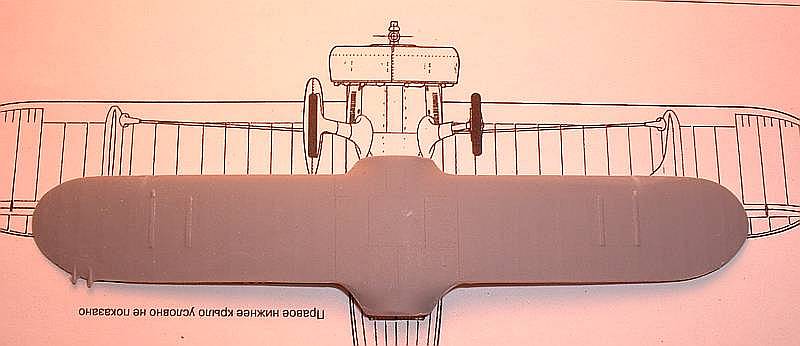
Again from the images you can see that all three upper wings are very accurate. The only way that one is better than the other is in the details. For example, the aileron actuator that sticks "out" of the wing and meets the aileron is a smidge too big on the Azur kit - and doesn't exist on the AvUsk one. The underside of the aileron/wing joint again, Pavla has correct with raised detail while the others do not.
However, all three fail in what the aileron/wing joint line was truly like. In all photos I have seen of I-15x series aircraft there is noticeable light between the aileron and the wing at the joint line. I can kind of see their rationale for not doing this. First, in 1/72nd, the gap would be small. Second, it may cost more money to mold the ailerons as separate pieces (although Roden has done it with their Fokker Dr.I).
|
AvUsk |
Pavla |
Azur |
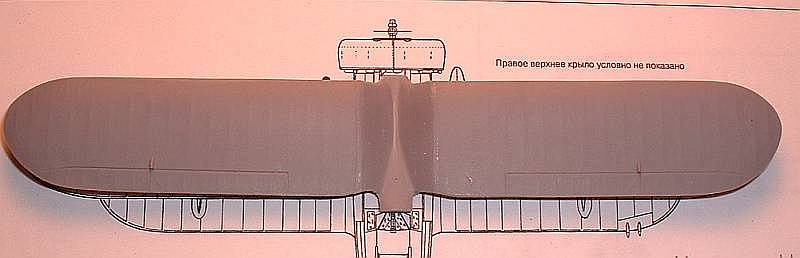
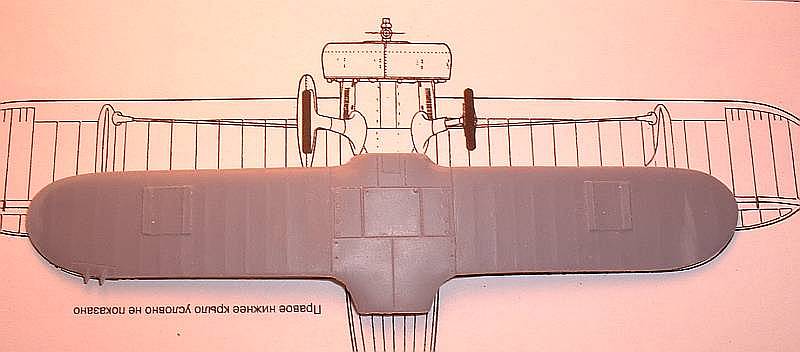
The images show that, again, the Pavla lower wing is the most accurate, although there are less differences between the three (aside from the AvUsk being in two pieces). It is the smaller "stuff" that makes the Pavla wing just a little better.
One item worth mentioning. I read a preview of the Pavla kit that states "carefully remove the raised representations of bomb rack attachments." I would not. I have yet to see an image of an I-15 with these pieces not installed, and they show up on Maslov's drawings. In addition, you could lose some of the surrounding detail.
|
AvUsk |
Pavla |
Azur |
Since the AvUsk does not contain any smaller details, there isn't any comparison there. However, between the other two Pavla would have to be the winner. Just the overall finesse to the parts as well as the detail pushes them above Azur. One thing the Azur kit has that the Pavla doesn't is the photoetch, and the instrument panel - at least - is best served as a photoetch piece with the film insert. One aspect that is very nice with the Pavla is the separate engine and engine face. The Azur kit is one piece it just doesn't have the finesse the Pavla separate pieces do.
One aspect of the Pavla kit that struck me as interesting is how the struts fit to the major parts. On the Pavla kit a very small part of the strut resides on the major part which means that if there are fit problems, you will be dealing with seams more on the strut instead of the possible difficult aspect of cleaning up a seam on the major part. Granted, this has yet to be seen until construction starts.
All parts from all three kits should be removed with a razor saw and not your usual parts nippers. The attachement points are thick and you run the risk of marring the piece you're trying to remove. I was able to successfully use the cordless Dremel to remove the leftovers of parts removal. This was nice because I usually lose some surface detail and it takes a little longer by using just sandpaper.
I did dryfit the wings to the fuselage of all three kits. All three will require a bit of dryfit to get the parts to mate close to perfect but it's worth it if you can glue the parts together without too much of a seam to deal with. One aspect that threw me off until I looked closer at it. There is an air intake in front of the upper wing right behind the cowl. The AvUsk and Azur kits mold this with the upper wing; the Pavla kit has this as part of both the upper wing and the fuselage. The AvUsk and Azur kit will need to be hollowed out while the Pavla kit will just need some sanding to achieve a good looking intake.
Unfortunately there still doesn't exist the "perfect" I-15 kit - out of the box - in 1/72nd. However, you can get there. If it wasn't for the "pebbly" texture of the Pavla kit I would give overall nods to it. Until something can be figured out to get rid of this texture without ruining the surrounding detail I can't say that "Pavla is it". Even so, a photoetch set would benefit it. So, if you have the money, buy both the Azur and the Pavla kit and combine the two. Use the plastic from the Azur (unless something can be figured out about Pavla's texture) with the Pavla resin and the Azur photoetch. This could result in the best, overall I-15.
This doesn't mean the Aviation Usk kit isn't workable - it definitely is. If
you already own it then buy an Encore I-152 and use its cockpit pieces then
work the kit. You do not have to worry about the fuselage inaccuracies, especially
if it's a "lone" I-15.
Istrebeitel I-15, Mikhail Maslov, ISBN 1680-0680 (the rest is in Russian, unfortunately)