Dive Bomber ChroniclesBy Alex Ruchkovsky |
The history of the Pe-2 Soviet dive bomber was by all means a drama, and at certain moments, even a tragedy. The plane's concept was revolutionary for the contemporary aviation industry of the Soviet Union; its design was innovative and sophisticated. The plane started its life as a high-altitude fighter which was then converted into a dive bomber but had to take up the "inborn" fighter role many times in its combat career. When designing the plane later to be named the Pe-2, V.Petlyakov was a prisoner of a special penitentiary institution for engineers ridiculously accused of treason, espionage and political unloyalness, things so common for the thirties in my country. Petlyakov was released from prison after the PB-100 prototype proved to be an outstanding aircraft, only to die in an aircrash in 1942, when flying to Moscow from the factory as a passenger in one of the planes of his own design. "Peshka", an affectionate nickname given by the pilots to the streamlined divebomber and formally denoting a pawn in chess, was produced in thousands, to a considerable extent by women and children working at wartime factories, but was also lost in thousands being piloted by young and unskilful pilots who often ignored the outstanding dive-bombing abilities of their planes and had dive brakes taken off as unnecessary. The design bureau spent all 1944 and 1945 trying to increase the power and to improve the defensive armament and many test versions were so promising, however the Peshkas that left the factory on the V-Day were engined and equipped almost the same way their predecessors were in 1943.
But if you ask anyone in Russia who has at least some basic knowledge of the VVS and Soviet aviation history, you'll probably hear that the most beautiful, most versatile, most elegant aircraft in the VVS inventory was the Pe-2.
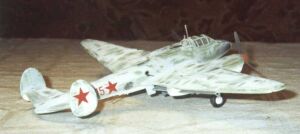 The Airfix kit was the only one representing the Pe-2 for many many years and
in my opinion the kit was not as bad as many would tell now. It was released
in the time when references for the type were extremely thin, when so many myths
and misconceptions about the plane were widespread (so many people spoke of
Pe-2FT and Pe-2FZ but now we know those designations were non-existent), when
the series-to-series development was not studied well. Under these conditions,
Airfix made a very decent kit that definitely intended to represent a late version
of the Pe-2 with rounded lower engine cowlings and faired dive brakes. With
more and more references showing up, the aged kit started looking inferior to
new standards and at the same time became more and more of a collectors item,
though Bilek seemingly goes on selling that with a new instruction and decal
sheet.
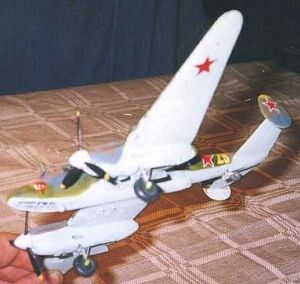
I should confess I was unable to get an Airfix Pe-2 kit for myself; it was the vacuform boom in early nineties in the new-born independent Russia that saved the day; vacu copies of hundreds of Western models flooded the market and the Pe-2 reproduction was also there. At that moment (1992) I had little knowledge of the series and subtypes; what I was building was the generic Pe-2. At a later date it turned out that what I had completed was Pe-2 series 179 (thus said the caption to the photo in the Red Stars book by C.-F.Geust et al.) of 73 BAP Red Banner Baltic Fleet (KBF) Aviation, the regiment later to be 12 Guards BAP led by famous Col. V.Rakov and later by K.Usenko who had a rank of Major at an age of 24. My main reference was the Modelist-Konstruktor magazine that provided excellent 1/72 scale drawings and cutouts showing interior of cockpits, nacelles with wheel wells and bomb bays, landing gear and armament sketches, instrument panels and what not. It was not until 1998 or 1999 when I noticed those drawings were a bit underscaled; some more on that later.
What was not good about the Airfix concept was that the fuselage was oval in cross section, instead of being circular. That spoiled the view just a little. As always with vacu modelling, all small things were scatchbuilt so I cannot comment on the quality of any minor parts of the Airfix kit, but the main airframe details looked reasonably accurate.
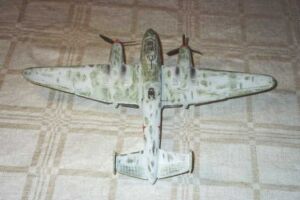 My first Pe-2 kit was born twice. It died in a shelf crash but was carefully
restored from absolute ruins and repainted to the same winter scheme. At that
time I rebuilt the landing gear and many other small details and tried my hand
to show extensive weathering of the winter whitewash, with summer green camo
showing up here and there.
What I did not know at that moment was that Calle Geust and company are not gods either; the Pe-2 I was modelling was in fact of series 110 and should have been shown with M-105RA engines that had entirely different cowlings. Mine was built to the later version… The photo of the nose of that "red 15" was published in the Armada book in 1999. If my model suffers another crash I'll rebuild it again with correct engines.
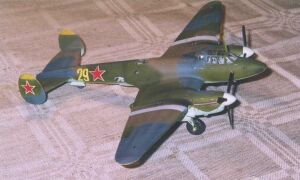 One
of Zvezda's early and, to me, very successful efforts, the Pe-2 kit has a number
of virtues that cannot be underestimated. First and foremost, the kit is very
accurate in dimensions and, furthermore, designers definitely succeeded in catching
the elegant lines and general outlook of the dive bomber. The assembled model
does look right from all angles. The guy who made a master model definitely
has a sharp eye and a good hand!
What you get in the box was meant to be Pe-2 series 205 configuration with aerodynamic improvements made in 1943 to enhance performance of the VVS workhorse. Improvements included redesigned oil cooler cowlings, new carburettor intakes, better attachment of the VUB-1 turret to the main canopy and therefore the aerial mast moved forward onto the windscreen. This series had M-105PF engines with VISh-61 propellors. (Sadly, the cowlings, spinners and props are a serious problem of the Zvezda kit.) I decided to go for a bit later aircraft, of Series 211 with new bomb racks and faired dive brakes, otherwise quite similar to Series 205.
It took me long before I started this kit; in fact I had been waiting for another Pe-2 kit that was long promised by VES Models and was said to deprive Zvezda/ Italeri of a slightest chance to be better in any respect. When I finally got a Zlinek kit which in fact originates from VES I decided to build both one after another.
When starting this kit, I already knew that the Modelist Konstruktor drawings are a bit undersized. For a very long time I had my own small obsession that the spinners are way too small on the Zvezda model. In reality, it should have been the same size and shape as the one from say the Yak-9 that had the same engine and prop. Study of photos and some measurement research prompted I was right. So the first thing I did was checking all scale plans I had and zooming them up to the scale length of Pe-2 series 205 and similar - 12525 mm long, 17116 mm wide. A short note on the way I found this data. Different sources will tell you the Pe-2 was 12600 mm long, however after you have a first round reading the Pe-2 literature you'll note all planes could not have been of the same length: early versions had a long tail cone. So I looked for sources that should be very accurate about those lengths, and here we go, the Finns who were using a bunch of early Pe-2s throughout the Continuation War (1941-1944) mention 12660 mm for a long Pe-2. The wartime documentary "Pe-2 aircraft" movie dated 1944 which is now available in Russia on videotapes as a part of the "Soviet Aircraft" collection of short films, gives the length for a Pe-2 series 110 with a short til cone, and it is 12525 mm. So I guess the most commonly used "12600 mm" is just an average between the two figures I found. The wing span is given close in all sources, 17100 to 17200, and the above mentioned wartime movie said 17116 mm and I decided to stick to that one.
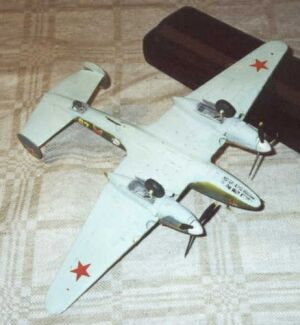 Rather than telling the story of how I built the model step-by-step, I would
concentrate on the things I found out that have to be corrected to improve the
model's look. Despite all of these, I insist the Zvezda kit is the recommended
platform to build any version of the Pe-2; you would probably agree with me
the moment you put together two fuselage halves and dry fit the wings.
 The kit contains 2 FAB-500 and 2 FAB-250 bombs for external loading, all molded
finely. The bomb racks are not too bad. Please note the Pe-2 could only lift
1,000 kg of bombs so putting all four bombs on your model will make it unrealistic.
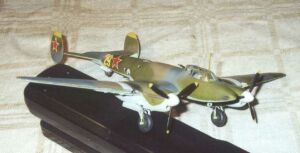 I finished my kit in a three color camo standard for 1943, green, brown and
grey on upper sides and blue undersides. The colors were prepared by myself
mixing different Humbrol and Revell enamels, the only brands reliably available
here in Latvia these days. The model represents a Pe-2 "yellow 29" flown Col.I.E.Korzunov
of 40 BAP Black Sea Fleet Aviation, which I figure out to be something between
series 211 and 350. The plane wears the regiment's traditional white identification
stripes on upper wings and the Order of Red Banner on the nose. The stars and
the nose decoration came from the Travers Pe-2/Il-4 decal sheet, the yellow
numbers from Zlinek's Pe-2 kit, rest of markings airbrushed.
 Meant to be of a new generation of plastic kits with recessed panel lines, rivets,
super detailed cockpits and wheel wells, this kit fell victim to enormous delays
in production. Developed on thin references, the kit, regrettably, suffers a
couple serious problems that, in my humble opinion, prevent that from beating
the Italeri kit. Actually, the major problem of that model is that it was built
right after the ill-fated Modelist Konstruktor drawings that happen to be underscaled.
So the kit is somewhere around 1/75 which is a shame. I should confess right
away that I did try to fix the basic dimensions by making inserts and replacing
the tail cone when converting the model to an earlier version; I enlarged the
nacelles and replaced the tail fins but what I did not even try was to "inflate"
the fuselage which is shrunk in section and it definitely shows when both Italeri
and Zlinek kits stand near each other.
Although the instruction sheet suggests the model represents Pe-2 series 205, the research of Pe-2 references prompt that the kit presents Pe-2 series 110 configuration. This denotes production year 1942, M-105RA engines with VISH-61B propellors, VUB-1 turret, reduced nose glazing, rear position of aerial mast. The model features the shortened tail cone typical for that production period.
The scale problem left aside, an overall quality of the kit is amazing though Hasegawa addicts would possibly not be happy with smaller details being not too crisp. The black plastic the kit is made of is soft and nice to handle. The quality of surface details exceeded my expectations. Panel lines are recessed, thin and subtle enough, riveting is all there and looking really good, undercarriage and wheel bay details are decent which is a surprise. The amount of interior detail is very substantial and extremely well done; again, tiny details like gun barrels could have been a bit crisper, but it is compensated by the unbelievable number of elements you have to find on sprue and put on the walls, into cockpits and elsewhere, including the radio, junction boxes, chairs, floor structure, complicated ventral gun assembly, ammo boxes with feeds etc. etc. Those who like lowered flaps and opened hatches have reasons to celebrate as suberbly done separate flaps and main entry hatch details are available.
The instruction sheet leads you through putting all those parts together and is quite clear and easy to understand. It even prompts the dihedral value for the stabilizer and the diameters of rods and struts to be added into the rear cockpit and u/c construction respectively. Strangely enough, it only gives three camouflage schemes of over 10 options included into the the decal sheet. The decal offers several very nice subjects, including two well known aircraft of 40 BAP, Black Sea Fleet, #5 "Za Borisa Safonova" and #29 flown by Col.Korzunov, this one I used for my Italeri kit; #3 "Vpered na zapad"; "K" of 140 BAP; "Yellow Lion" of 99 ORAP; postwar Czech and Polish and Yugoslav AF bombers, and some more related to the Pe-3 boxing of this kit. The problem is that almost all those options pertain to late Pe-2 versions, series 205 onwards, and some serious conversion work is required to make it historically correct, the work I honestly do not think is even worth starting once the Italeri offering is available. The decal looks very glossy but "yellow 29" looked fine on my Italeri model.
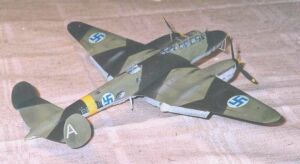
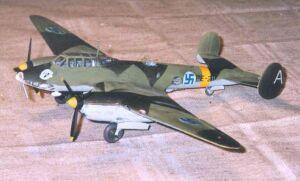
Wishing to make something different from what I achieved with Italeri, I decided to build a very early Pe-2 in Finnish markings. I decided to build the PE-211, the war survivor that logged the longest flying time among all the Pe-2s used by the Finns. I will not concentrate on the Finnish modifications to the plane since this is a VVS website after all. Three most essential things to accomplish were the following ones,
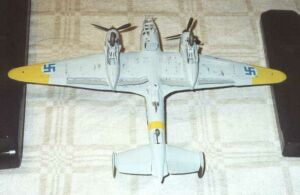 The rest of work was less challenging. Step by step, I modified the model to
Series 18 standard, scratchbuilt the TSS-1 upper turret with the ShKAS gun,
ammo belt and chute, made early-type round-shape small side windows in the radioman's
cockpit, added two more tiny windows in the tail part of the fuselage's spine,
modified the rear cockpit to match the way it should look on early a/c.
I painted the plane in standard Finnish colors, black segments on top of olive green and greyish blue undersides. Toned down insignias and all codes were taken from the Finnish-made InScale72 decal sheet devoted to Pe-2 and Pe-3 in the Finnish AF. The outstanding instruction sheet by Pentti Manninen helped a lot and, generally, the Finnish contribution to research of the early Pe-2 is enormous. My special thanks go to Kari Lumppio who always helps me so much with all my Finnish projects.
 As a conclusion, I should say that the Zlinek kit is a fine effort and real
VVS addicts will find it attractive enough to get one for their collection.
Representation of early-type engines is one of the strongest reasons why you
should get yourself this kit, at least until someone comes up with a quality
aftermarket item.
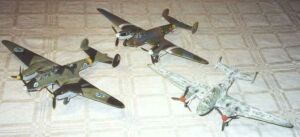 A trio of Petlyakov bombers are on my shelf now. Tired of this theme, you think?
No, I am not. The Pe-3 will be started next in a not-too-distant future, and
someday later when we hopefully have some interesting photo evidence of Pe-2M-82
I'll make it as well.