A Tale of
Two Il-2`s
Or, Pete and Bob build Accurate Miniature's Il-2
By Peter Vill and Bob Partridge
A Tale of
Two Il-2`s
|
|
|
Erik Pilawskii seems to be responsible for an awful lot of things lately, most of them good. When he came over to Great Britain in May 2001 I introduced him to a very good friend who I consider to one of the best all 'round modelers in the South West (UK) if not the country-- Bob Partridge. Now, Bob models almost exclusively aircraft that fought against the Japanese in the far east, and so had never considered or even looked at a VVS subject in the belief that they never really came into contact with the Japanese. Well, Erik went to some length to inform Bob of the little 'do' these two had at Kalkin Gol and the 11 day campaign in 1945. You should have seen Bobs eyes light up-- here was an area of the Second World War that no one appeared to be modeling and it fell within his area of interest. All Erik had to do was reel him in with the offer of artwork.
The result of the first piece of artwork supplied by Erik you will already have seen on the site: the I-16 "White 37" flown during the Japanese invasion of Manchuria. In the meantime, Bob had been out and purchased almost every 1/48 scale VVS aircraft model available: YAK-9, I-153, YAK-3, Pe-2, I-16 and the IL-2. It is with this last kit we are concerned with in this article.
I was already thinking about building a Shturmovik when Erik sent via e-mail some artwork of Il-2s for Bob and myself to look at; its probably best that Bob takes up the story for a time now.
Erik had sent me a scheme for an IL-2 (originally of 622 ShAP, at the time in the 967 ShAP) flown by Kpt. Vinshikovskiy and S. Szht. Romistrov during the 11-day campaign against the Japanese occupation forces of China in 1945. An "Oscar" fighter, the pilot of which had obviously never seen an IL-2 before, attacked this particular aircraft. The rear gunner reported that the Japanese aircraft was flown so beautifully that he was mesmerized and did not think to shoot back. The gunner watched in amazement as the little fighter looped and turned tightly to bring his guns to bear time and time again, the Il-2 being hit repeatedly but totally undamaged. The pilot of the "Oscar" must have been close to having used up his ammo when as the IL-2 gunner put it, " Having watched him for a while I grew bored, so I blew him to hell...."
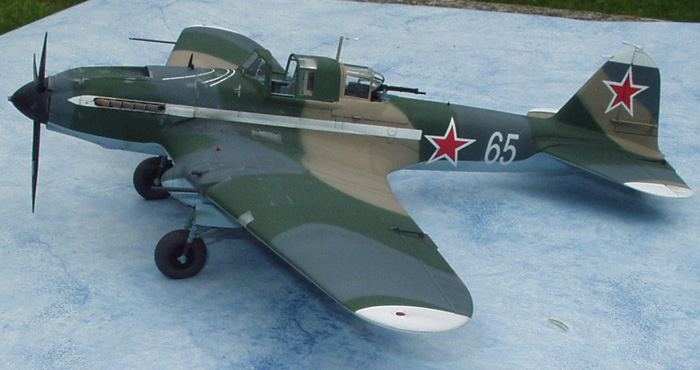
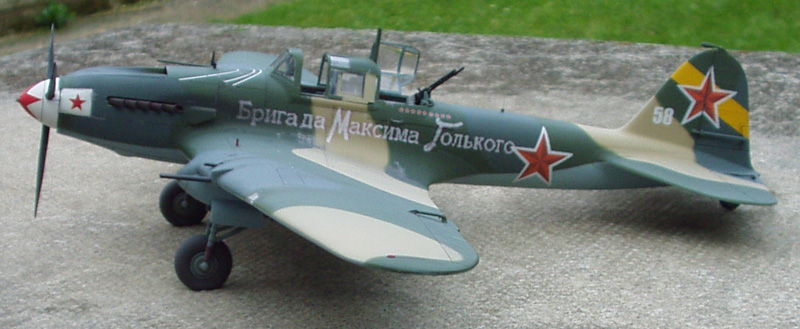
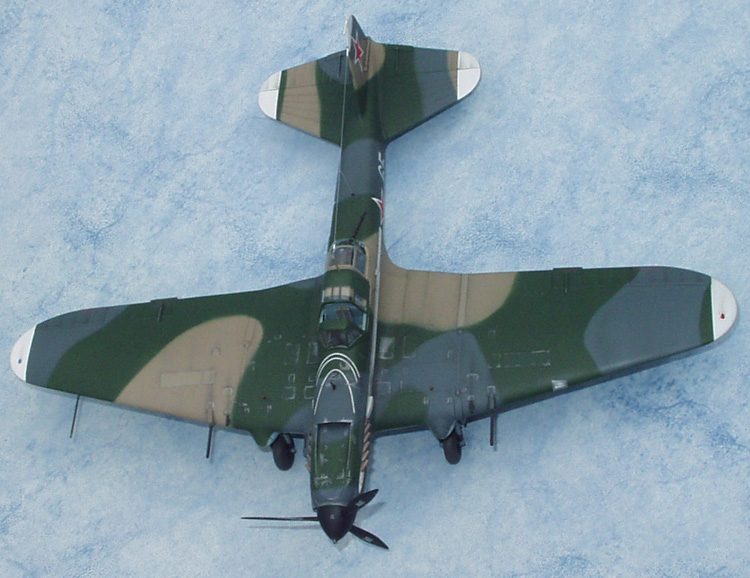
Both Il-2 schemes sent were 3-colour applications (AMT1 Brown/ AMT12 Grey/ AMT4 Green) over AMT7 Blue; both had extra paintwork, flashes or slogans applied.
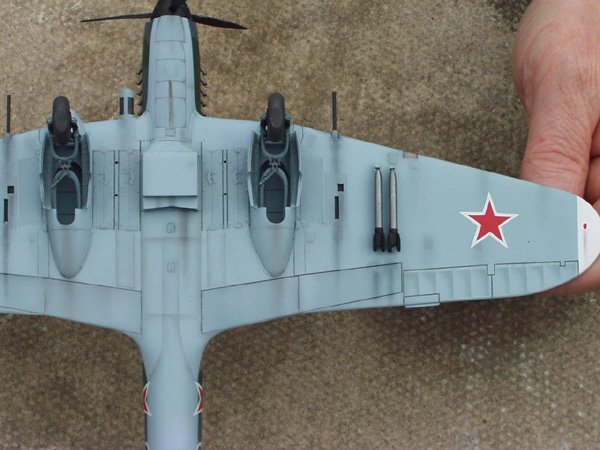
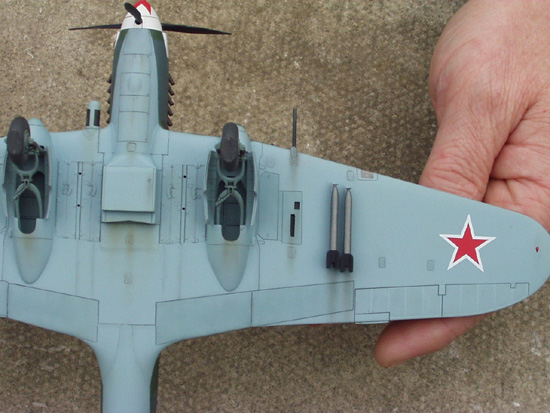
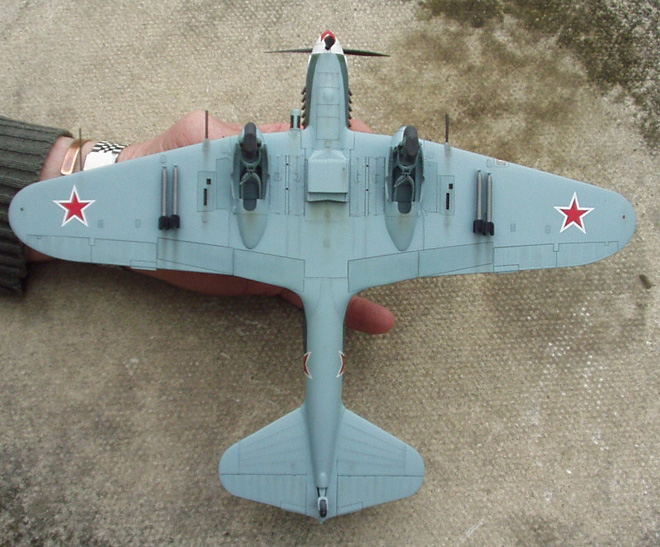
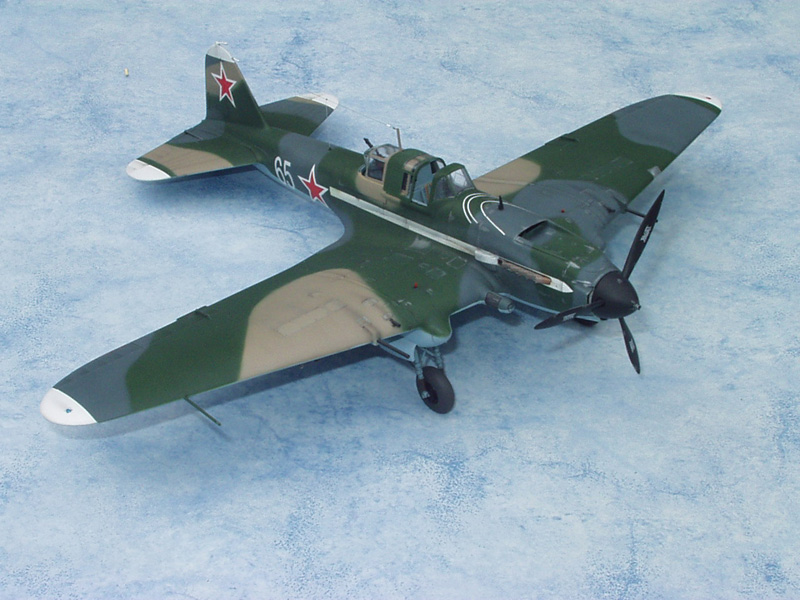
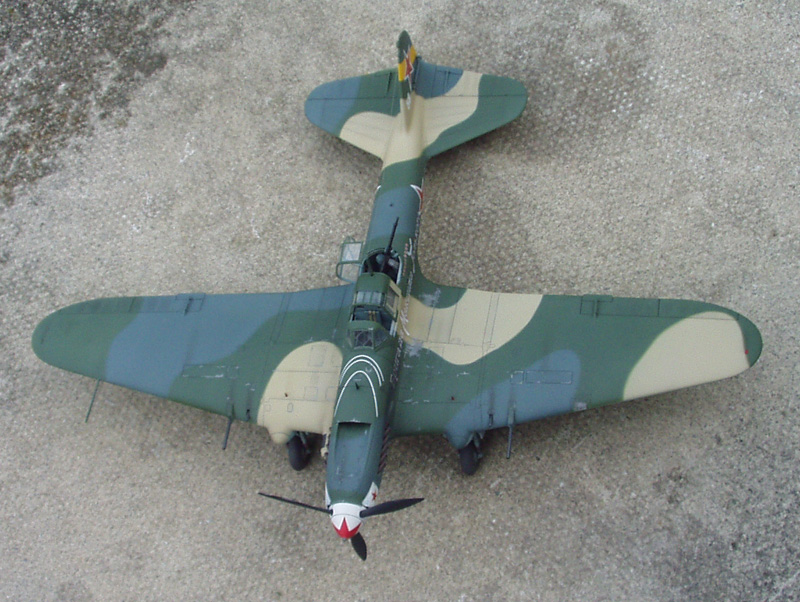
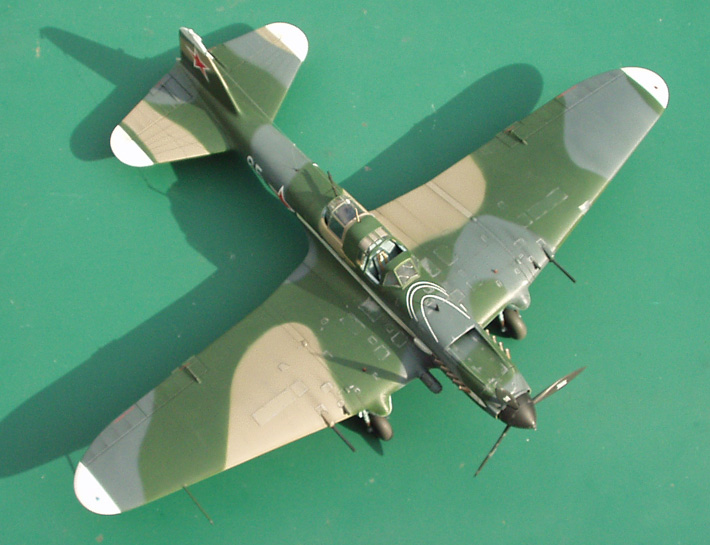
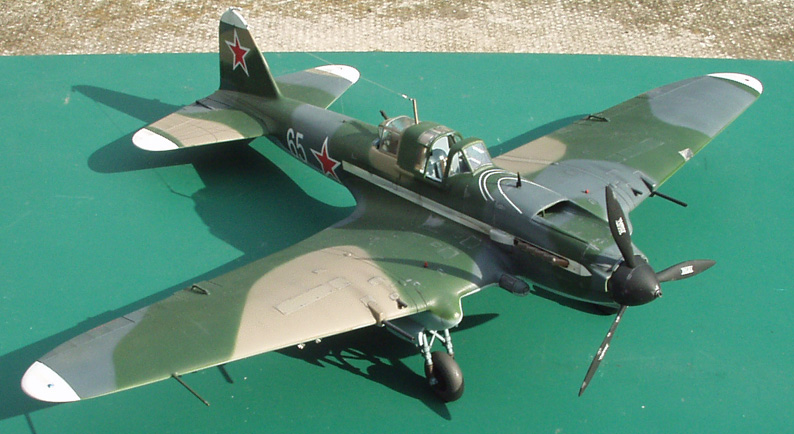
Bobs aircraft would be "White 65" and would be finished with a white spear/arrow down each side of the fuselage; more white being applied to the wing, tail plane and rudder tips. Victory stars were indicated.
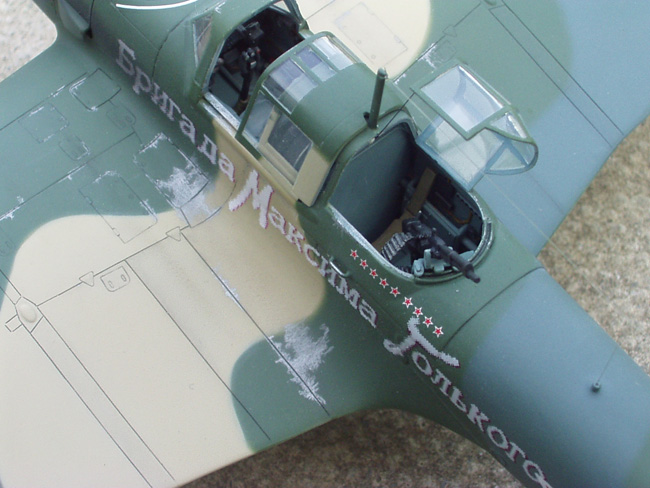
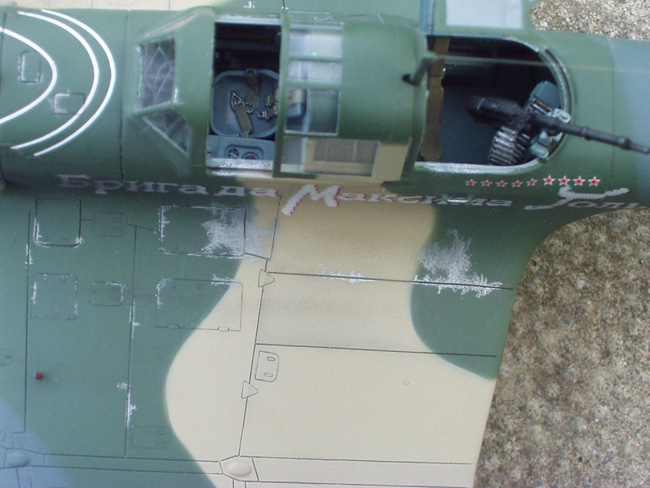
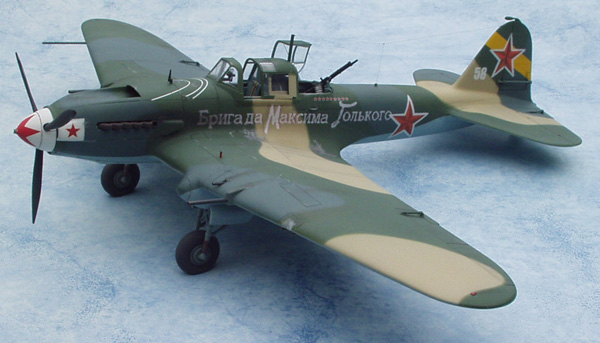
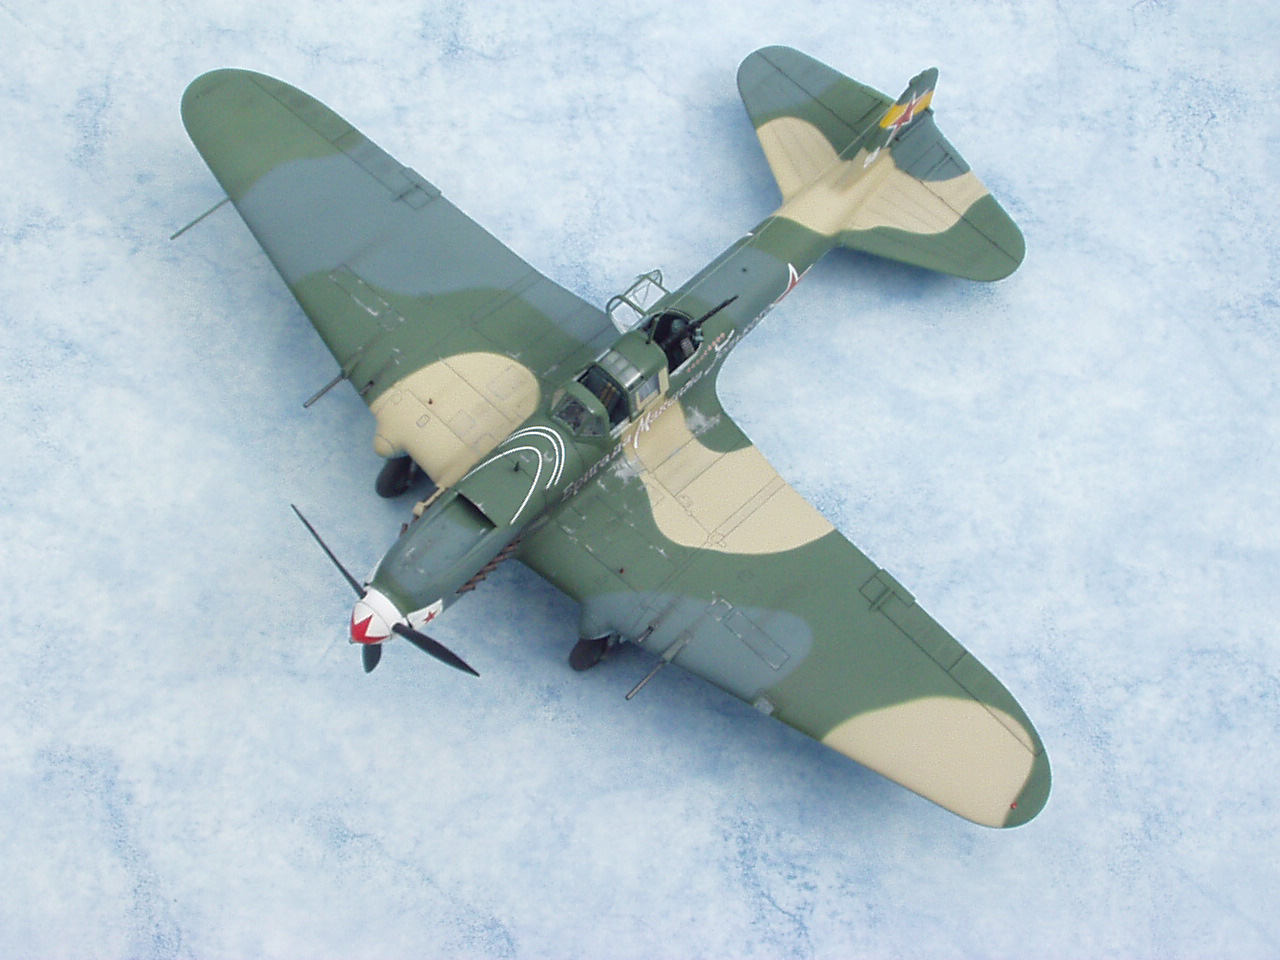
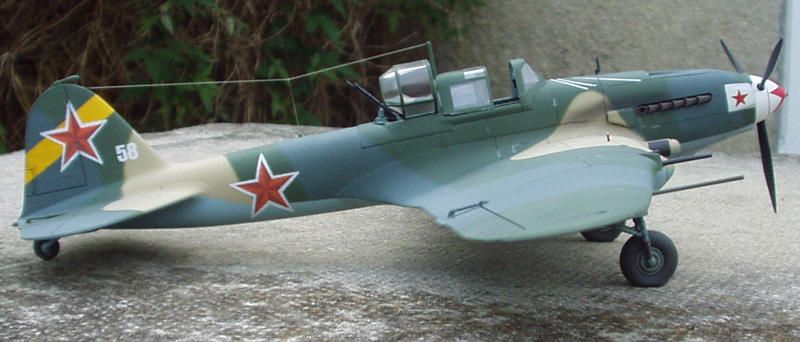
My aircraft, "White 58" of 949 ShAP, was depicted with the spinner and engine cowling forward vent in white upon which a red star was painted. Down the side was a slogan "Brigade of Maxim Gorky"; a yellow stripe at about 45 degrees ran from top to lower section of the fin and rudder. To finish it off, the aircraft was to carry white outlined Kremlin stars.
The bad news from Erik was that both IL-2 "Arrows" had wooden outer wings and not the metal ones, as depicted in the kit. We understand from Erik that the vast majority of war time IL-2`s with swept back wings (Hence the term "Arrow") were in fact constructed with wooden outer wing sections, the metal wing outer wing only being fitted to a very small number of war-time aircraft and to airframes made after the war had finished.
Listed below are the alterations made to the basic kit, alterations made only
by Bob will be suffixed by a "B", those suffixed "P" were carried out only by
myself and "BP" means that we both carried out this particular alteration. We
will also detail the areas to watch out for when making the AM Il-2 which is
shortly to be released by Italeri.
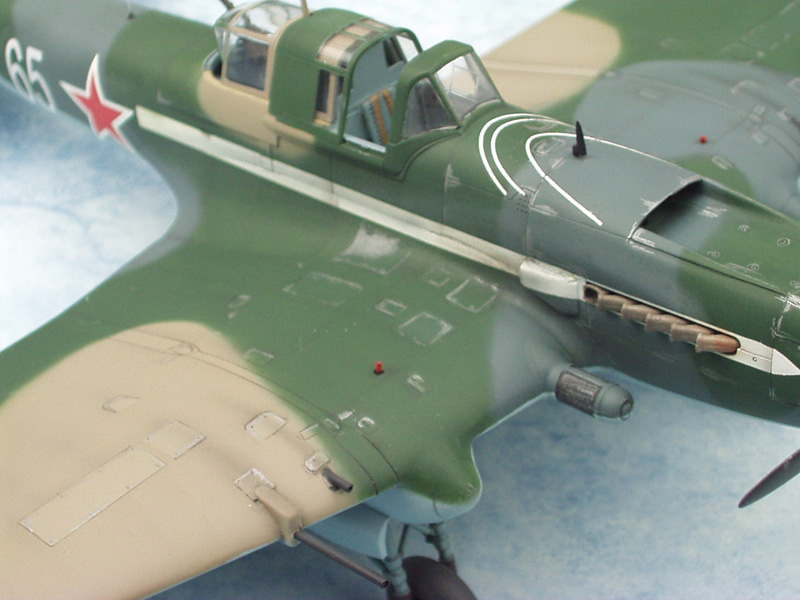
PB: All outer wing panel lines filled with super glue applied on the edge of a scalpel. It is necessary to keep some of the inspection hatch detail; check your scale drawings to determine which ones. Unfortunately you are more than likely to loose some of the detail you wanted to retain, particularly on the under-wing surface; the small inspection hatches can be replaced in the following manner.
P: Cut the shapes required from 5-thou plastic card and glue into place; re-scribe those that can be done.
B: Cut the shapes required from Scotch Magic Tape; this was then pressed down into place.
PB: Gun barrels, pitot tube and aerial mast replaced with brass tube or rod cut and filed to shape
P: Handle on side of gunners compartment replaced with item made from brass rod; the item moulded on the kit looks more like a step.

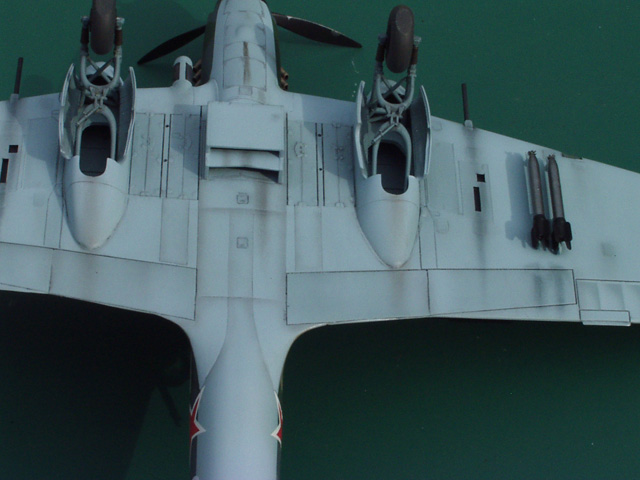
B: Replaced fuse spinners with scratch made items
P: Replaced fuse spinners with some etched brass items made by "PART"
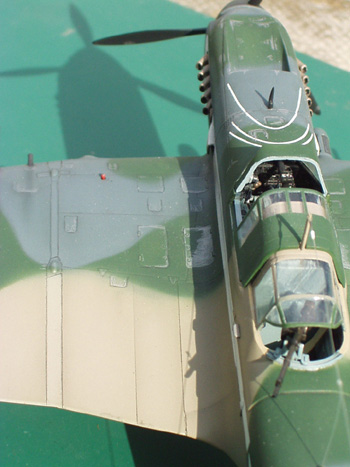
PB: Etched brass seat belts added to the pilots seat.
PB: Replaced the rudder balance horn with a scratch made item fitted
just before painting; this prevents you knocking it off during build.
The build went as follows, points to watch out for are in bold type.
The cockpit and floor present no problem whatsoever, only seat belts require adding to the pilot's seat. Assembly of the interior of the fuselage halves requires very little work; the only point to watch out for is the sink holes that will remain visible when the model is assembled, particularly the ones in the rear gunner's compartment. You can always do what we did, that is to extend the electrical loom rearwards from the front cockpit and end it in a fuse/control box that just happens to be over the sink hole; looks right.
Take your time when assembling the forward nose section; if care is taken you can achieve a very good fit. If you want the propeller to rotate you should thin the oil deflector plate that is formed onto the upper section of this nose assembly. If you dont do it you will find out that, having painted the kit, your spinner assembly does not fit. You will then have 2 choices-- thin the plate down, or cut off the propeller mounting spindle and glue the spinner/propeller onto the nose. Your choice.
Having cemented the 2 fuselage halves together, test fit the instrument panel; you may find that it does not fit correctly in so much as it is not square. The answer is to very carefully reduce the thickness / clean up the fuselage in the location area.
Wing centre section, wing spar-- well, as I hate this method of assembly, all I can say is take your time. I have taken to tacking it into place with super glue; the rest of this stage presented no problem. Remove the air filter/intake from both this section and the corresponding upper wing section. This will make any filling and subsequent sanding down a lot easier; keep the removed sections safe for refitting later.
Having fixed the wing centre section to the fuselage, your problems will start. The upper wing sections can result in a very poor fit were they join the fuselage if you do not take your time. Even so, you will be left with some corrective action to take, but you can minimize this. When fitting the lower outer wing sections, again take your time and test fit; test fit and test fit again. You can end up with quite a nasty step along the join line if you dont watch out for it. Wheel gear fairings-- test fit, adjust by careful and slow removal of plastic, test fit, test fit, adjust, test fit. I think you should have got the idea now; you are still likely to end up filling but you can reduce it with careful building.
Everything from here is really clear sailing. The only other thing we did was to put a piece of plastic card between the exhaust stacks on the inside of the fuselage, as they are only held in place with a small contact area of glue and if some one picks the model up when it is finished it is possible that they might dislodge them(!).
Well thats about it. Bob's is finished using colours made up using Tamiya
paints, mine is finished using paints very kindly supplied by my good friend
Erik Pilawskii. Both models have decals supplied by Erik (ALPS printer).
 |
 |
 |
 |
 |
 |
 |
 |
 |
 |
We would both like to thank:
Erik Pilawskii
E. D. Models
Whoever supplied the kits; sorry we cant remember. [ED Note: Too much drink; brains softened]