ICM 1/72nd Polikarpov I-1 (Il-400b)By Matt BittnerPhotography by David Van Wagoner |
|
History
Nikolai Polikarpov developed the Il-400 while he was a junior designer at GAZ 1, Moscow, under the direction of Tupolev. There were several other designers working on monoplane fighters at this time at Moscow, and of these, Polikarpov's was initially judged the most advanced. The Il-400 featured single spar wooden wings with corrugated metal skinning. The fuselage was built up around steel tubing, and was covered with plywood. Power was provided by a 400-hp Liberty engine taken from a DH9A, as was the radiator.
The first flight took place on 2 Aug. 1923, but the machine was woefully unstable and crashed, injuring test pilot Artseulov. The aircraft was found to have insufficient fin area and a center of gravity too far aft. The revised Il-400b was completed in Jun. 1924, featuring a revised structure, larger fin and rudder, redesigned radiator (relocated below the motor), and forward positioned cockpit. The Il-400b first flew in July 1924, and was successfully tested by the Zavod 1 staff. The fighter was turned over to the NOA on 1 November 1924, and was examined by the Institute Pilots. The NOA judged the fighter to be fairly unstable longitudinally, though possessed of high performance.
|
The State Aviatrust ordered the fighter in limited series production as the I-1M-5, the use of the Soviet manufactured Liberty engine (M-5) being specified in the contract. GAZ 1 built eight pre-production machines with metal corrugated wings and 25 further examples with wooden ply covered wings (the cost of the metal skinning being seen to be exorbitant). The production machines were not satisfactory in manufacturing standard, being something of a hasty lash-up when the metal corrugated wing skinning was abandoned, and displayed poor performance and handling. None of the completed I-1 fighters were distributed to service Regiments within the VVS, and most languished at Khodinka airfield until they were broken for salvage. |
Kit
 The ICM kit contains 32 injected parts, one injected windscreen, and a
decal scheme for the only aircraft known to have been photographed, a
natural aluminum example.
The ICM kit contains 32 injected parts, one injected windscreen, and a
decal scheme for the only aircraft known to have been photographed, a
natural aluminum example.
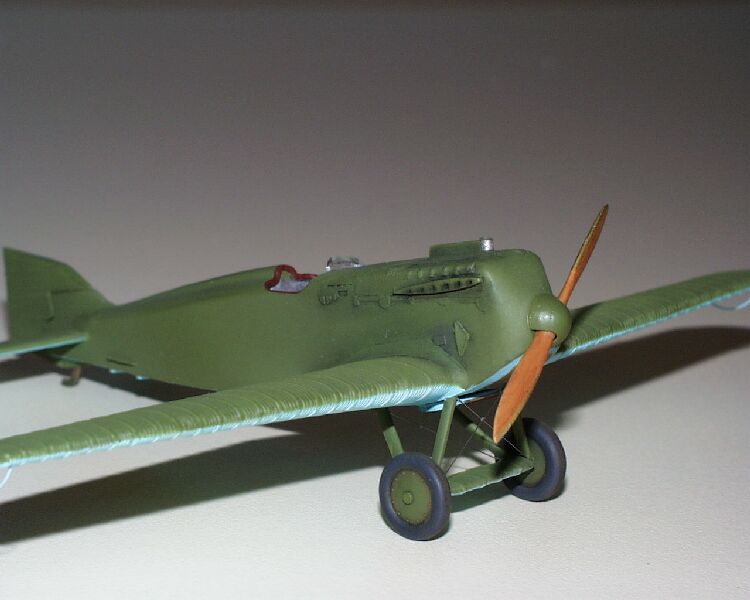
This kit was – in general – a joy to build. Most parts fit well, and there aren't a lot of parts to deal with. I decided to go with a 'stock box' cockpit so added only photoetch seat belts.
Since there is a wing spar that helps with wing alignment and provides a solid point for gluing, don't forget to add it before gluing the fuselage together.
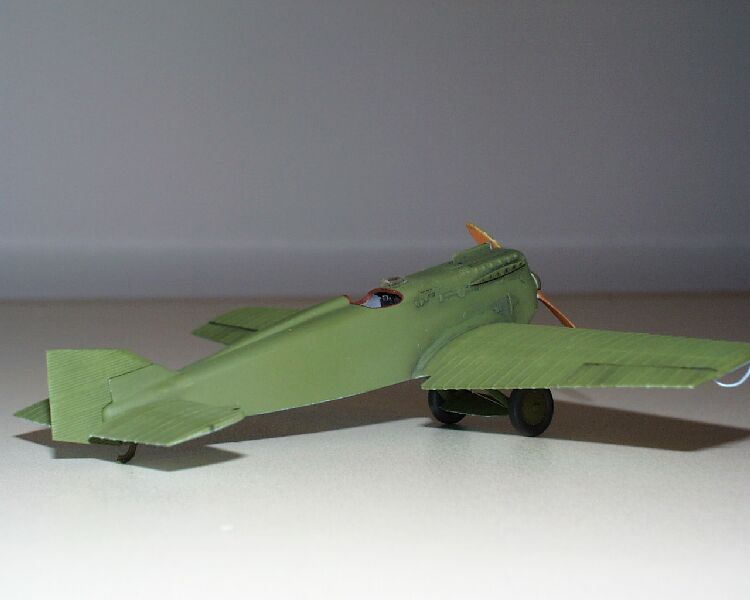
Once the cockpit was in, the wing spar added and the fuselage halves joined together, most of the other parts just fell together. However, there is a trick – I feel – to gluing on the wing parts to leave little to no gaps. First and foremost, do not glue any of the wing-part-halves together. Instead glue the parts together as you add them to the rest of the model. For example, starting with the wing roots, glue the top portion onto the fuselage/wing-spar first and when dry add the bottom portion. After this had finished drying, then add the top of the outer, forward wing followed by the bottom, forward wing. Let everything set well – at least a day or two – before adding the trailing edge 'portion'. Unfortunately, this is the worst engineered portion of the kit. The gaps that result – except for the aileron hinge lines – do not belong. Fixing this seam on the corrugated wing was a chore.
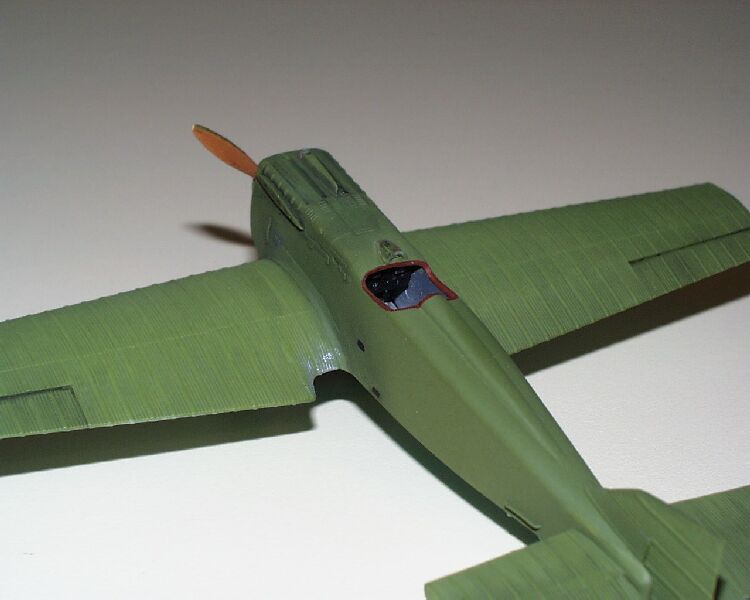
 I accomplished the correction of the seam where the trailing edge portion
of the wing mates with the forward main wing in the following manner.
First, be sure to dry fit to avoid large gaps before gluing. Once glued
on, then I carefully filled any gaps (and there weren't many, luckily)
with gap-filling CA. Once dry then I used a 'pyramid-shaped', small needle
file to file the corrugations back into the wing. This was done very carefully
and very slowly. I also used this file to re-add the corrugations to the
leading edge after dealing with any gaps found there. The fixes aren't
perfect, but they're pretty close.
I accomplished the correction of the seam where the trailing edge portion
of the wing mates with the forward main wing in the following manner.
First, be sure to dry fit to avoid large gaps before gluing. Once glued
on, then I carefully filled any gaps (and there weren't many, luckily)
with gap-filling CA. Once dry then I used a 'pyramid-shaped', small needle
file to file the corrugations back into the wing. This was done very carefully
and very slowly. I also used this file to re-add the corrugations to the
leading edge after dealing with any gaps found there. The fixes aren't
perfect, but they're pretty close.
Luckily the rest of the kit wasn't bad as far as gaps go. I had some to deal with on the fuselage underside, which meant I would have lost the glue points for the radiator slung under the landing gear struts, as well as the points for the landing gear struts themselves. Prior to filling and sanding I drilled a small hole directly in the middle of all location points. Then once the filling and sanding was complete, I then had a reference point to where these parts were glued.
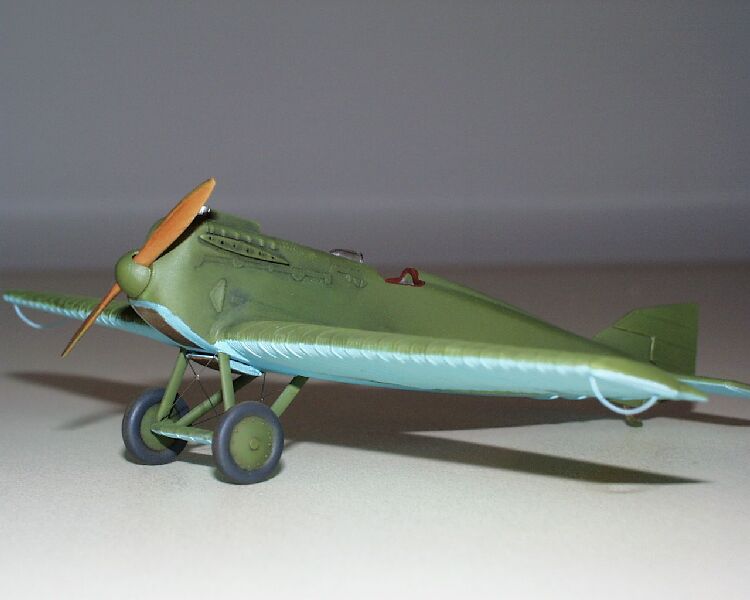
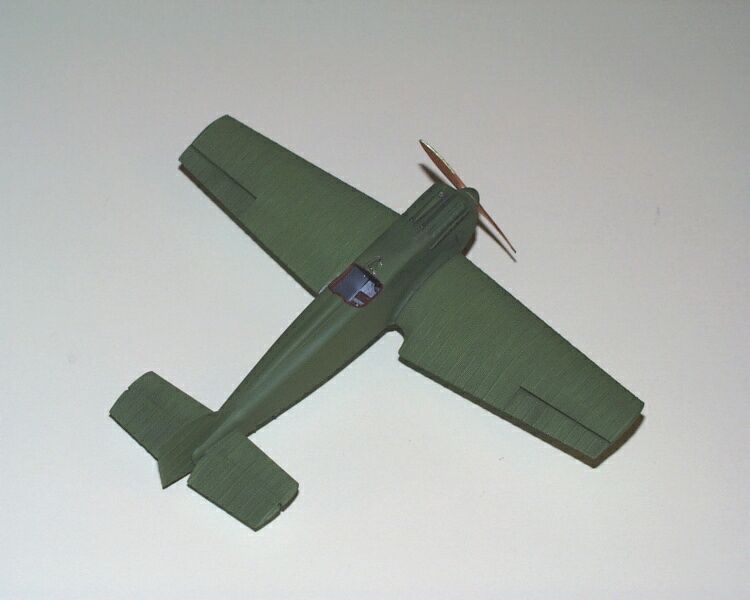 The French magazine, La Fana de l'Aviation, came out with a special on
the VVS, les Avions de Combat Sovietiques. In it there is a color plate
of an I-1 in operational colors of green uppers with blue lowers. Knowing
that most modelers building this kit – when coming upon the lack
of reference material – would opt for the kit scheme of overall natural
aluminum, I decided to paint the kit using this scheme. Weathering was
accomplished with a combination of oils, drybrushing a lighter shade of
green on the corrugations, and pastel chalk. All paints were Polly Scale.
The French magazine, La Fana de l'Aviation, came out with a special on
the VVS, les Avions de Combat Sovietiques. In it there is a color plate
of an I-1 in operational colors of green uppers with blue lowers. Knowing
that most modelers building this kit – when coming upon the lack
of reference material – would opt for the kit scheme of overall natural
aluminum, I decided to paint the kit using this scheme. Weathering was
accomplished with a combination of oils, drybrushing a lighter shade of
green on the corrugations, and pastel chalk. All paints were Polly Scale.
Conclusion
While I hoped to build this kit in a short period of time, the trailing edge portion of the wing-to-main wing joint precipitated any quick build. However, overall this is an extremely well engineered kit, one that provides the best wing-root-to-fuselage-joint anywhere.
My thanks to Erik Pilawskii for all the help.