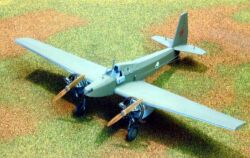
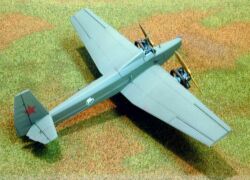
"WINGED HORSE" TOMASHEVICH PEGAS (PEGASUS) RUSSIA, 1942By Caz DaltonModel
Subject: Tomashevich Pegas
|
|
History of the aircraft modeled:
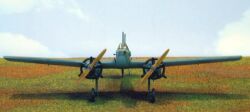
Looking like some design left over from the Tupolev bureau during the
early 1930s, the Tomashevich Pegas was conceived in 1942 as a light attack
aircraft to supplement and possibly replace the aged Po-2. The chief requirements
for the Pegas were technological simplicity and use of low cost wood,
plywood, and high-carbon steel to allow for mass production. Unlike the
Po-2, however, the pilot was completely protected by an armor cage, with
exception of the open cockpit. 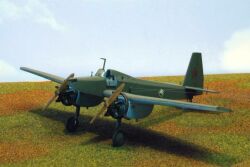 Armament
was to consist of a single 12.7-mm machine gun and possibly a 20-mm nose
cannon plus hard points under the fuselage for either one FAB-500 or two
FAB-250 bombs or up to nine RS-82 or RS-132 rockets. Designed by Major
General Dmitriy Tomashevich, the first prototype was completed in January
1943. State acceptance trials were completed in June 1943, but it was
shown that the aircraft possessed poor maneuverability, low survivability,
and took more than the average pilot to handle it. For these reasons and
the fact that the Soviets' offensive was working without need for a massed
force of this type, the project was cancelled and the Soviet VVS decided
to go on with the Po-2, which many German fighters pilots found to be
exceedingly difficult to shoot down when in the hand of a capable pilot
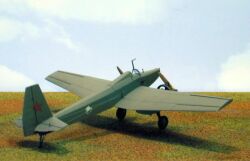
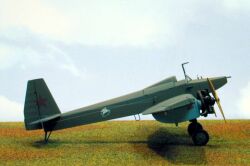
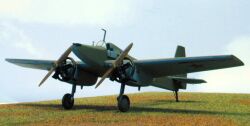
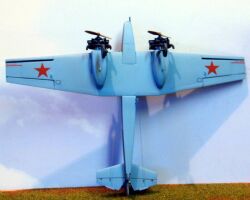
due to its unbelievable maneuverability at slow speeds. The model represents
the first prototype, which did not have the hard points added and possessed
uncowled engines and a long nose with one 12.7-mm UB machine gun.
 Building the model:
Cockpit:
The cockpit was a fairly simple affair. I only drilled out and cut away
a tiny slot in the seat for the seat belts, which I printed on plain inkjet
paper, coated with Microscale Superfilm and applied with Elmer's 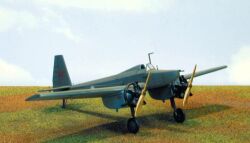 Glue.
Glue.
The cockpit was painted medium gray with the control handle painted flat black. The first aid kit was molded into the starboard fuselage half and this was painted white. The kit's instrument panel decal was used and the instrument panel, like the real thing was small, providing only the barest VFR instruments.
Engines:
 The
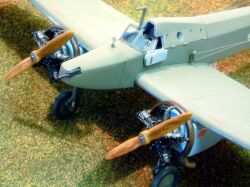
kit came with two rather pathetic Shvetsov M11 radials, but Anton sent
me two Neomega M11 resin engines from Russia and all I have to say is;
they are tiny works of art. All I had to do was cut the gear casing and
five cylinders from the resin sprues and they went together like a fine
Swiss clock. Thanks Anton, these engine help make this kit stand out.
I painted the gear casing dark gray; the cylinders oxidized aluminum,
and the pushrods and intakes black. The kit's exhaust collector rings
were used and these were first painted burnt iron and afterwards received
a wet wash of rust.
Exterior:
 Here's
where I had to get the cookie cutters out. Seriously, the kit fit very
well and only some minor filling and sanding was required. But there were
many things missing on the exterior that just did not replicate the real
plane to my liking and these parts had to be made from scratch. The gunsight
is photoetched and styrene rod, the elevator control horns were done with
sheet styrene strips and fine wire. Underwing tie-down hooks are styrene
sheet and fine wire, as is the footstep. Fine wire also replaced the two
tailskid braces, as the kit's piece was short shot. The kit's machine
gun was used after drilling out the barrel with a #80 bit. Elevator control
wires were done using smoke-colored invisible thread. Brake lines were
done with aluminum beading thread. I used Krystal Klear
  for
the round window in the port fuselage in lieu of the kit's badly molded
clear piece.
Painting and decaling:
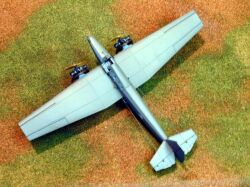
The entire model was primed in Russian underside blue and once masked
I painted the uppers Imperial Japanese Green, as this was the nearest
match I had for Russian topside green, which had 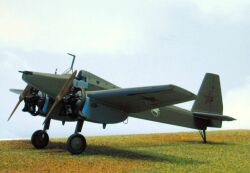 thickened
to the consistency of peanut butter in my jar. The colors are most similar,
so much so as to lead my eye to say they are one and the same. After all
received a couple coats of clear gloss for prep, kit decals were used
with exception of the Red Star National Insignias, which I took from a
Superscale sheet. The decals were flat, but strong and possessed good
adhesion and fair opacity, better than most Russian decals I have had
experience with. Another two gloss coats seals the decals and two flat
coats finished the job.
Conclusion:
 What
a rush! So ugly, it's beautiful! The minute I received this kit from Anton,
I knew I had to construct it. It is such an unusual bird and so Russian
in its look. The kit is not a bad build either; matter of fact I did mine
in two weeks, scratch building and all. I can recommend it for any modeler
with a few limited run kits under their belts. But for serious modelers,
you just have to order those Neomega engines; they really set this kit
out.
 |
Article © Caz Dalton March
2002
|
 |
